Enable SSO with Google Workspace (OIDC)
Firezone supports Single Sign-On (SSO) using Google Workspace and Cloud Identity through the generic OIDC connector. This guide will walk you through how to obtain the following config settings required for the integration:
- Config ID: The provider's config ID. (e.g.
google) - Label: The button label text that shows up on your Firezone login screen.
(e.g.
Google) - Scope:
OIDC scopes
to obtain from your OIDC provider. This should be set to
openid email profileto provide Firezone with the user's email in the returned claims. - Response type: Set to
code. - Client ID: The client ID of the application.
- Client secret: The client secret of the application.
- Discovery Document URI: The OpenID Connect provider configuration URI which returns a JSON document used to construct subsequent requests to this OIDC provider.
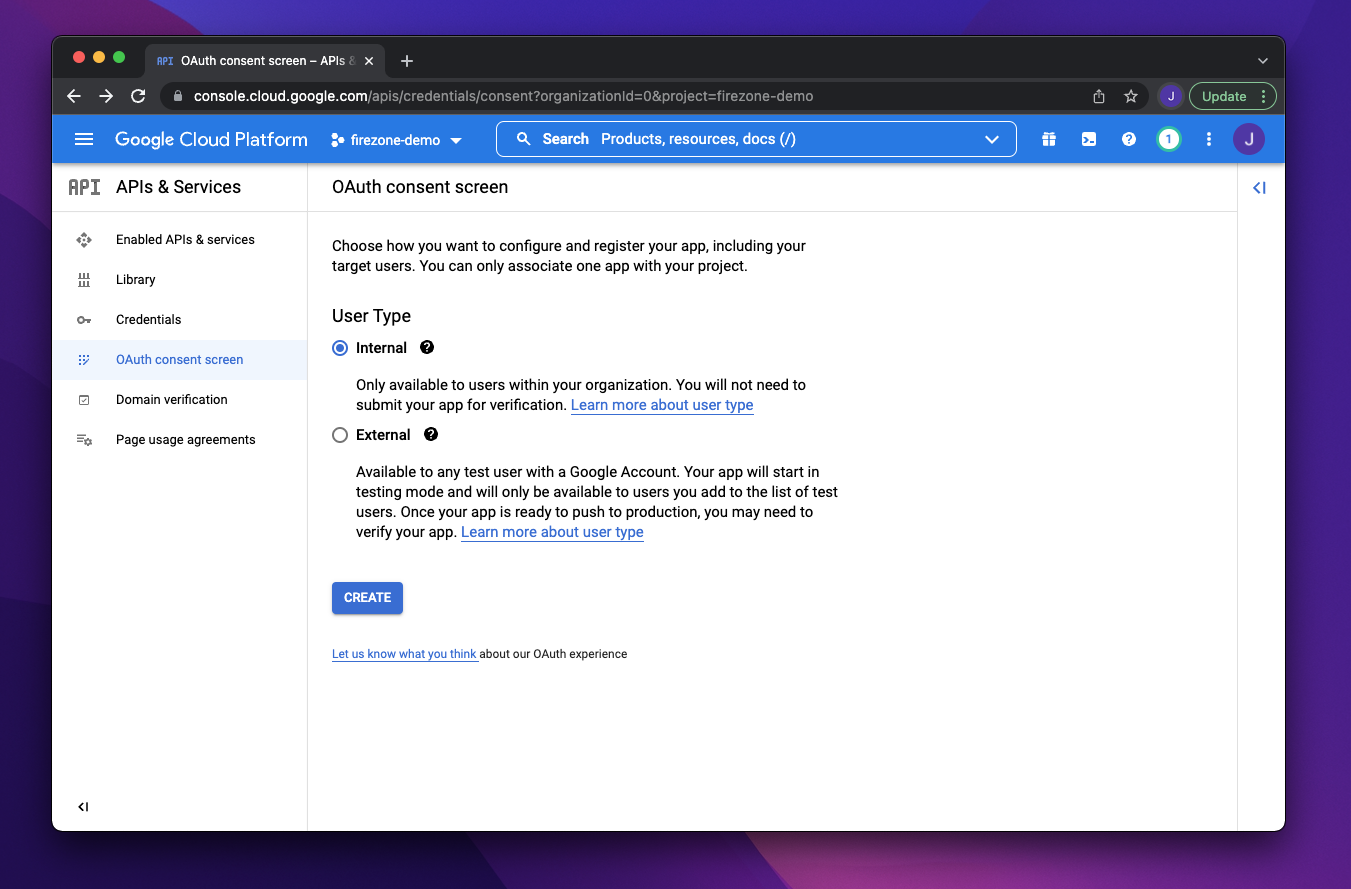
Step 1: Configure OAuth consent screen
If this is the first time you are creating a new OAuth client ID, you will be asked to configure a consent screen.
IMPORTANT: Select Internal for user type. This ensures only accounts
belonging to users in your Google Workspace Organization can create device
configs. DO NOT select External unless you want to enable anyone with a valid
Google Account to create device configs.
On the App information screen:
- App name:
Firezone - App logo: save link as.
- Application home page: the URL of your Firezone instance.
- Authorized domains: the top level domain of your Firezone instance.

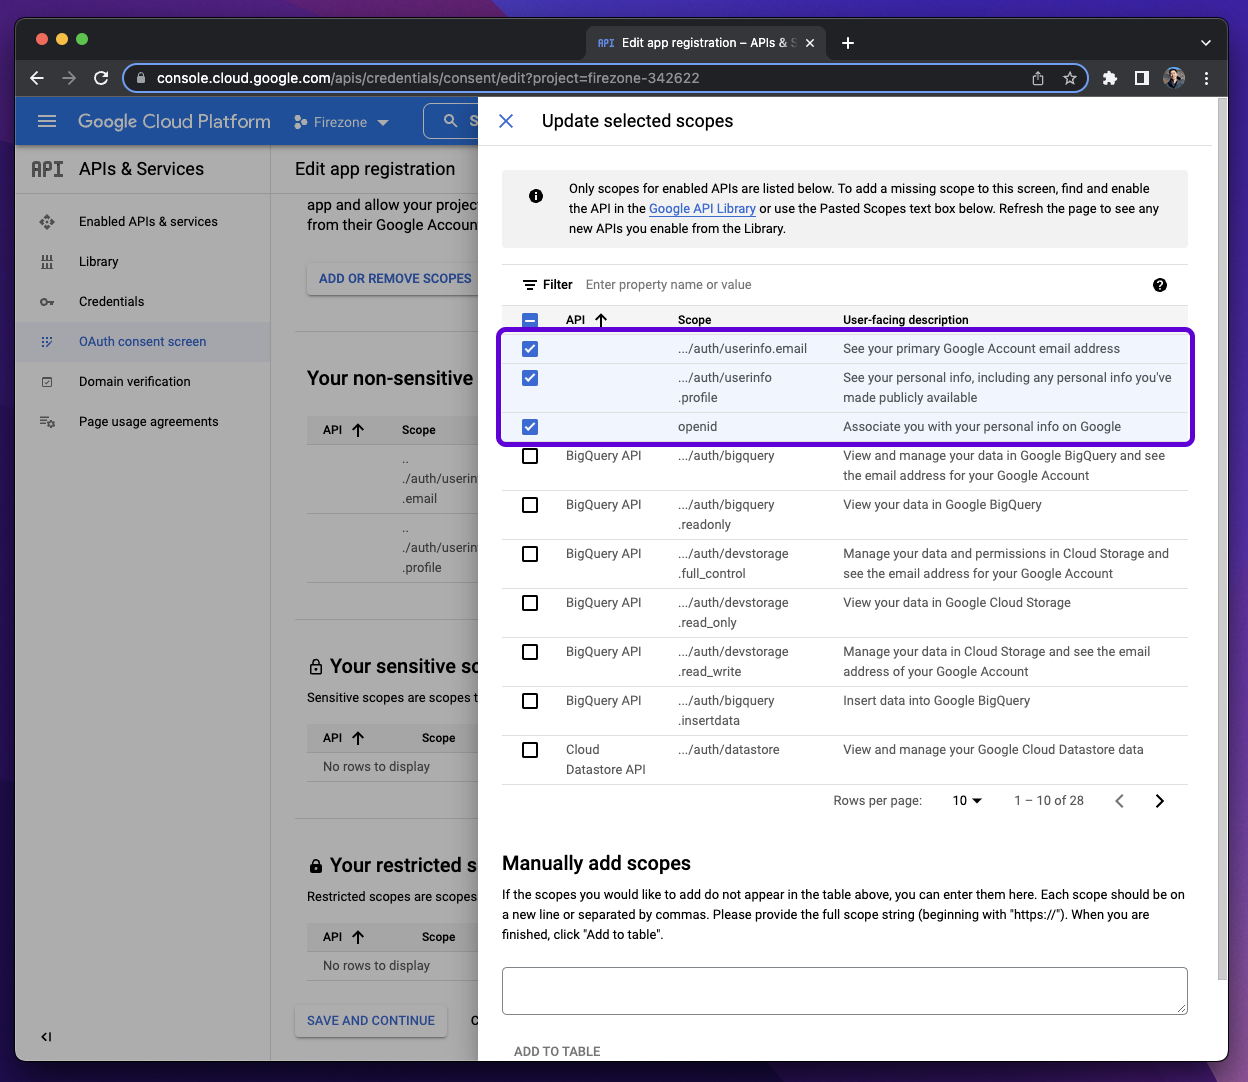
On the next step add the following scopes:
Step 2: Create OAuth client
This section is based off Google's own documentation on setting up OAuth 2.0.
Visit the Google Cloud Console
Credentials page page,
click + Create Credentials and select OAuth client ID.
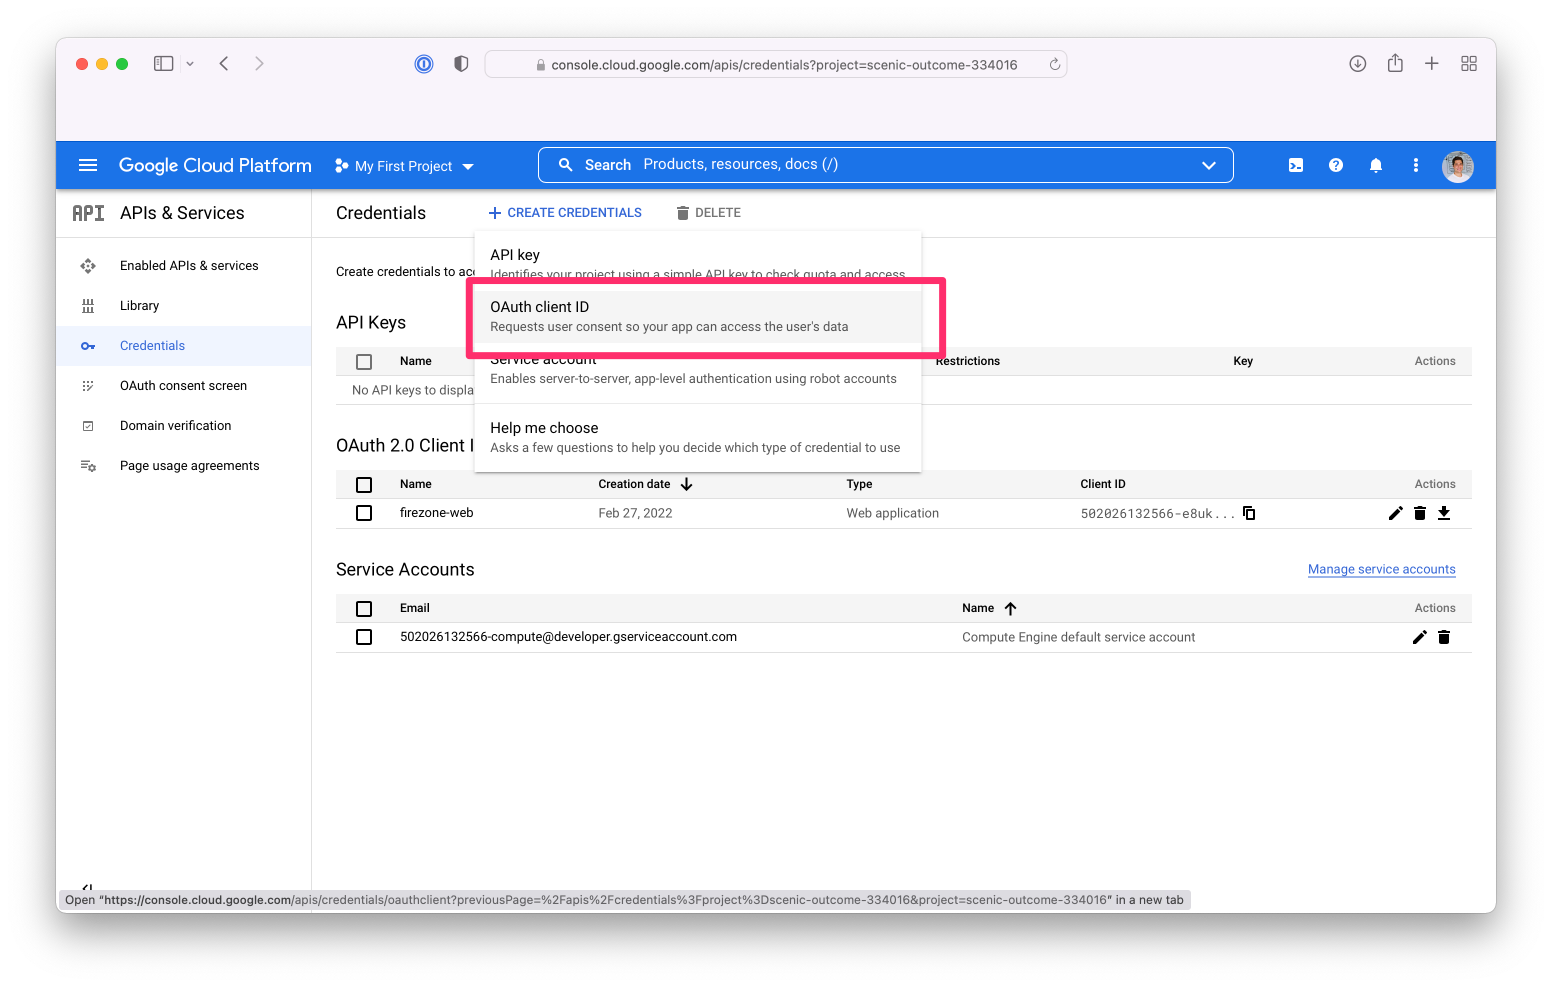
On the OAuth client ID creation screen:
- Set
Application TypetoWeb application - Add your Firezone
EXTERNAL_URL + /auth/oidc/<Config ID>/callback/(e.g.https://firezone.example.com/auth/oidc/google/callback/) as an entry to Authorized redirect URIs.
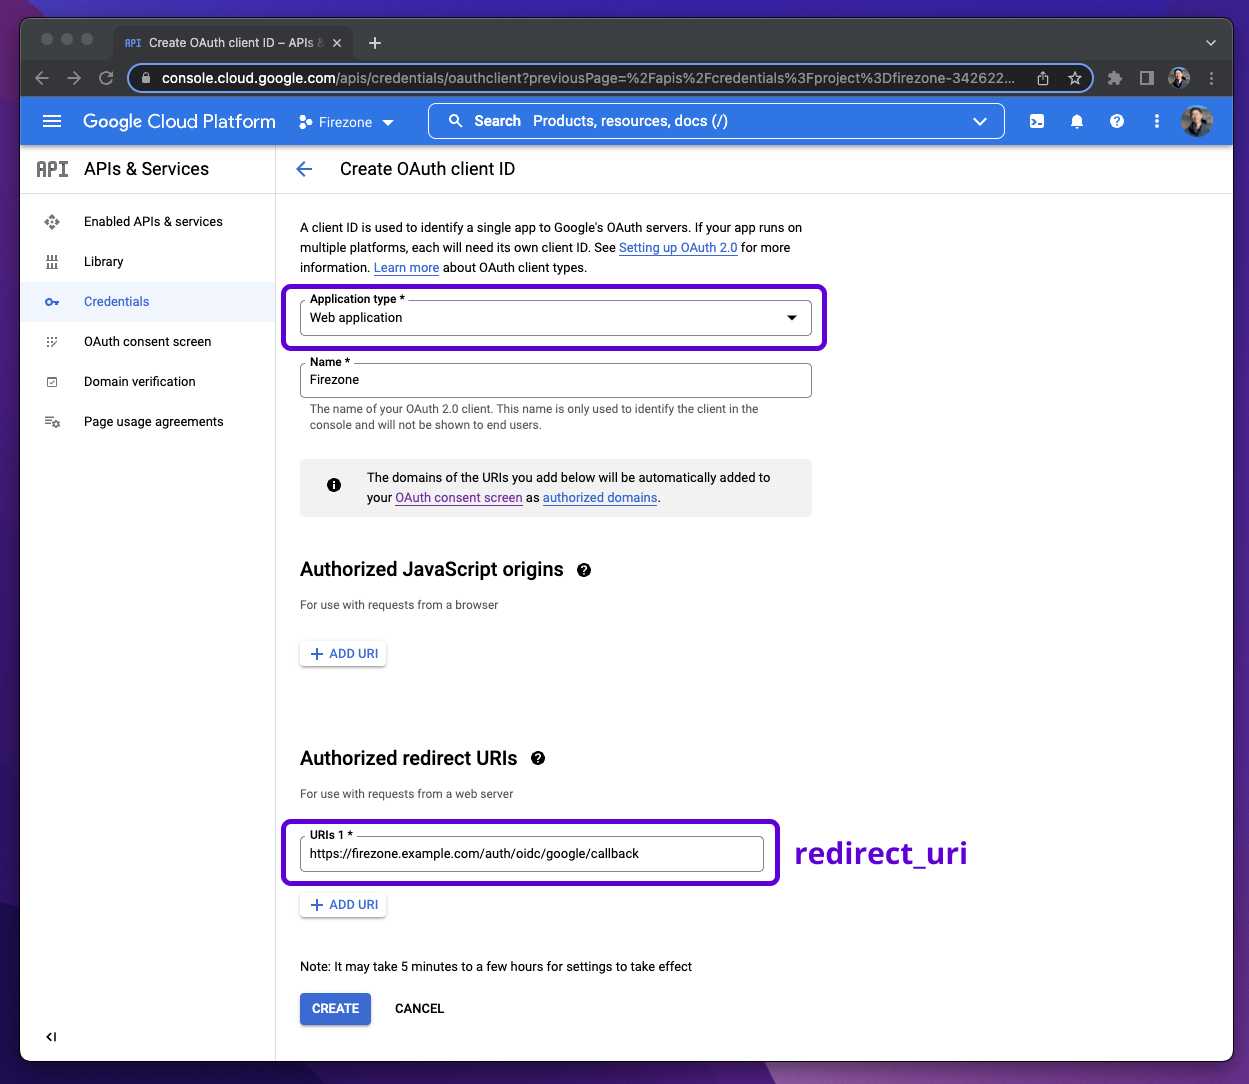
After creating the OAuth client ID, you will be given a Client ID and Client Secret. These will be used together with the redirect URI in the next step.
Step 3: Integrate with Firezone
Navigate to the /settings/security page in the admin portal, click "Add OpenID
Connect Provider" and enter the details you obtained in the steps above.
Enable or disable the Auto create users option to automatically create an unprivileged user when signing in via this authentication mechanism.
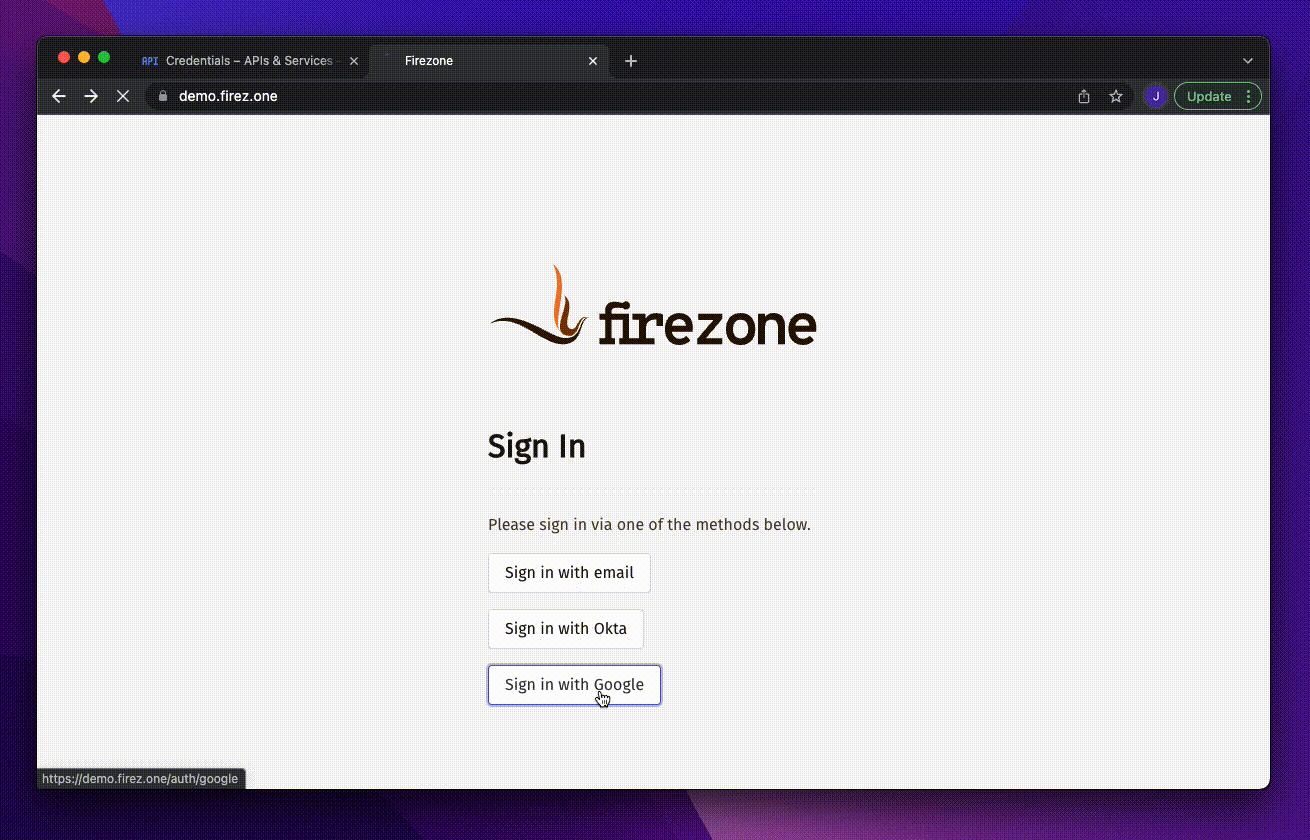
And that's it! The configuration should be updated immediately. You should now
see a Sign in with Google button on the sign in page.