Sync with Okta
On Enterprise plans, Firezone can automatically synchronize users and groups from your Okta tenant. This eliminates the need to manually create and manage users in Firezone. You can add multiple Okta directories to sync from different Okta organizations.
Overview
Users and groups assigned to your Okta authentication app will be automatically synced to Firezone.
To enable directory sync, you'll create an API service app in Okta that allows Firezone to connect to the Okta APIs with read-only access to users, groups, and applications.
Prerequisite: Before proceeding, you must have completed Okta authentication setup. Directory sync requires an existing Okta authentication provider to function.
Setup
Note on API rate limits: Firezone intelligently throttles API requests to stay within the rate limit you configure for your service app. In the Application Rate Limits tab of your Okta service app, you can set a percentage of your org's total rate limit capacity. To complete syncs faster, we recommend setting this to the highest value that still allows your other Okta integrations to function properly.
Step 1: Create a custom role in Okta
To ensure Firezone has only the minimum required permissions, you'll create a custom role in Okta with read-only access to users, groups, and a specific set of applications.
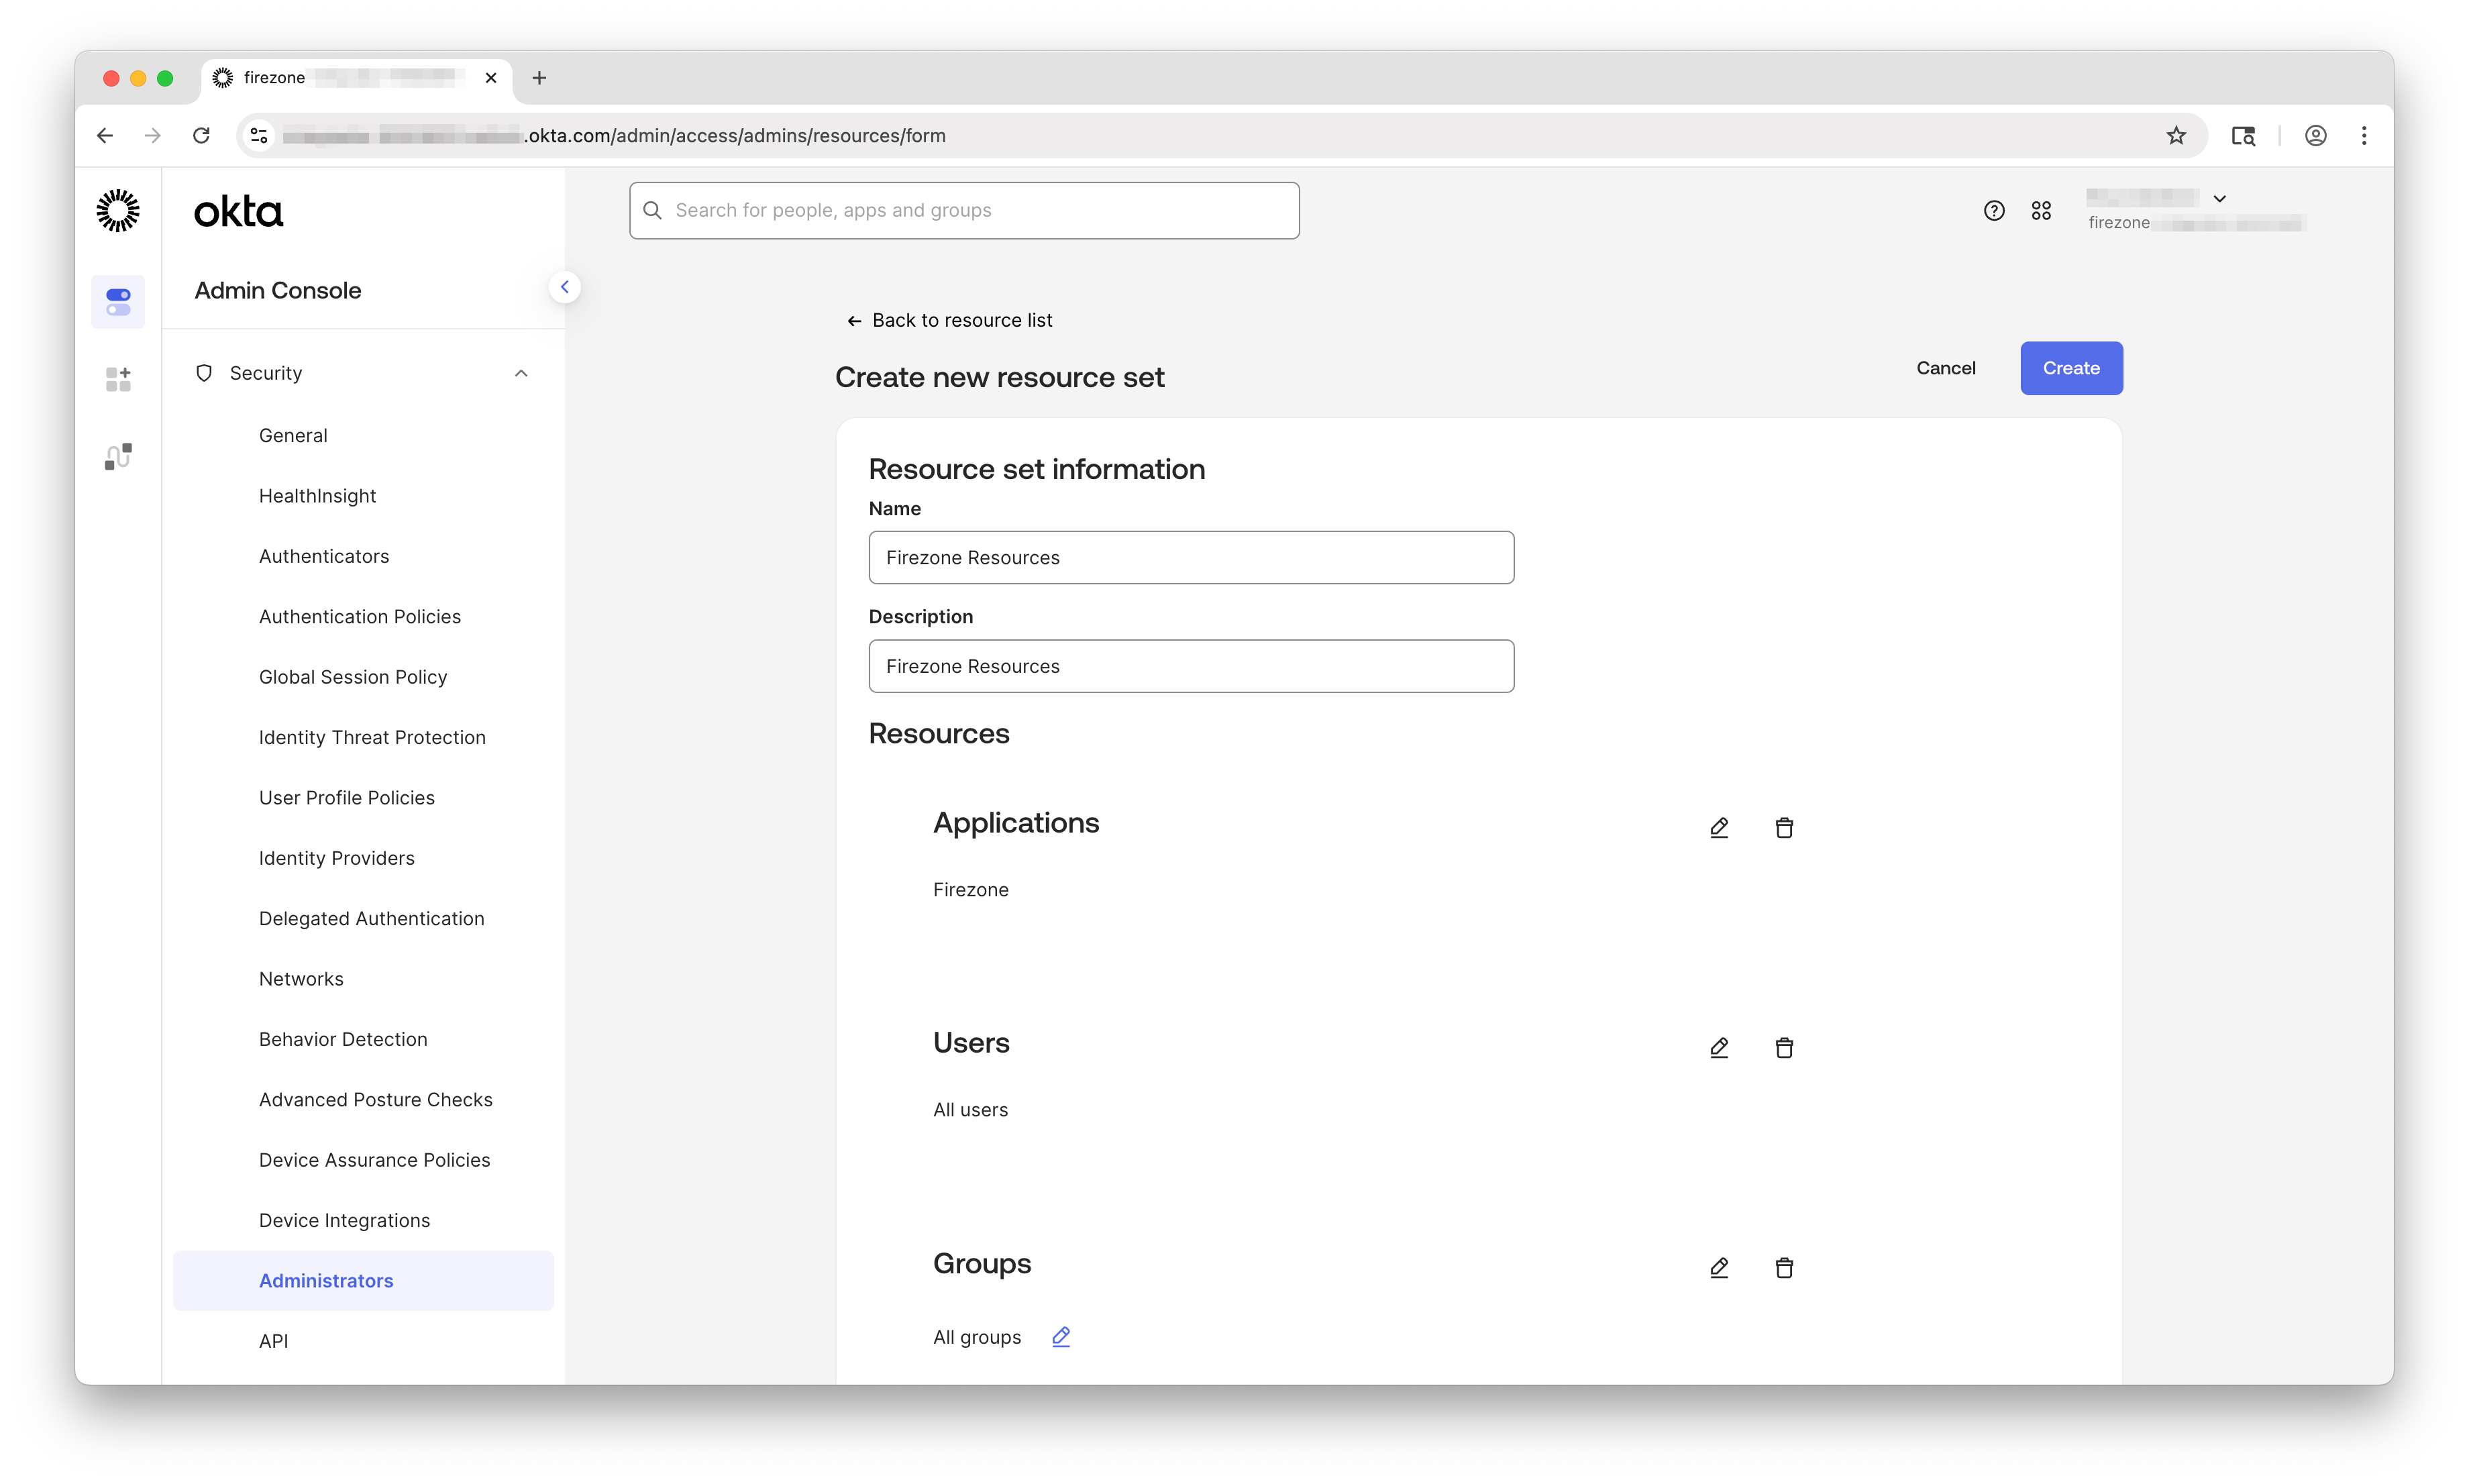
Create a Resource Set
First, create a Resource Set that defines which Okta resources the Firezone API service app can access.
In your Okta admin portal, go to Security → Administrators, select the Resources tab and click Create new resource set.
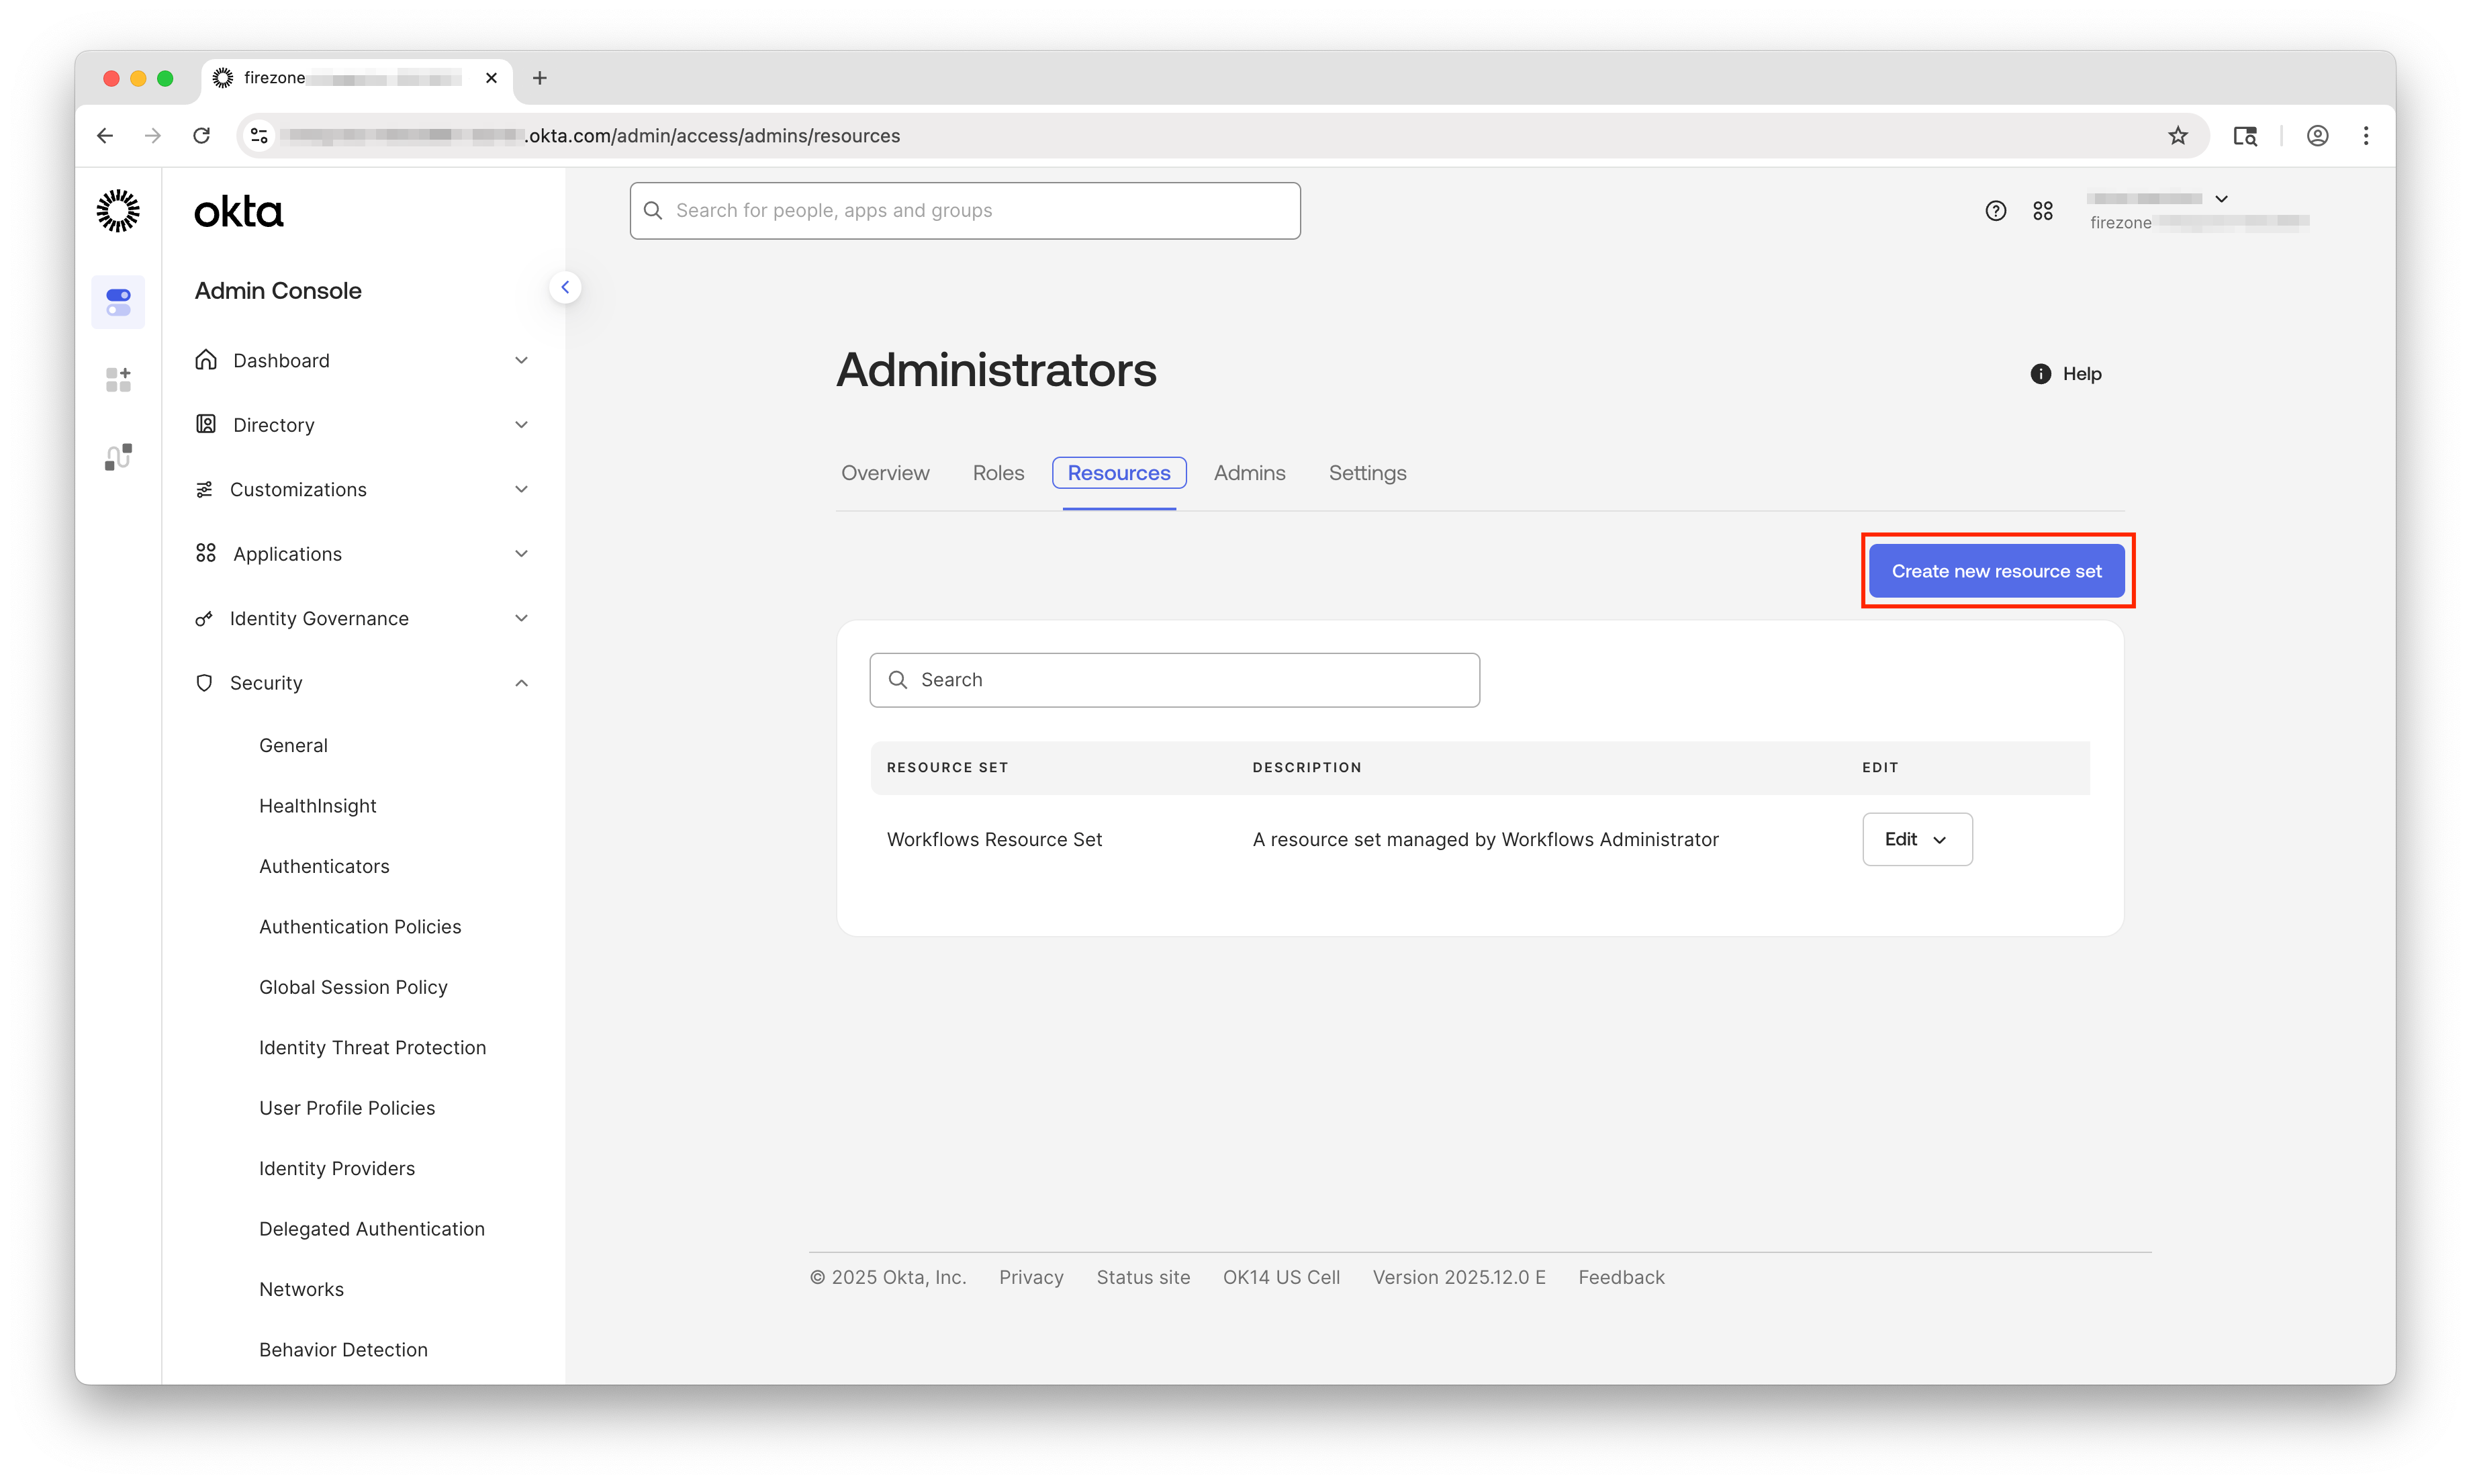
Configure the Resource Set as follows:
- Name:
Firezone Resources - Description:
Resources for Firezone Directory Sync - Resources:
- Applications →
Firezone OIDC app - Users →
All Users - Groups →
All Groups
- Applications →
Click Create.
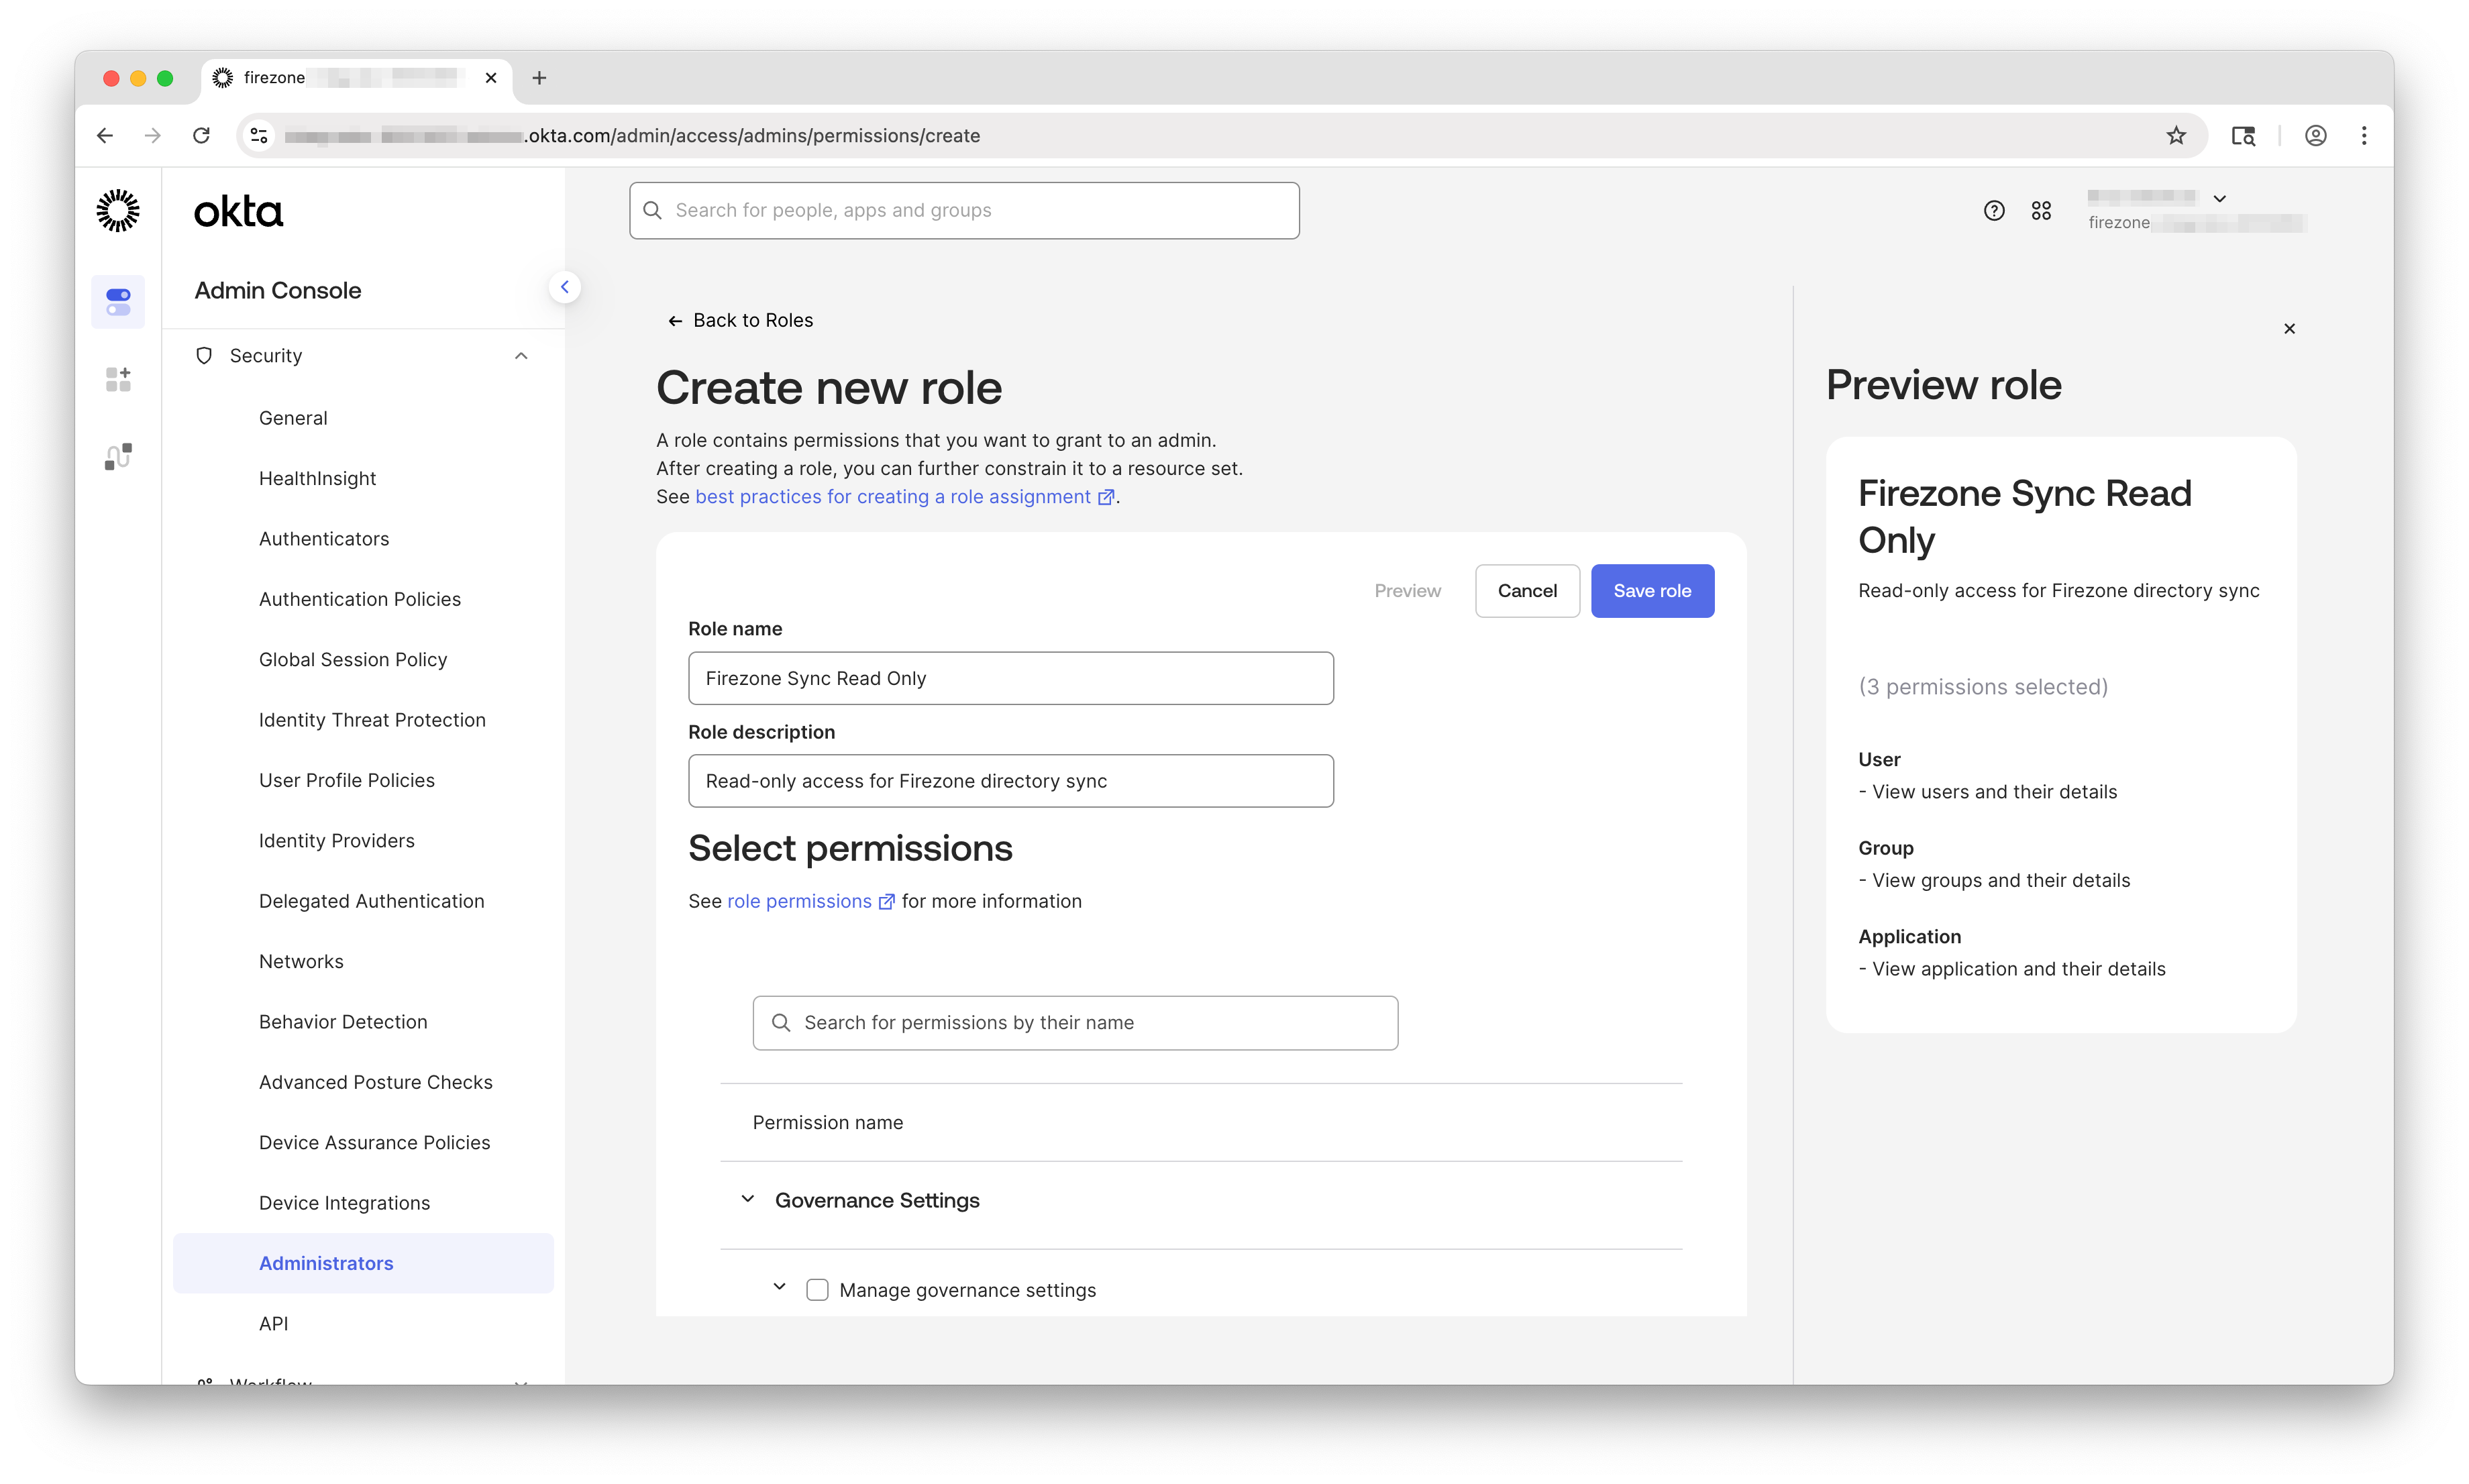
Create a Custom Role
Now create a custom role that will be assigned to the Firezone API service app.
In the Administrators page, select the Roles tab and click Create new role.
Configure the role as follows:
- Role name:
Firezone Sync Read Only - Role description:
Read-only access for Firezone directory sync
Under Permissions, add the following:
- View users and their details
- View groups and their details
- View applications and their details
Click Save role.
Step 2: Start the Directory Sync setup in Firezone
In a new browser tab, open your Firezone admin portal, and go to Settings → Directory Sync.
Click the Add Directory button and choose Okta.
You should now see a setup form. Click the Generate Keypair button to create a public/private key pair that will be used for authentication during directory sync.
Keep this page open as you'll need the public key and other values in the next step.
Step 3: Create an API service app in Okta
In your Okta admin portal, go to Applications → Applications and click Create App Integration.
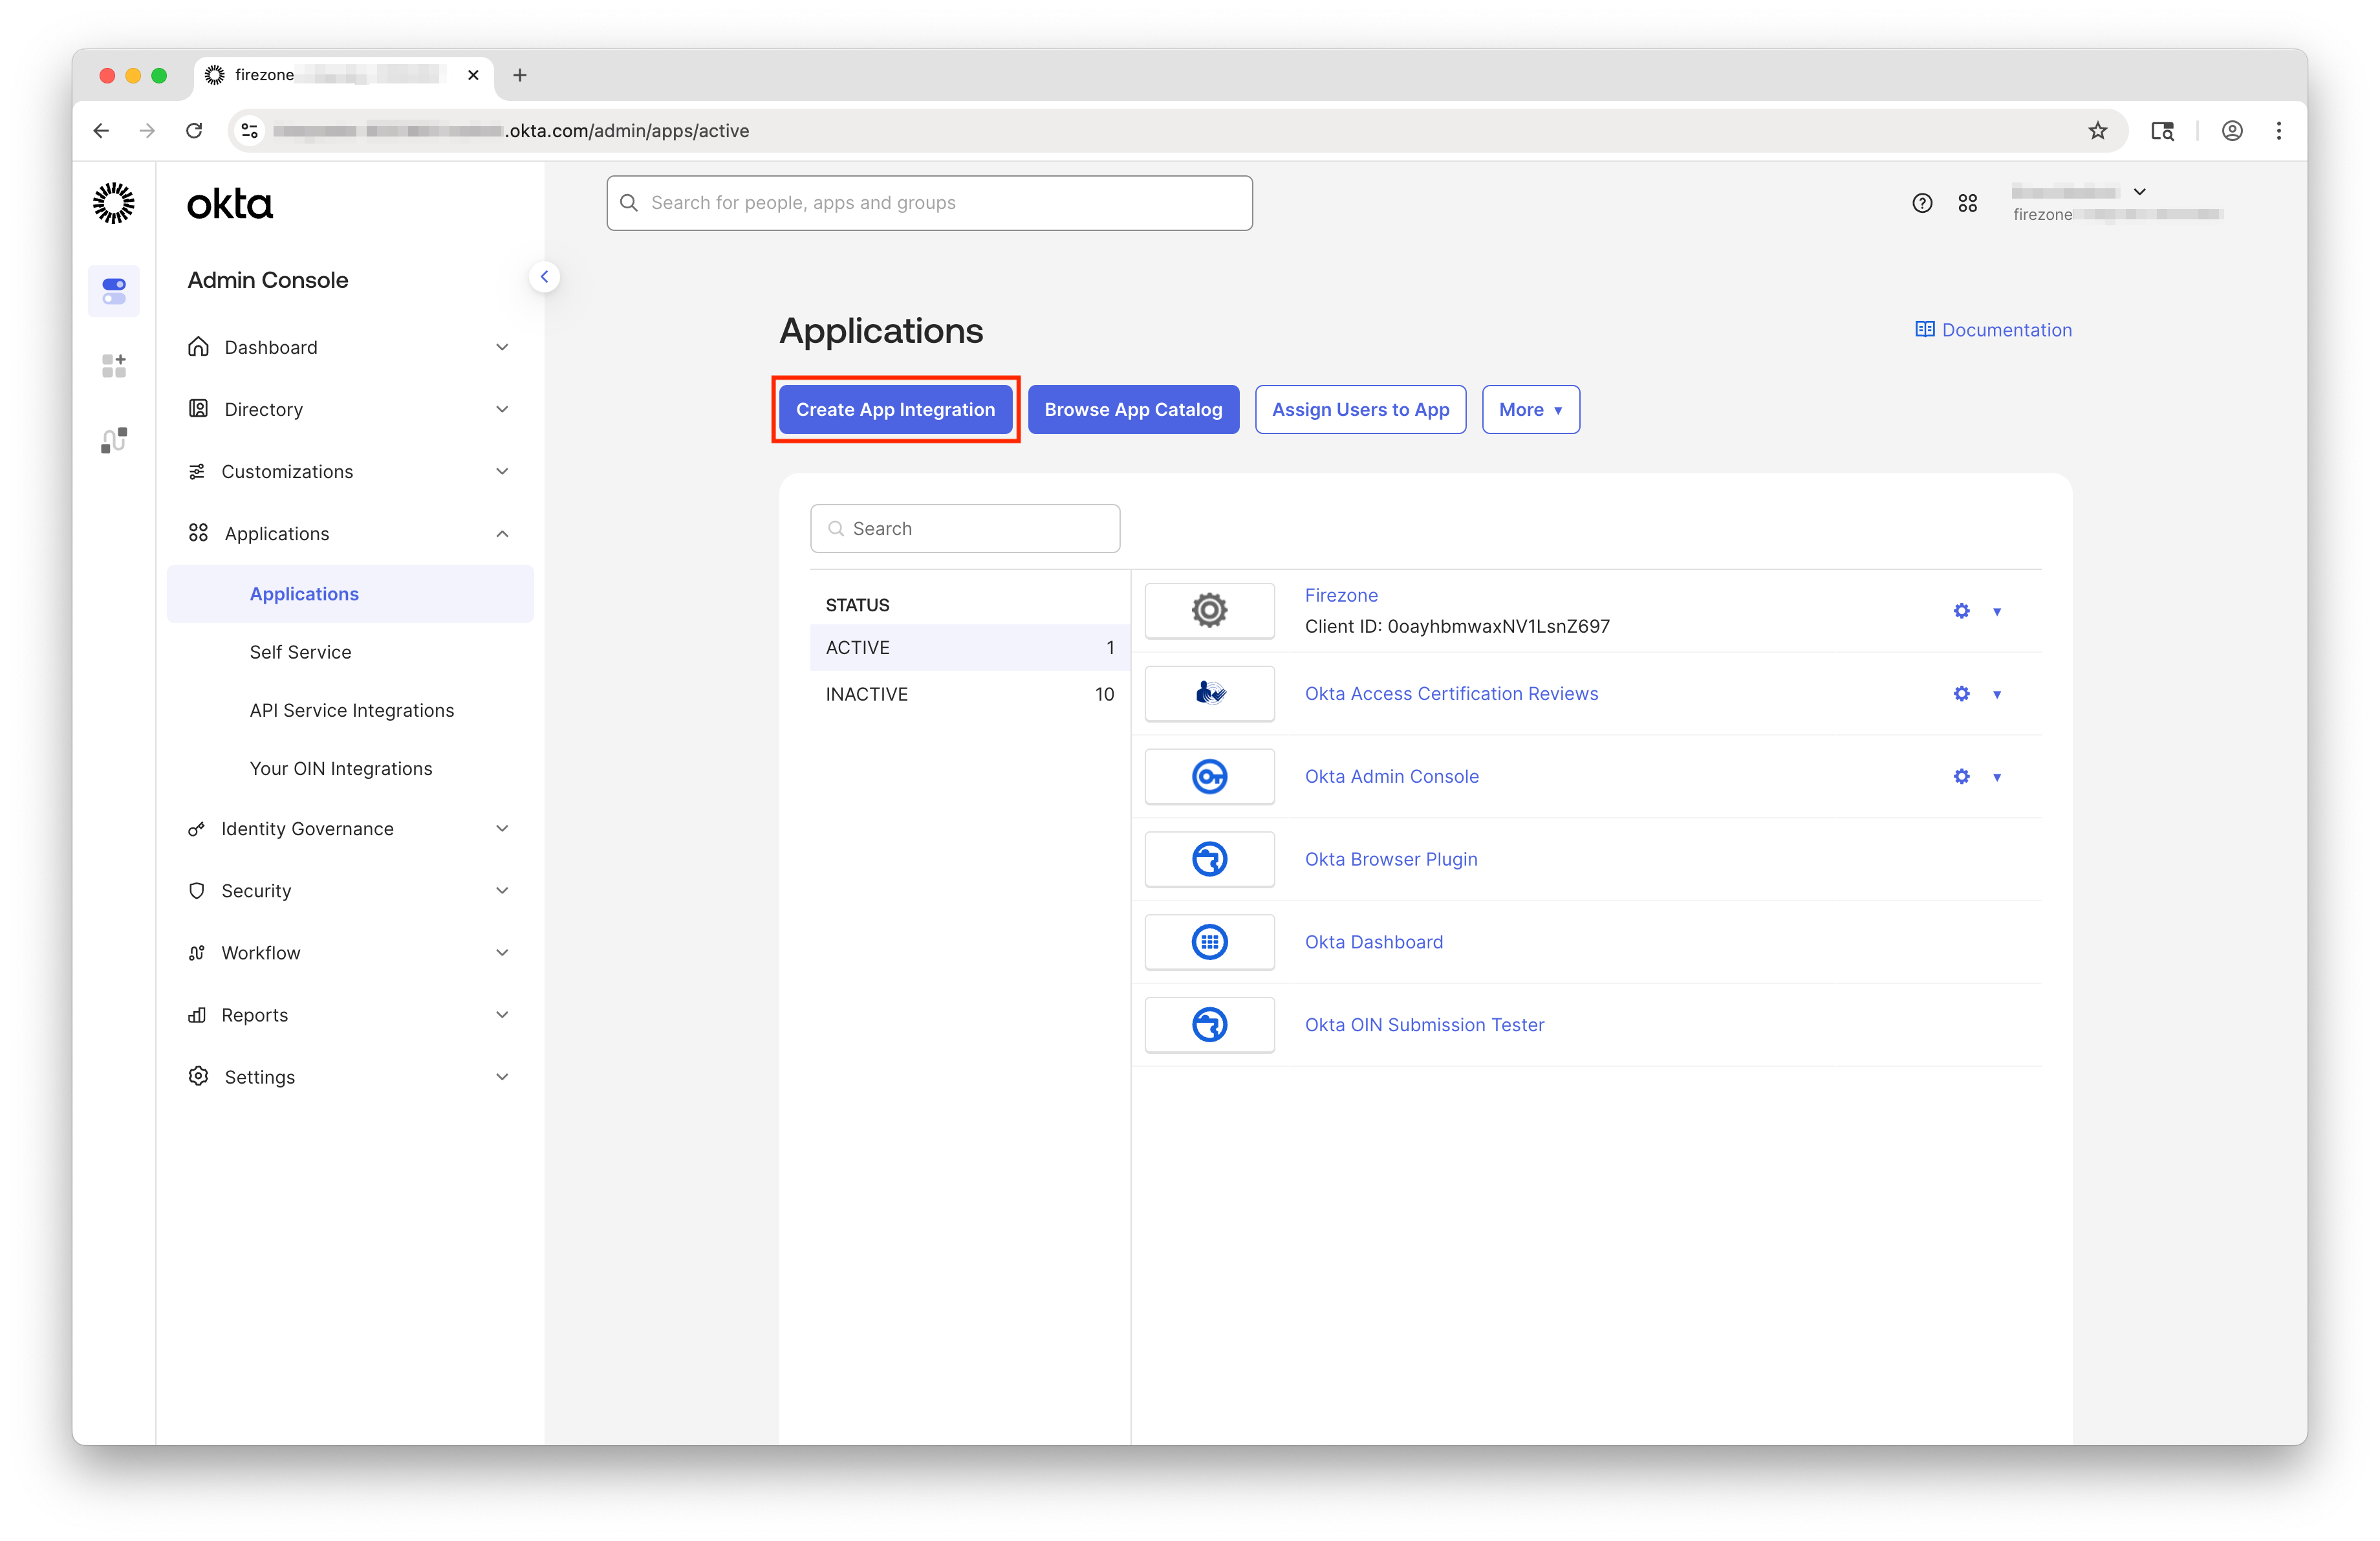
In the modal that appears, select API Services and click Next.
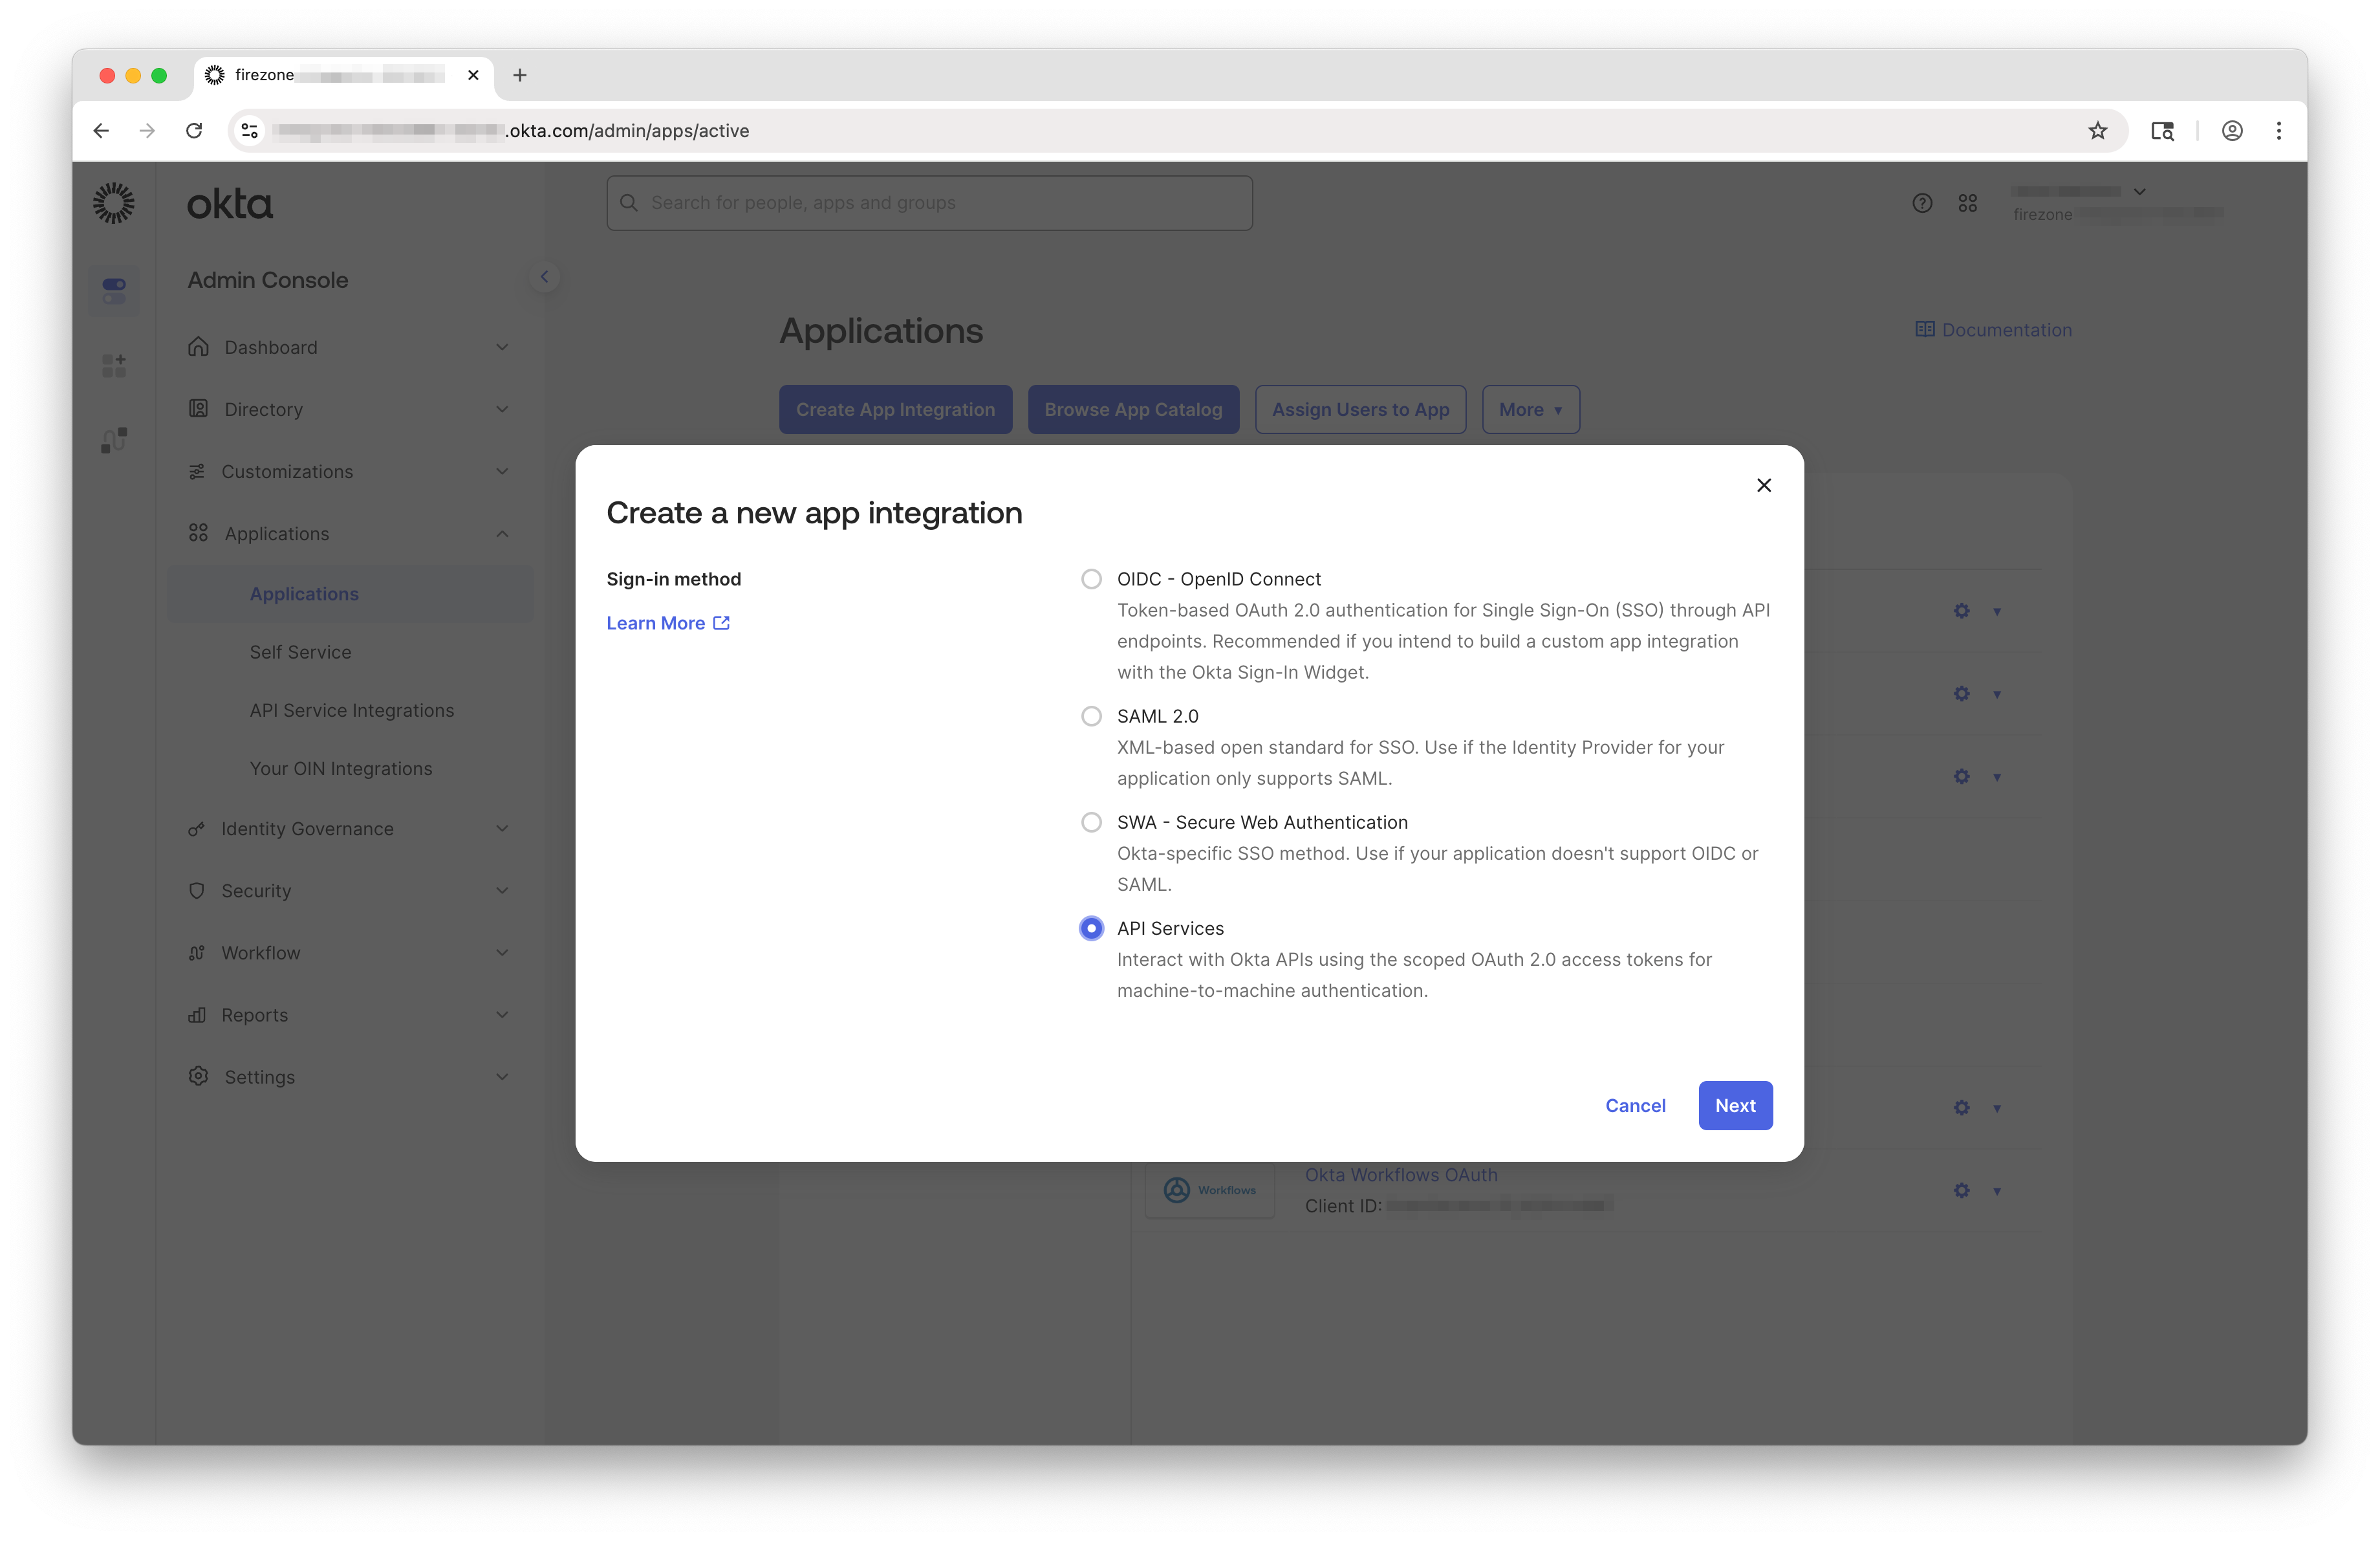
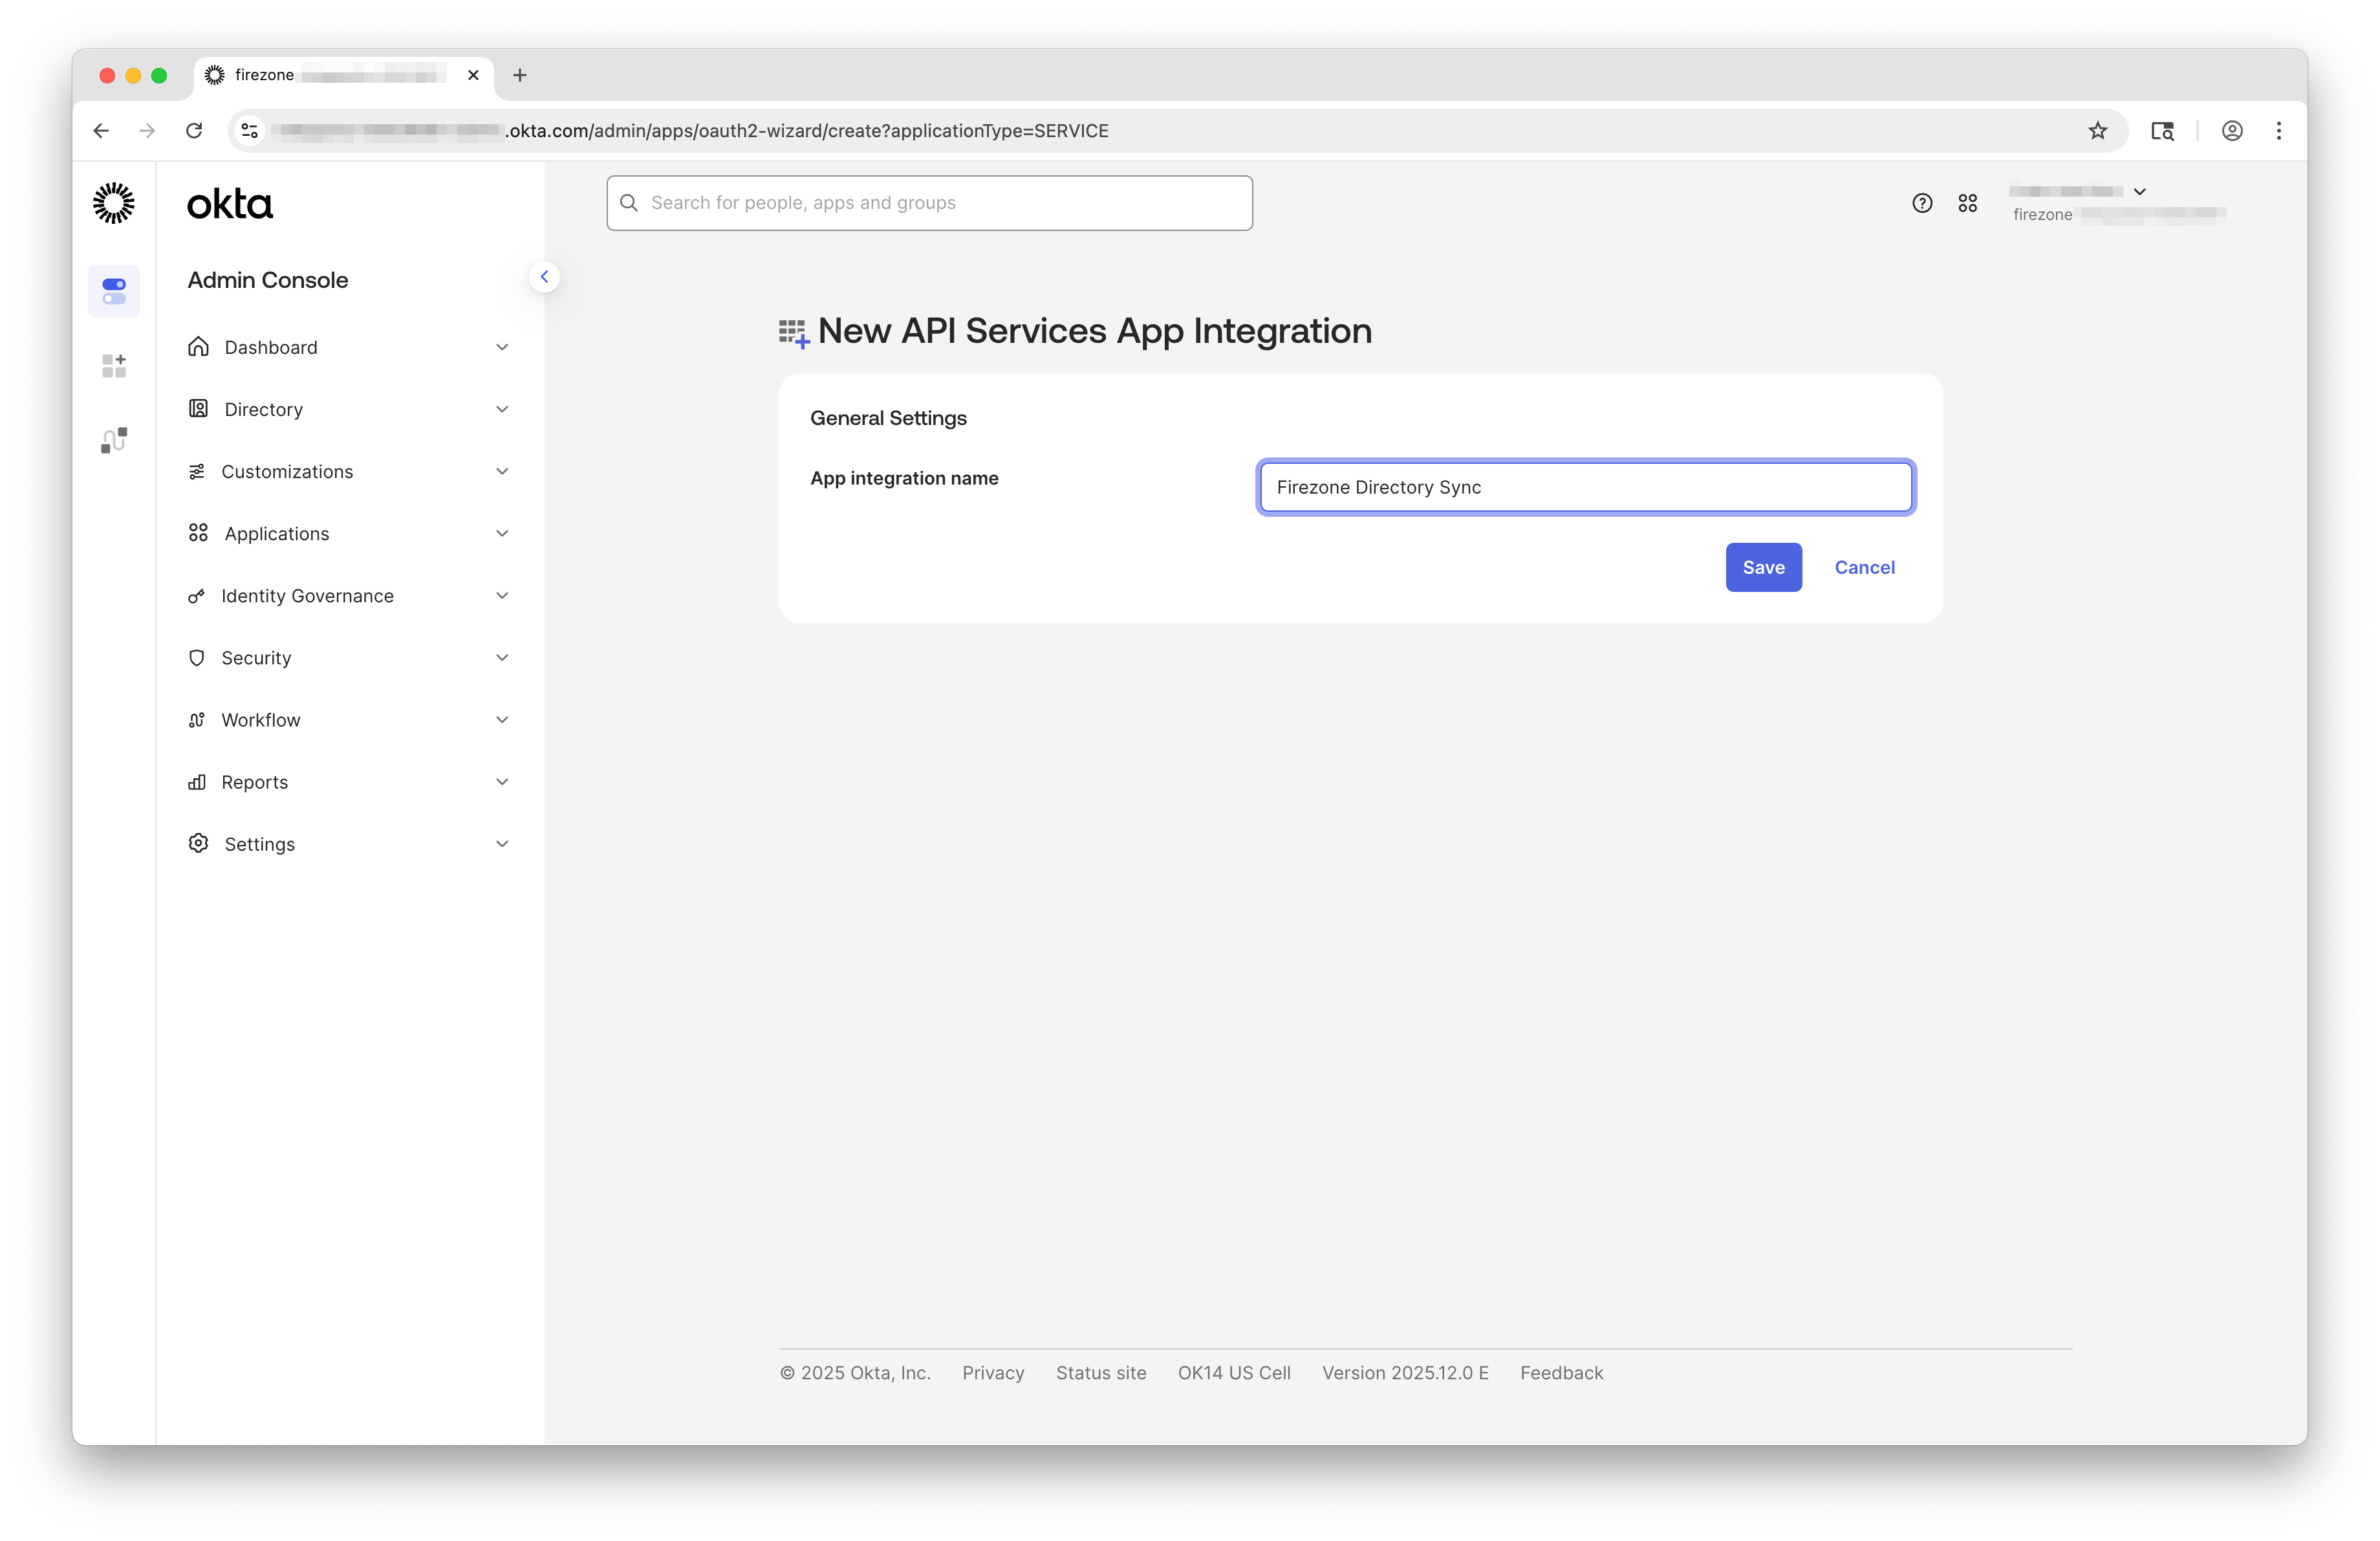
Give the app a descriptive name such as Firezone Directory Sync.
Click Save to create the application.
Configure client authentication
Once the app is created, you'll need to configure its authentication method.
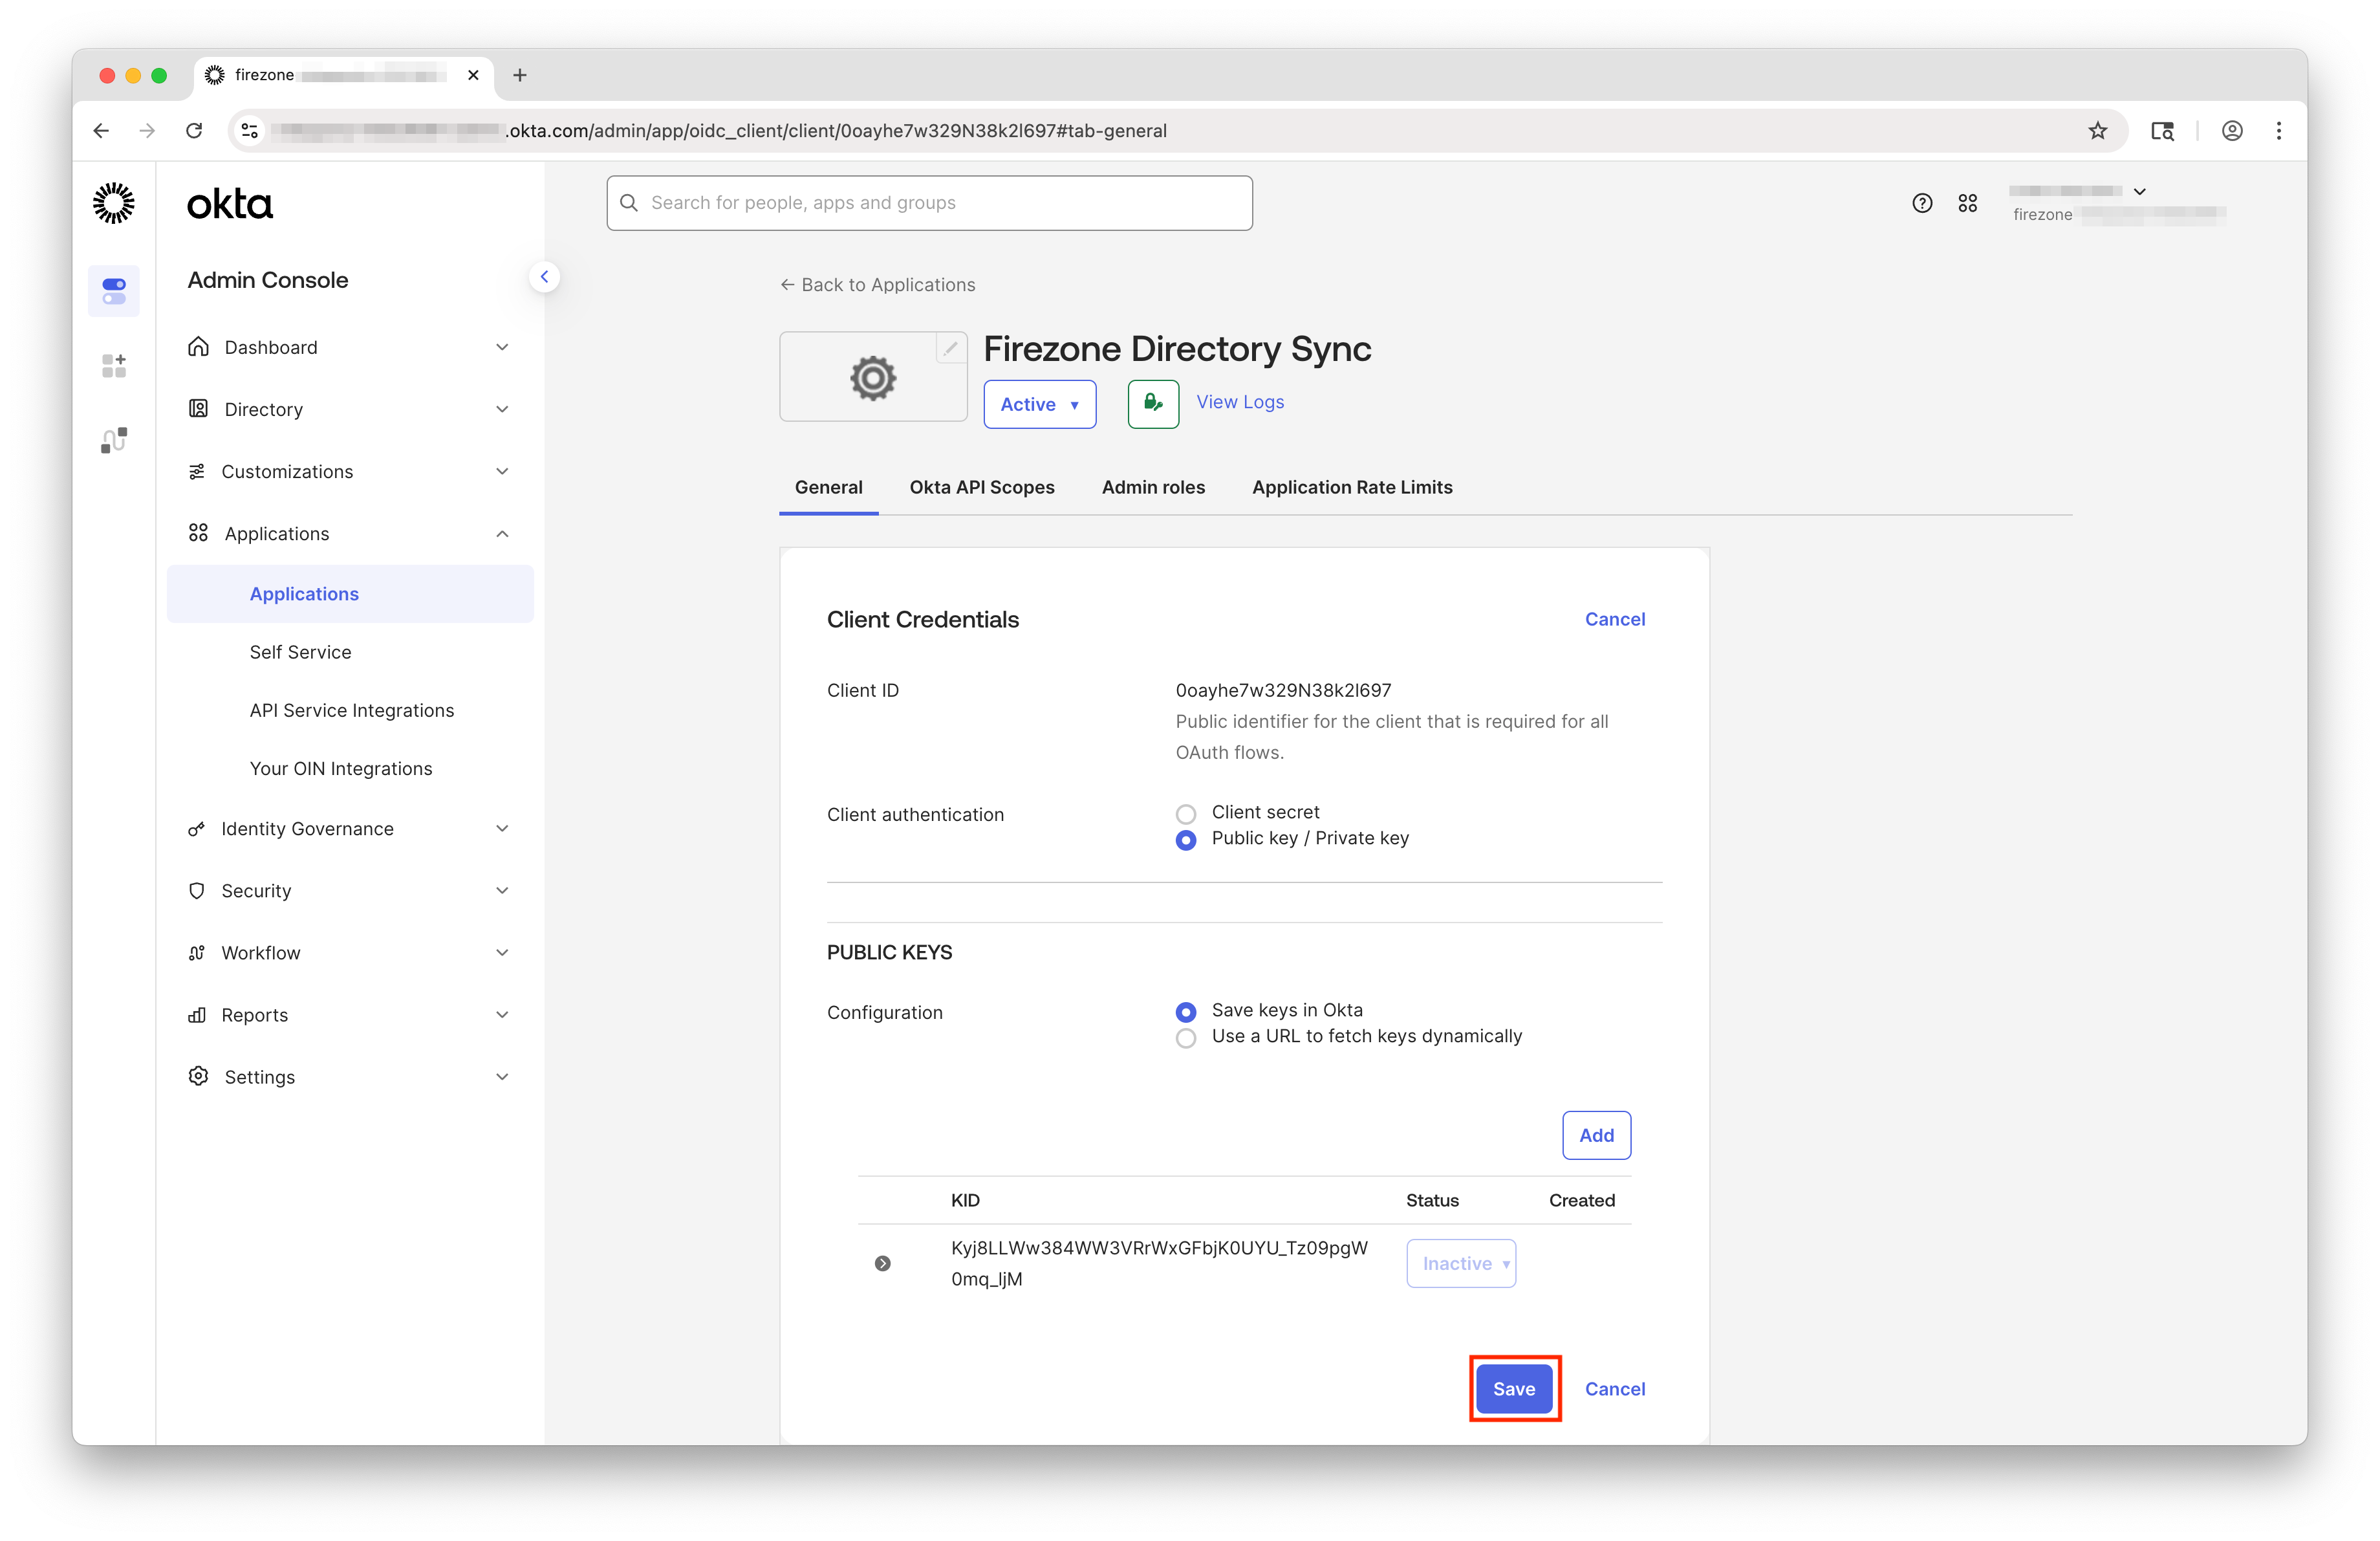
On the General tab, click Edit in the Client Credentials section.
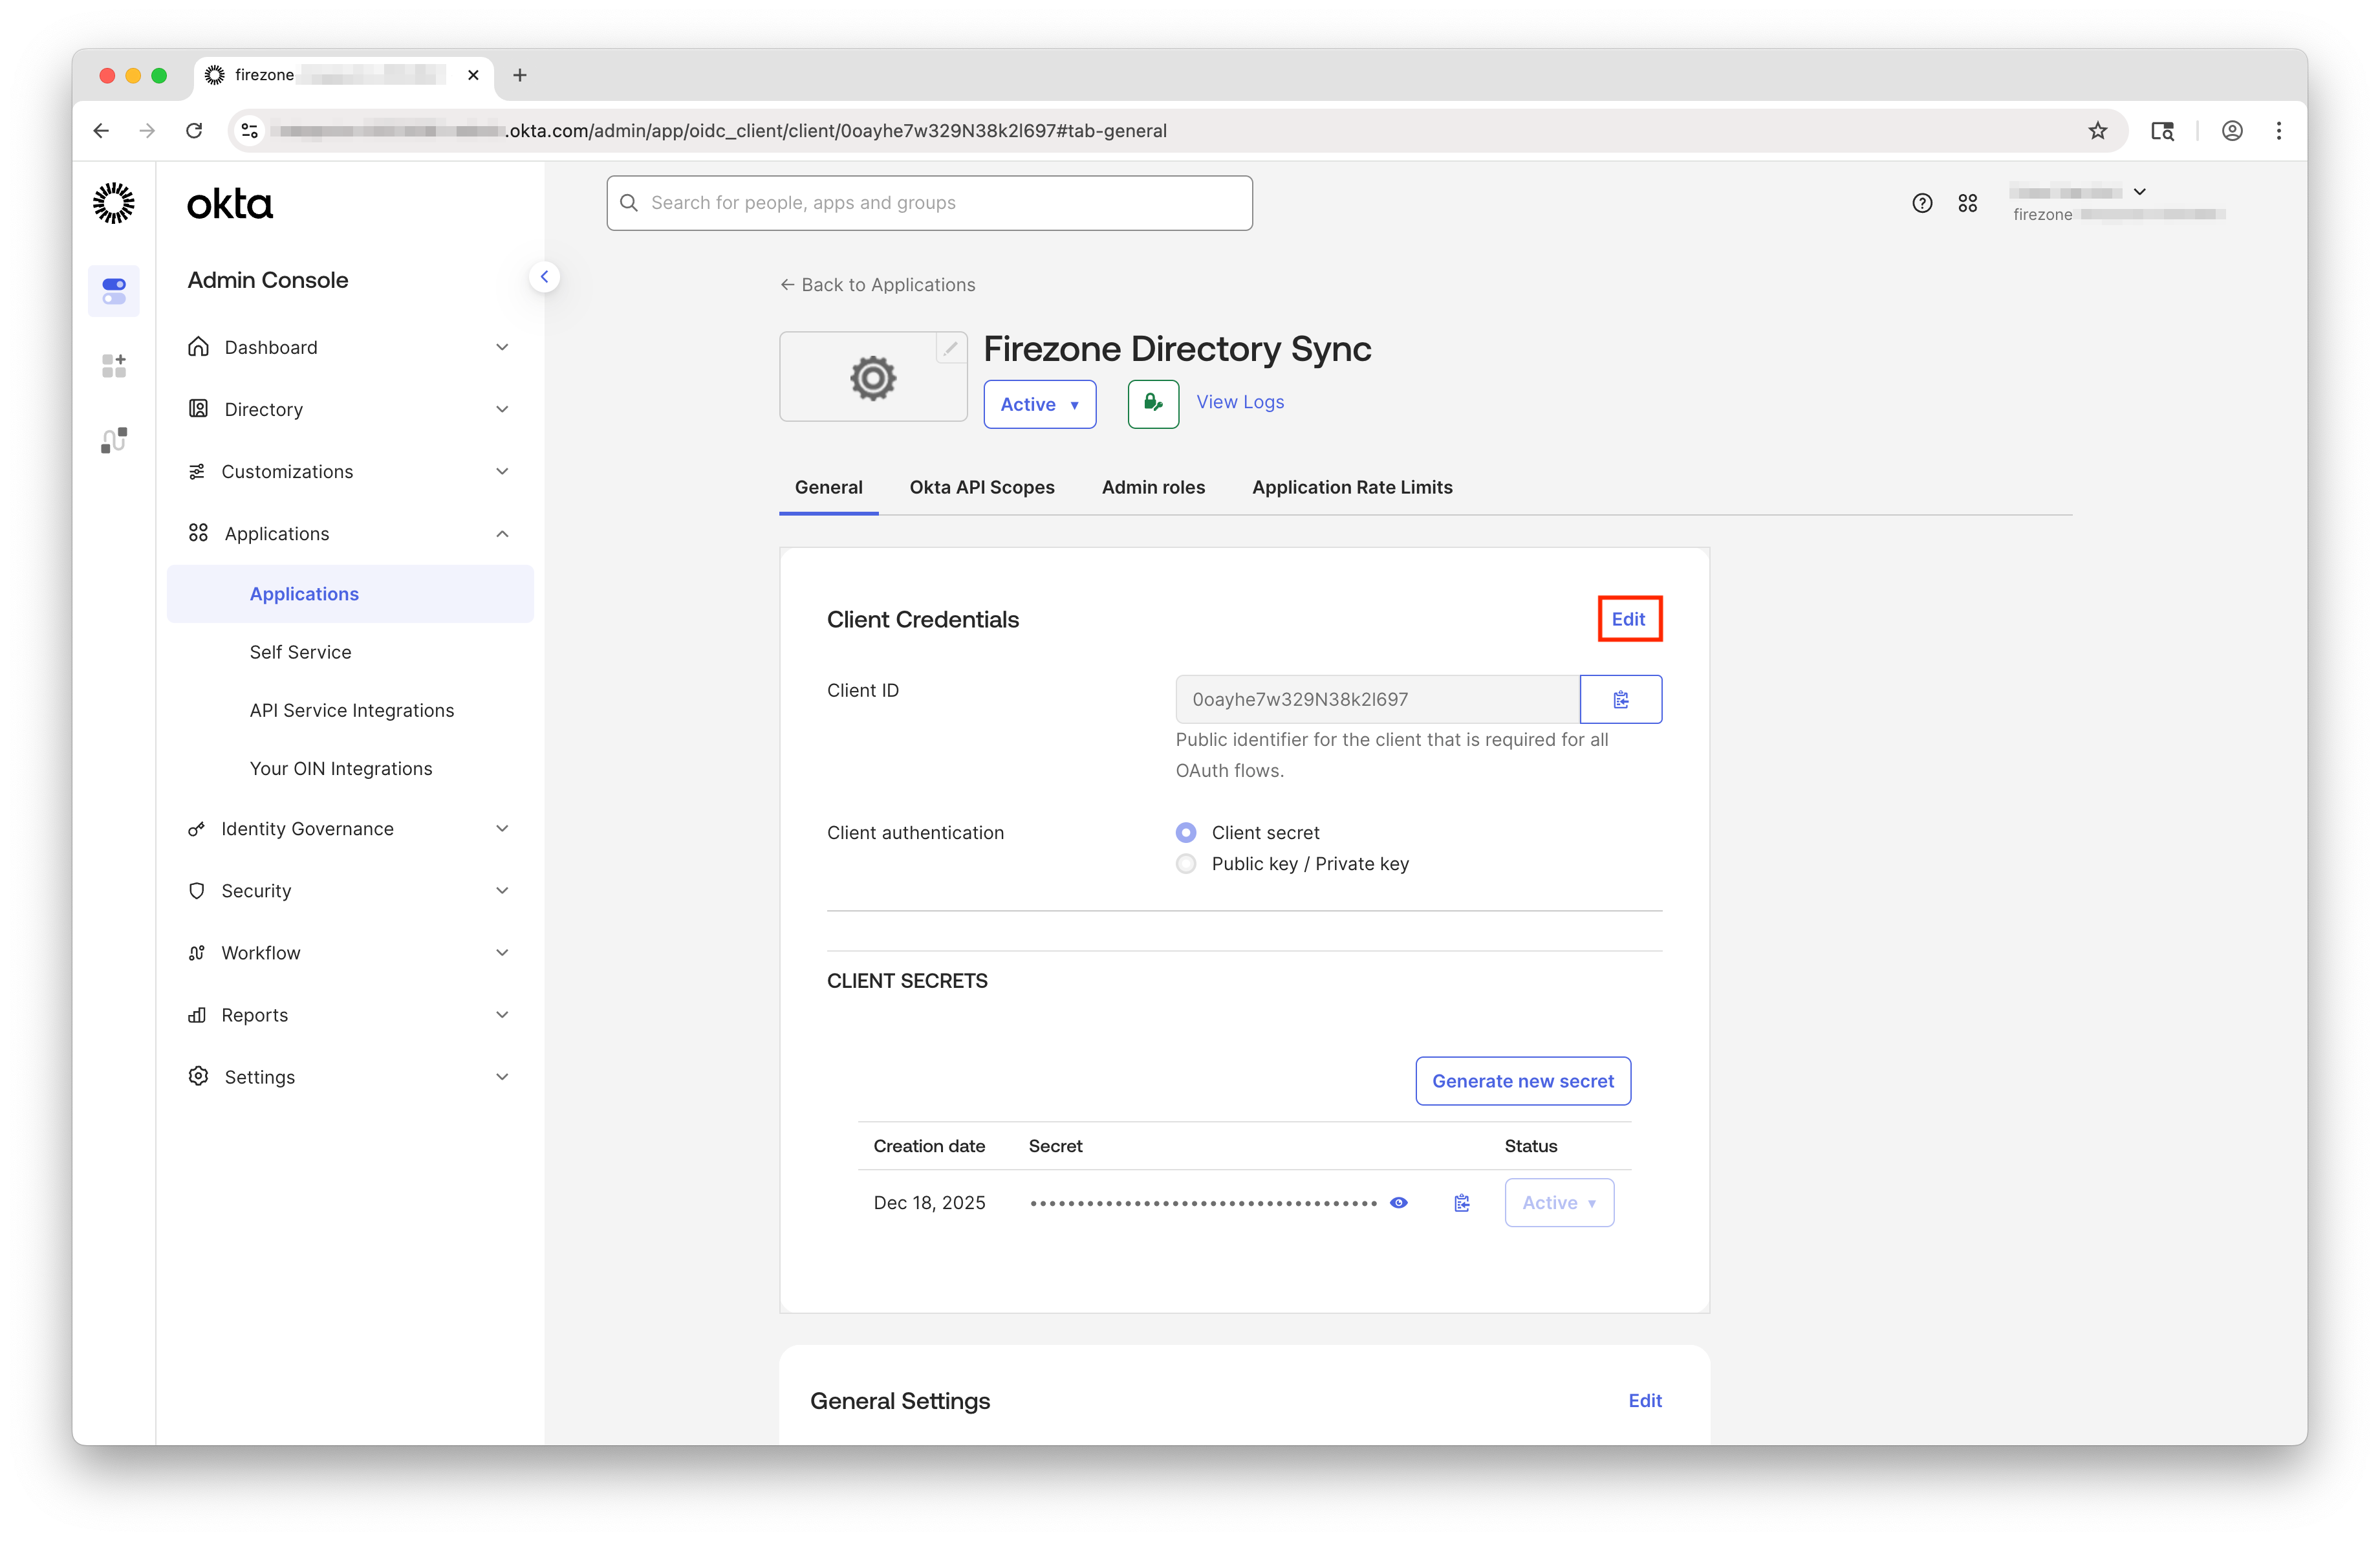
Select Public key / Private key for the Client authentication method.
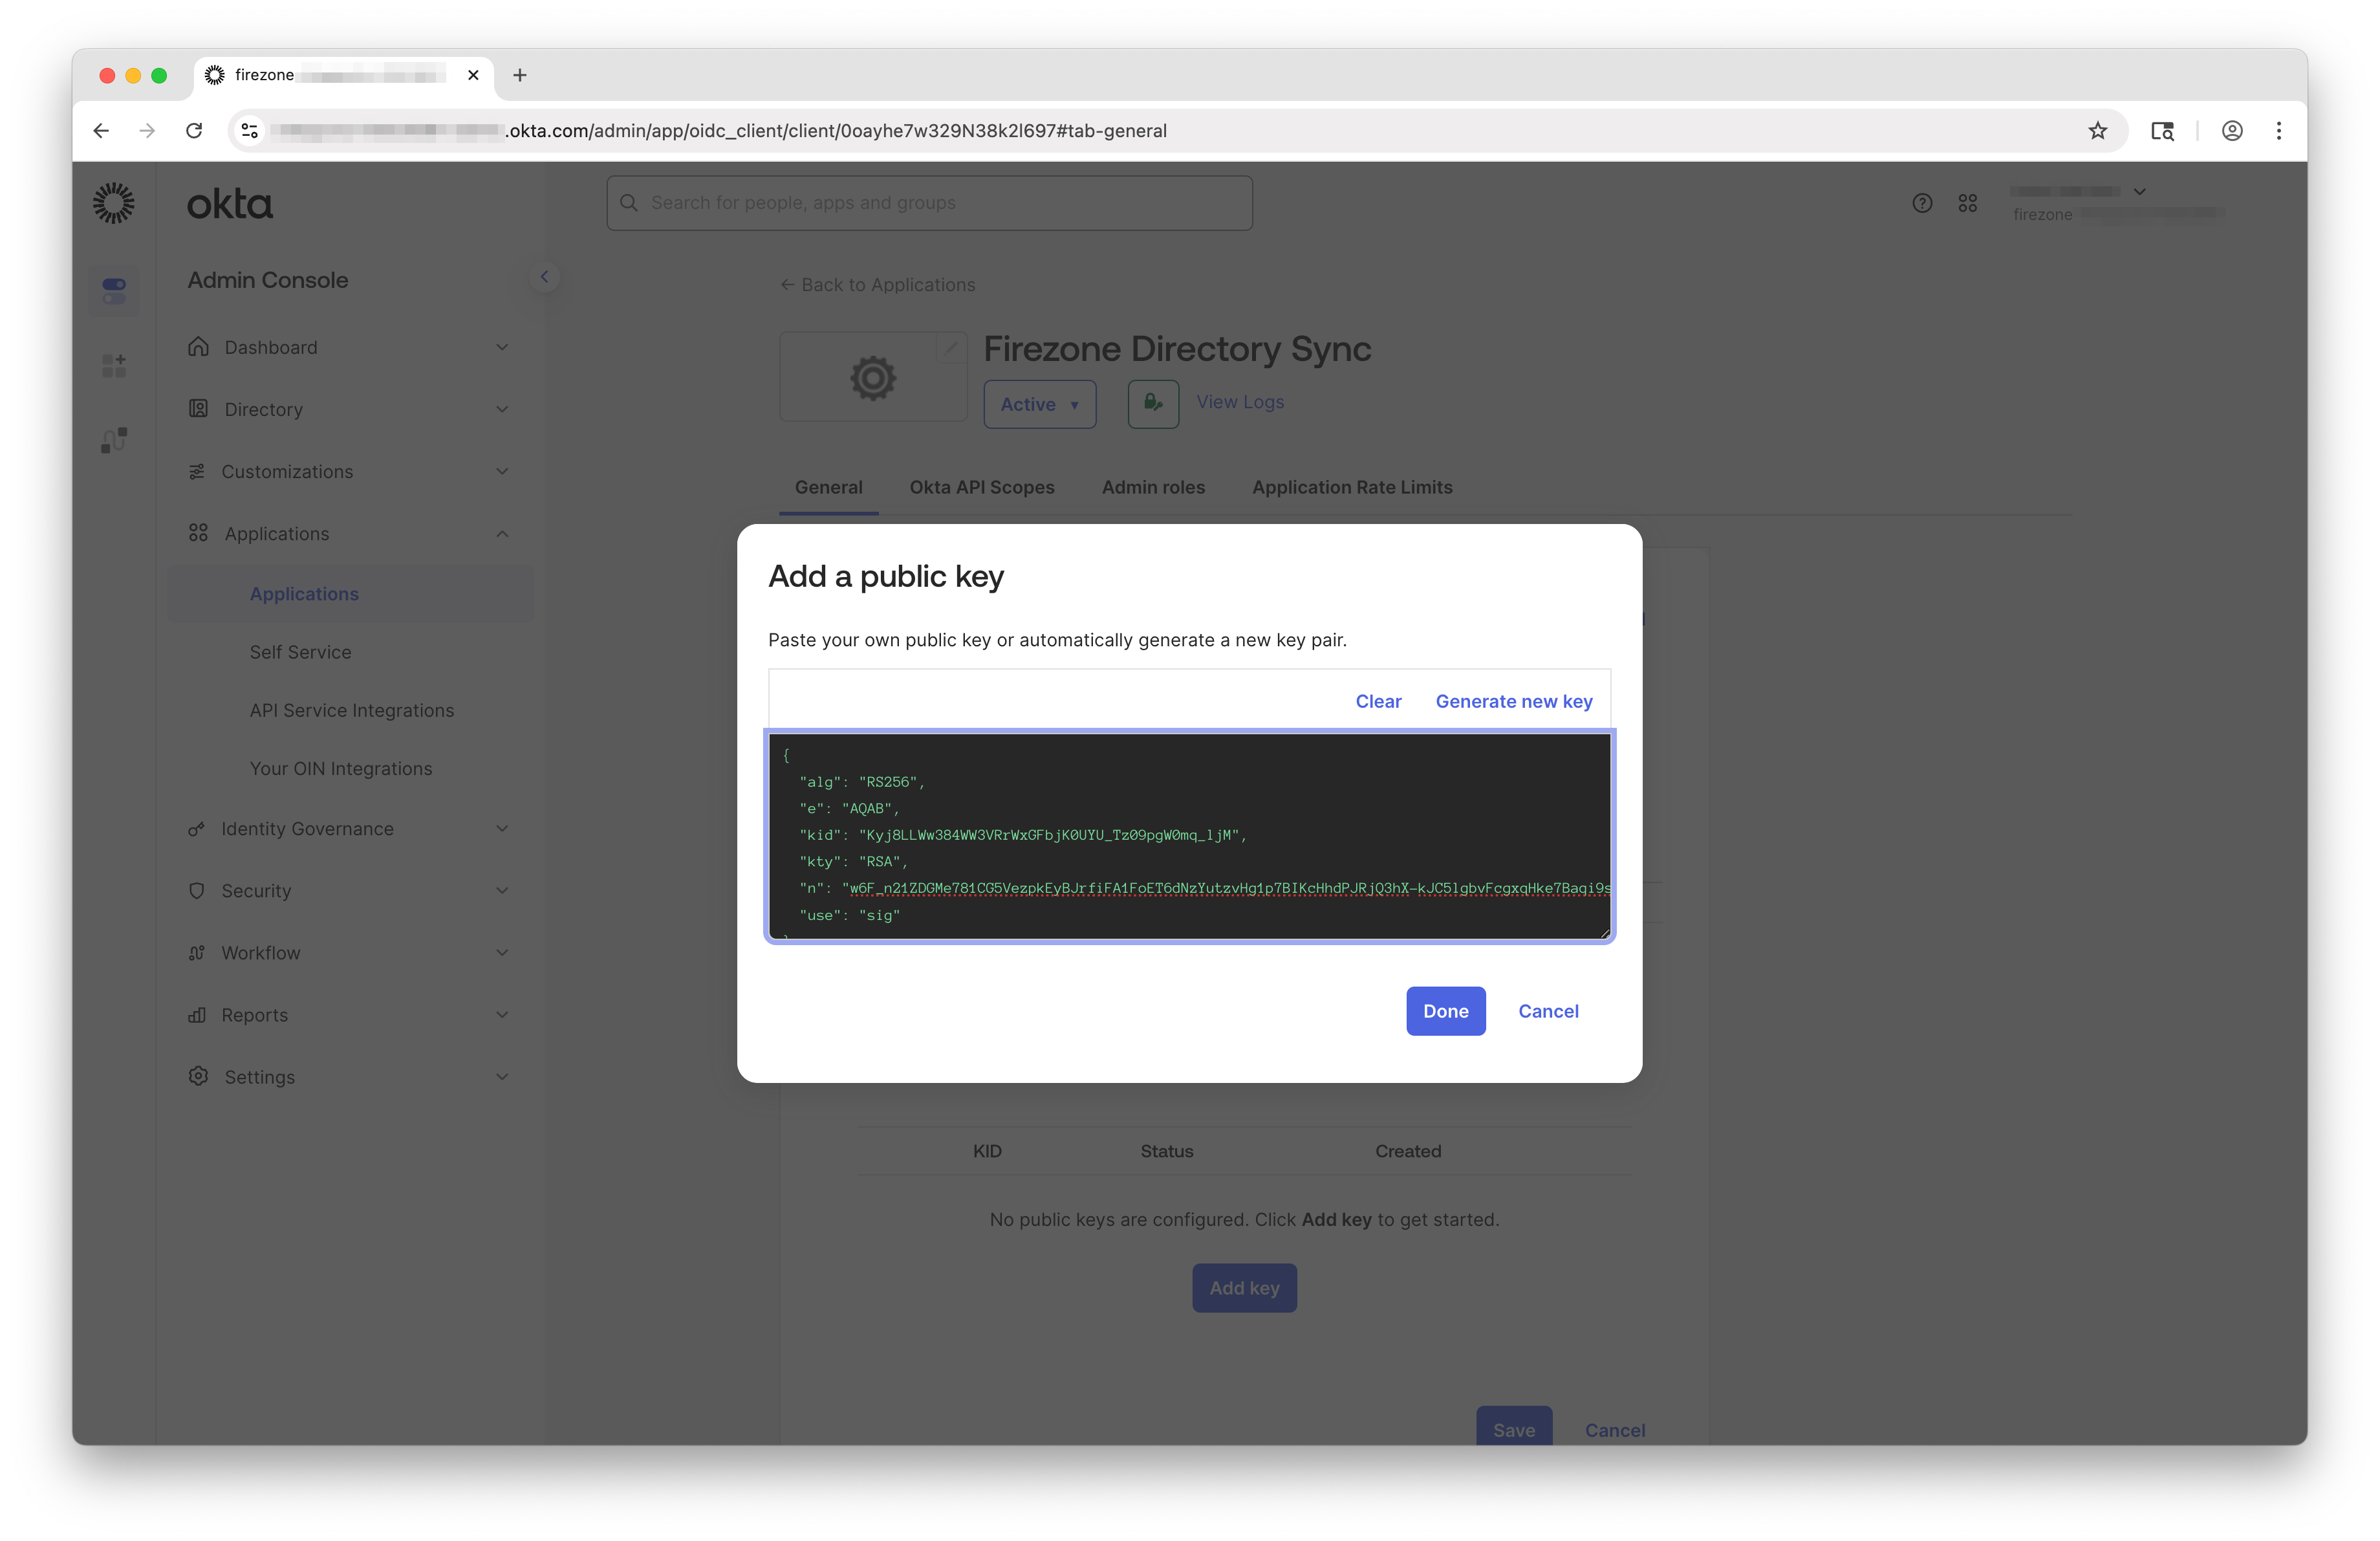
Under the PUBLIC KEYS section, click Add key.
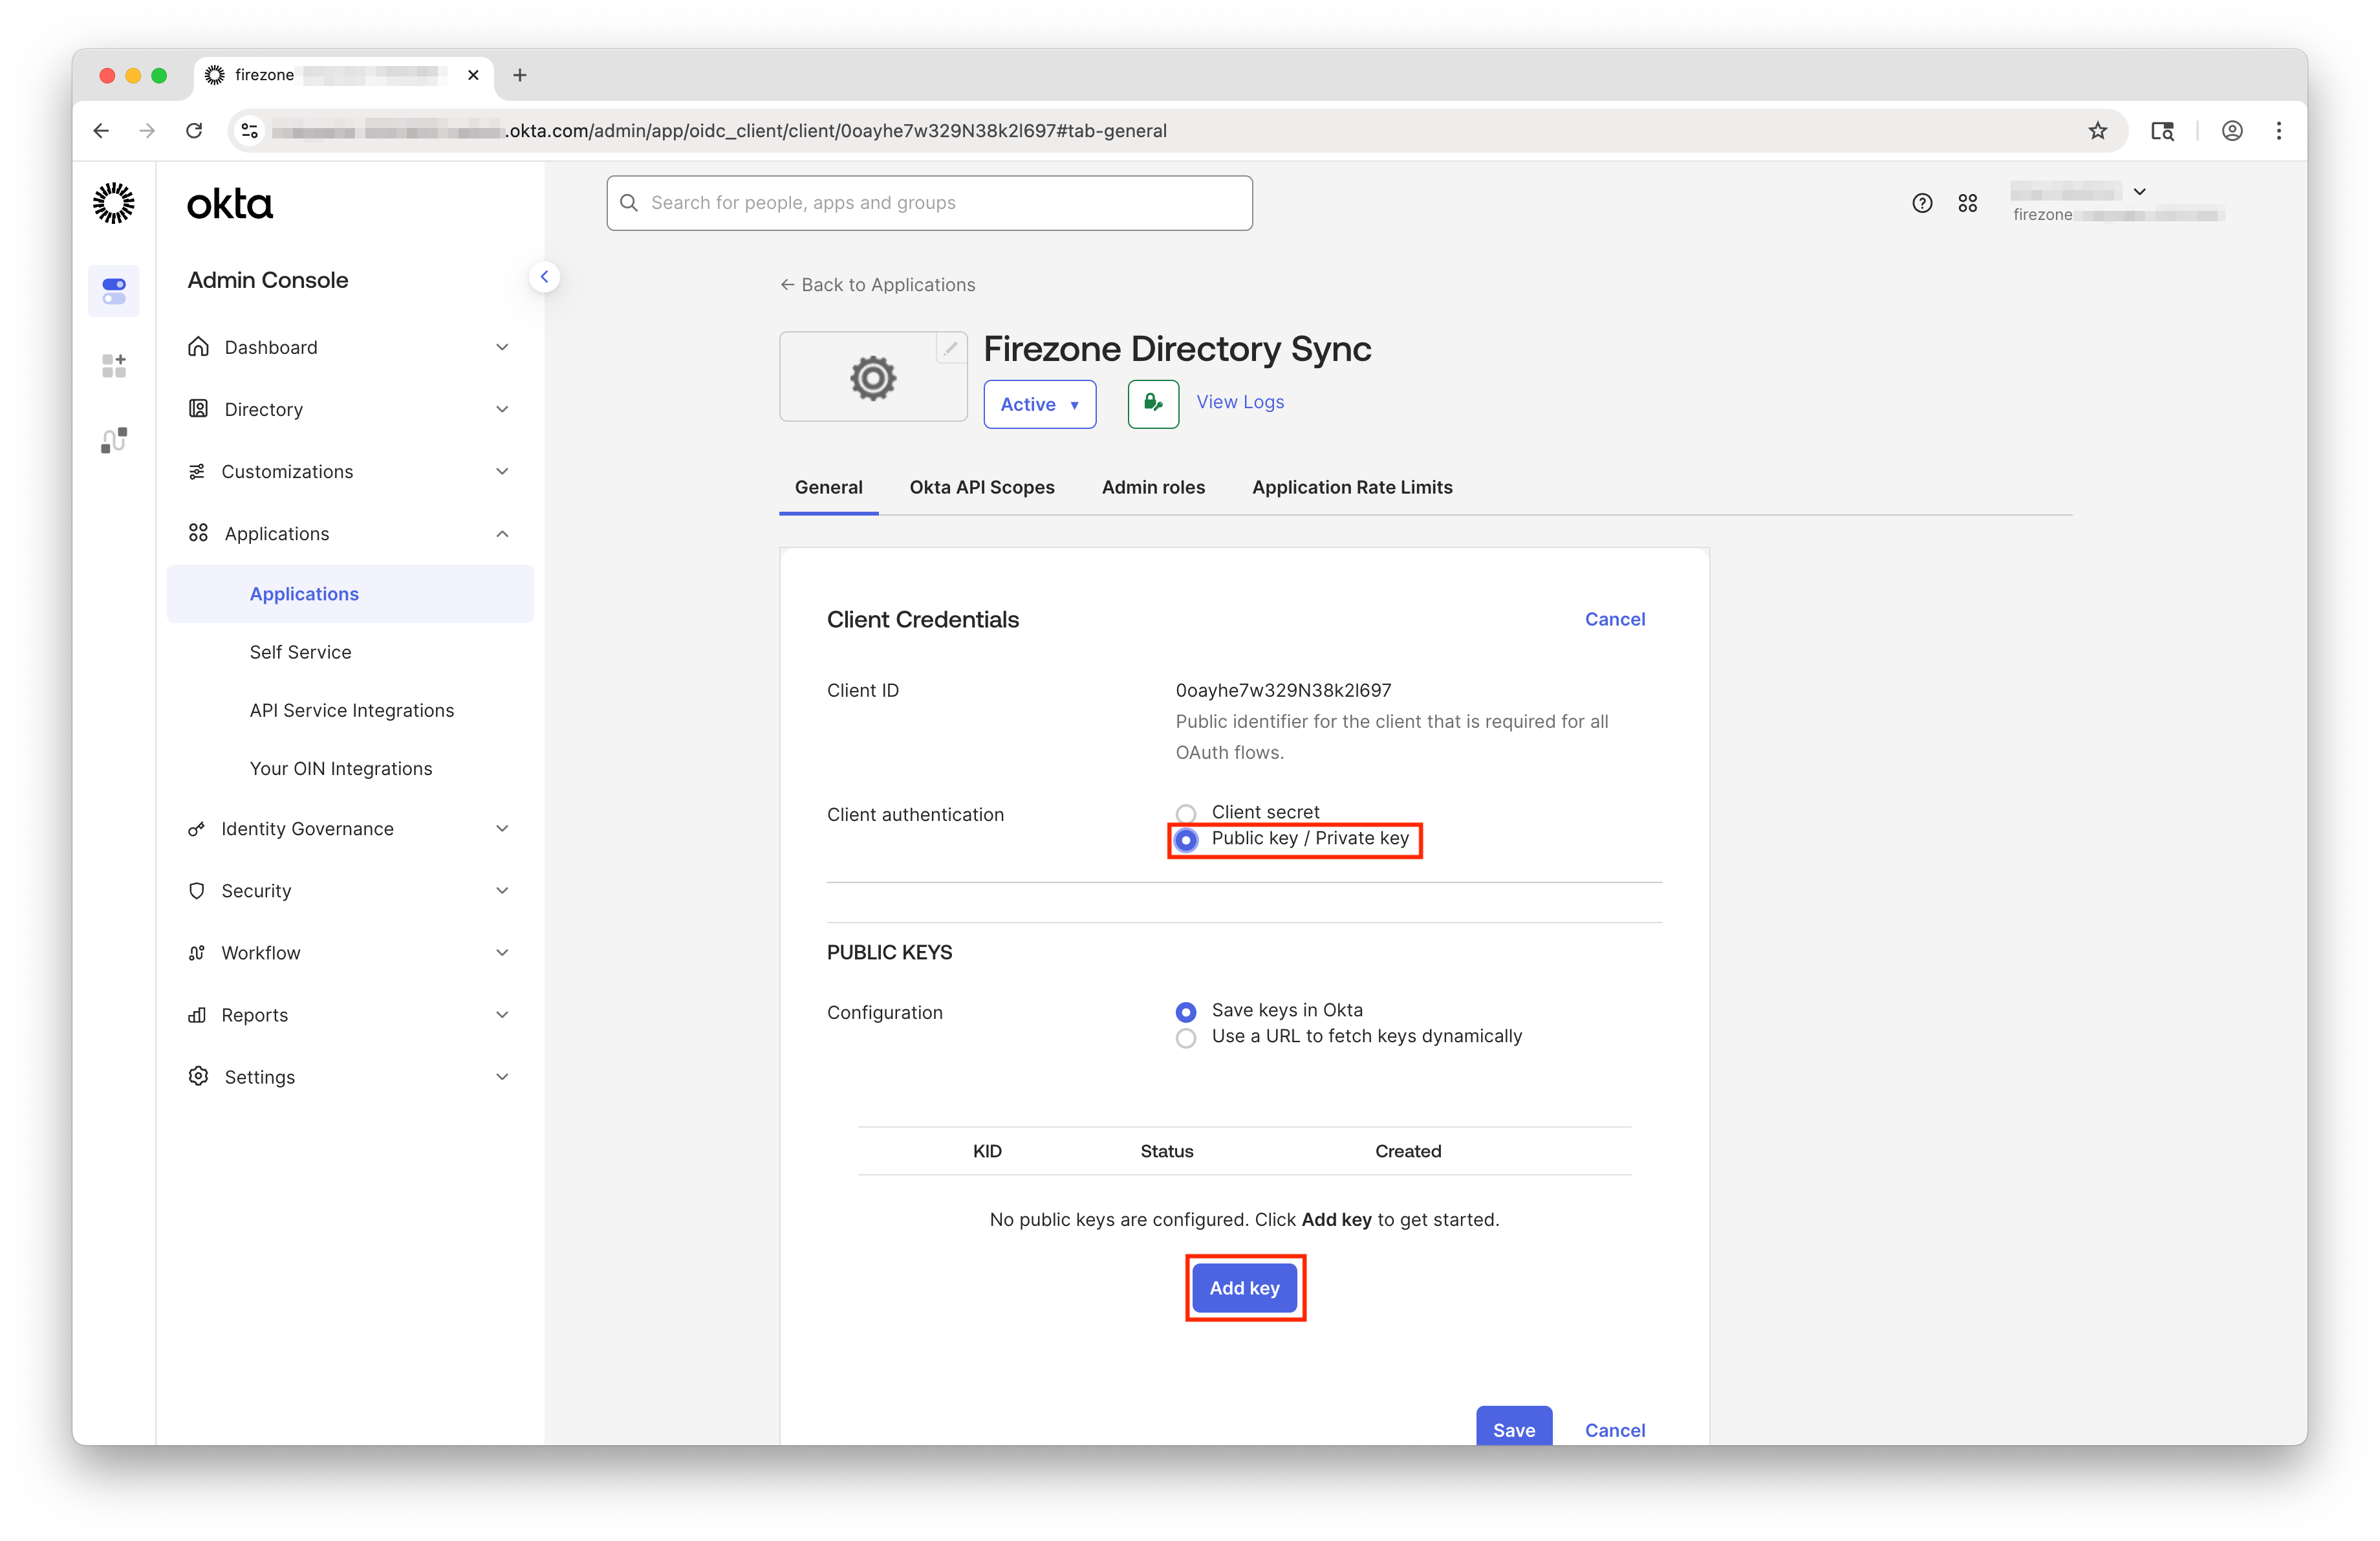
In the modal that appears, paste the public key from your Firezone setup form and click Done.
Click Save to save your changes.
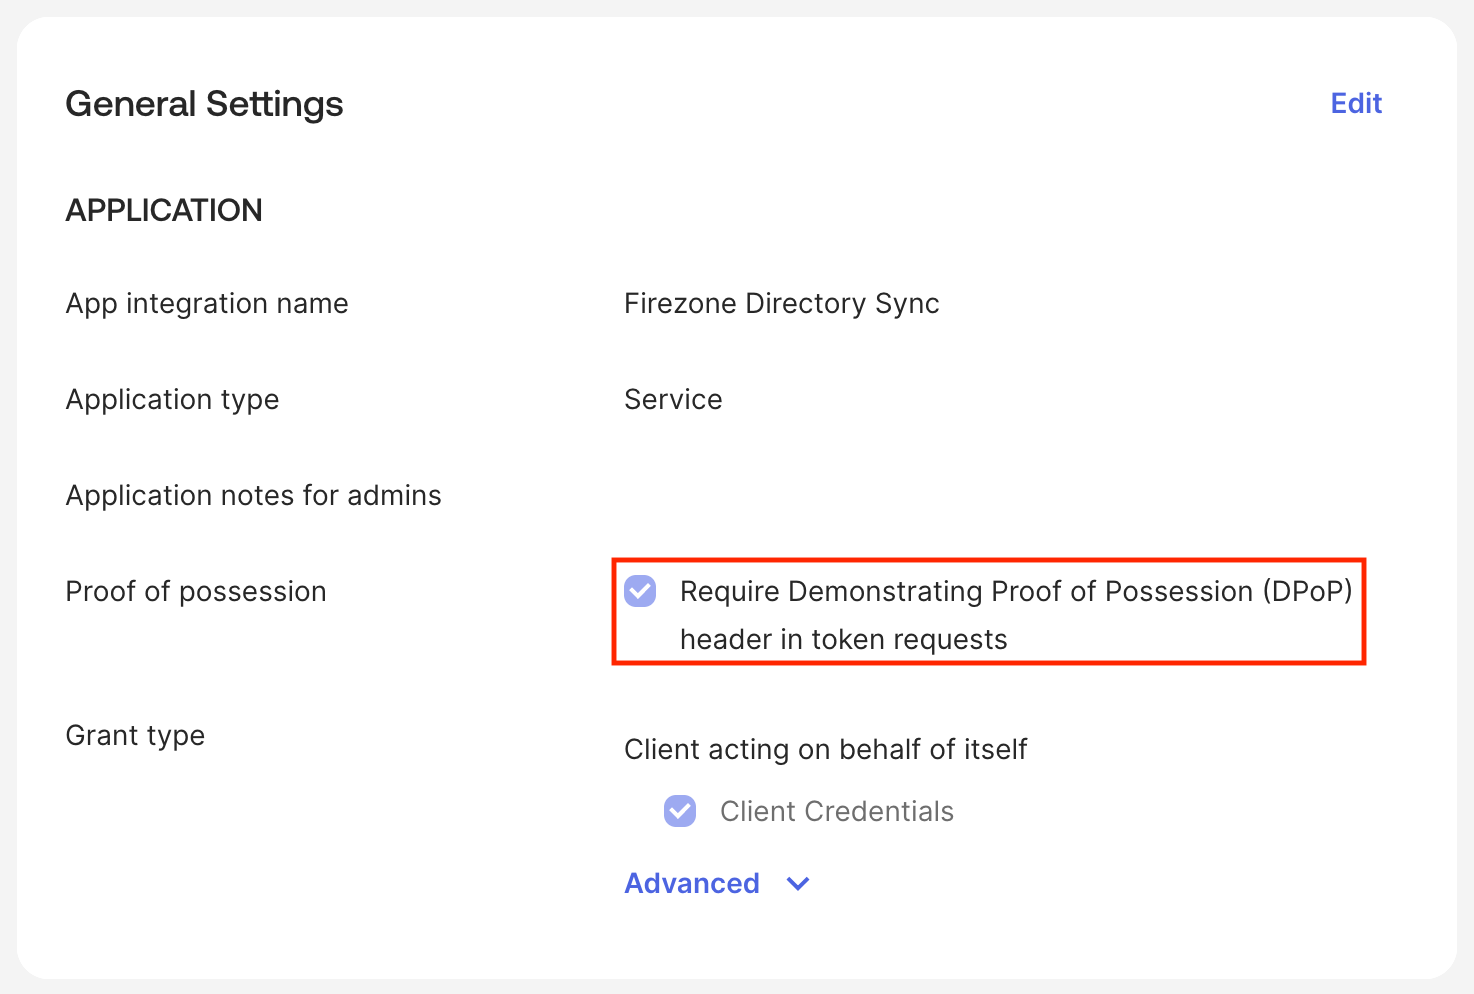
Configure General Settings
In the General Settings section, ensure Require Demonstrating Proof of Possession (DPoP) header in token requests is checked.
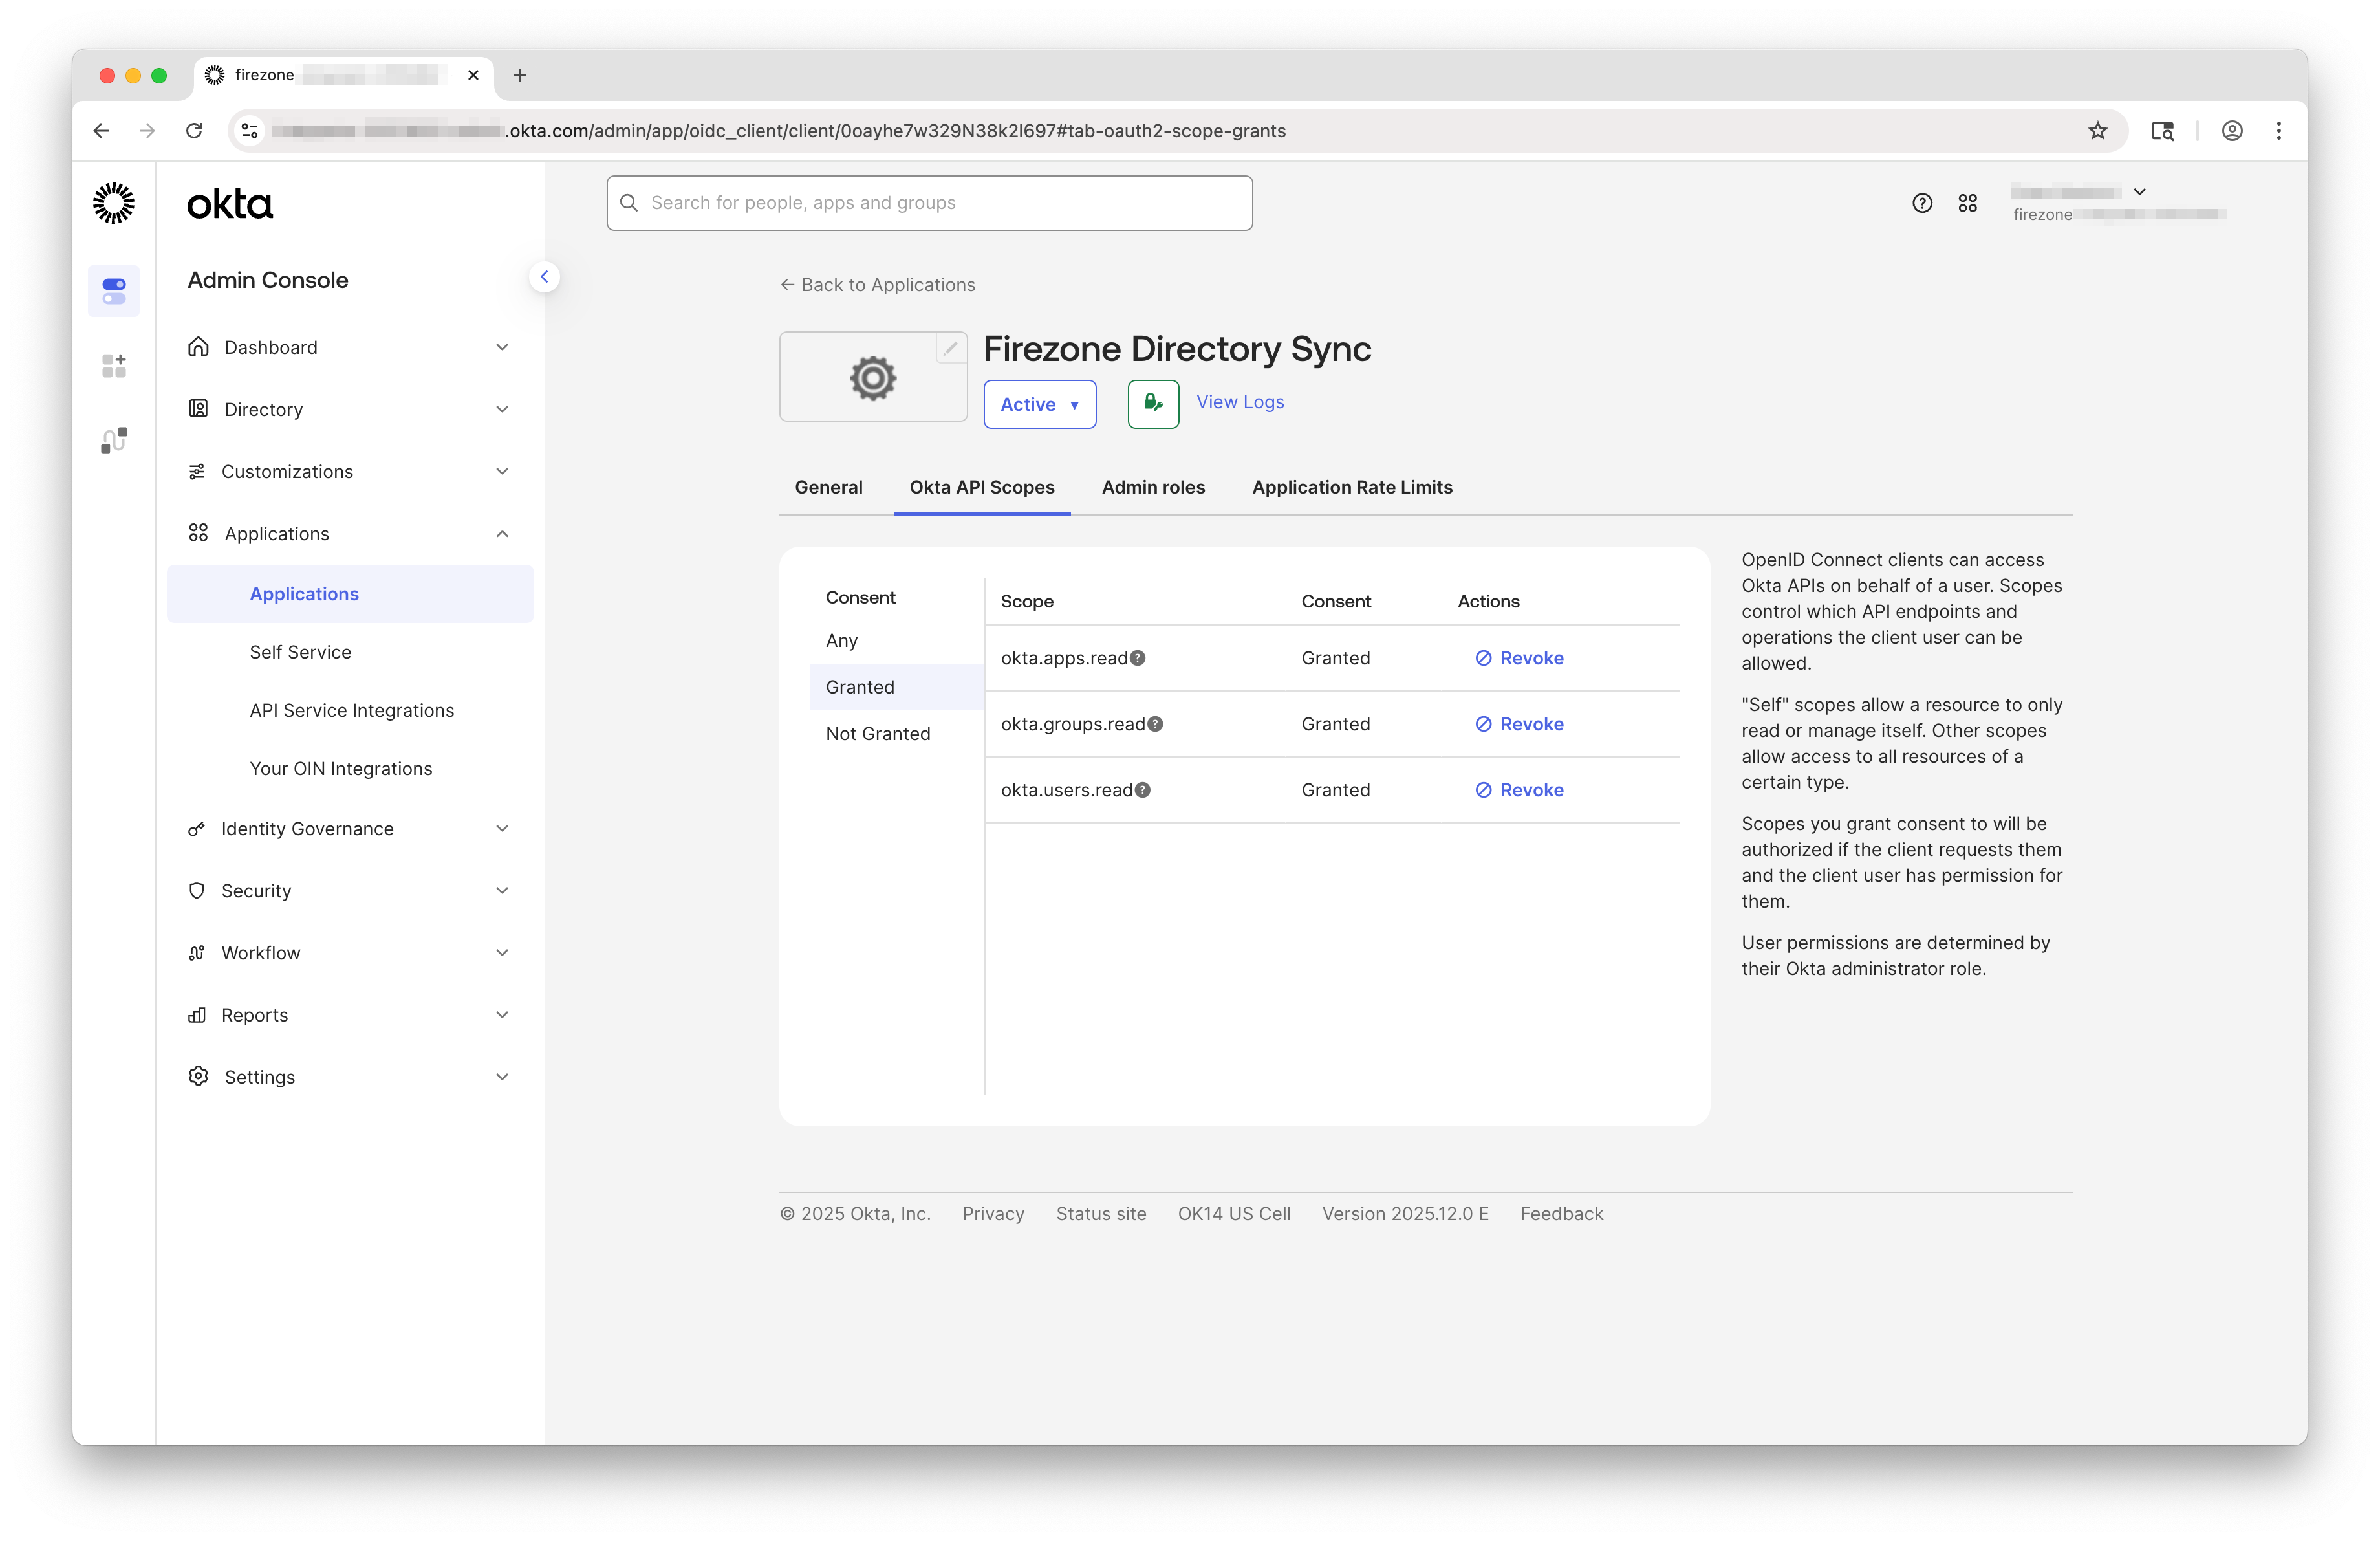
Grant API scopes
Navigate to the Okta API Scopes tab and grant the following scopes:
- okta.apps.read
- okta.groups.read
- okta.users.read
These scopes provide read-only access to applications, groups, and users.
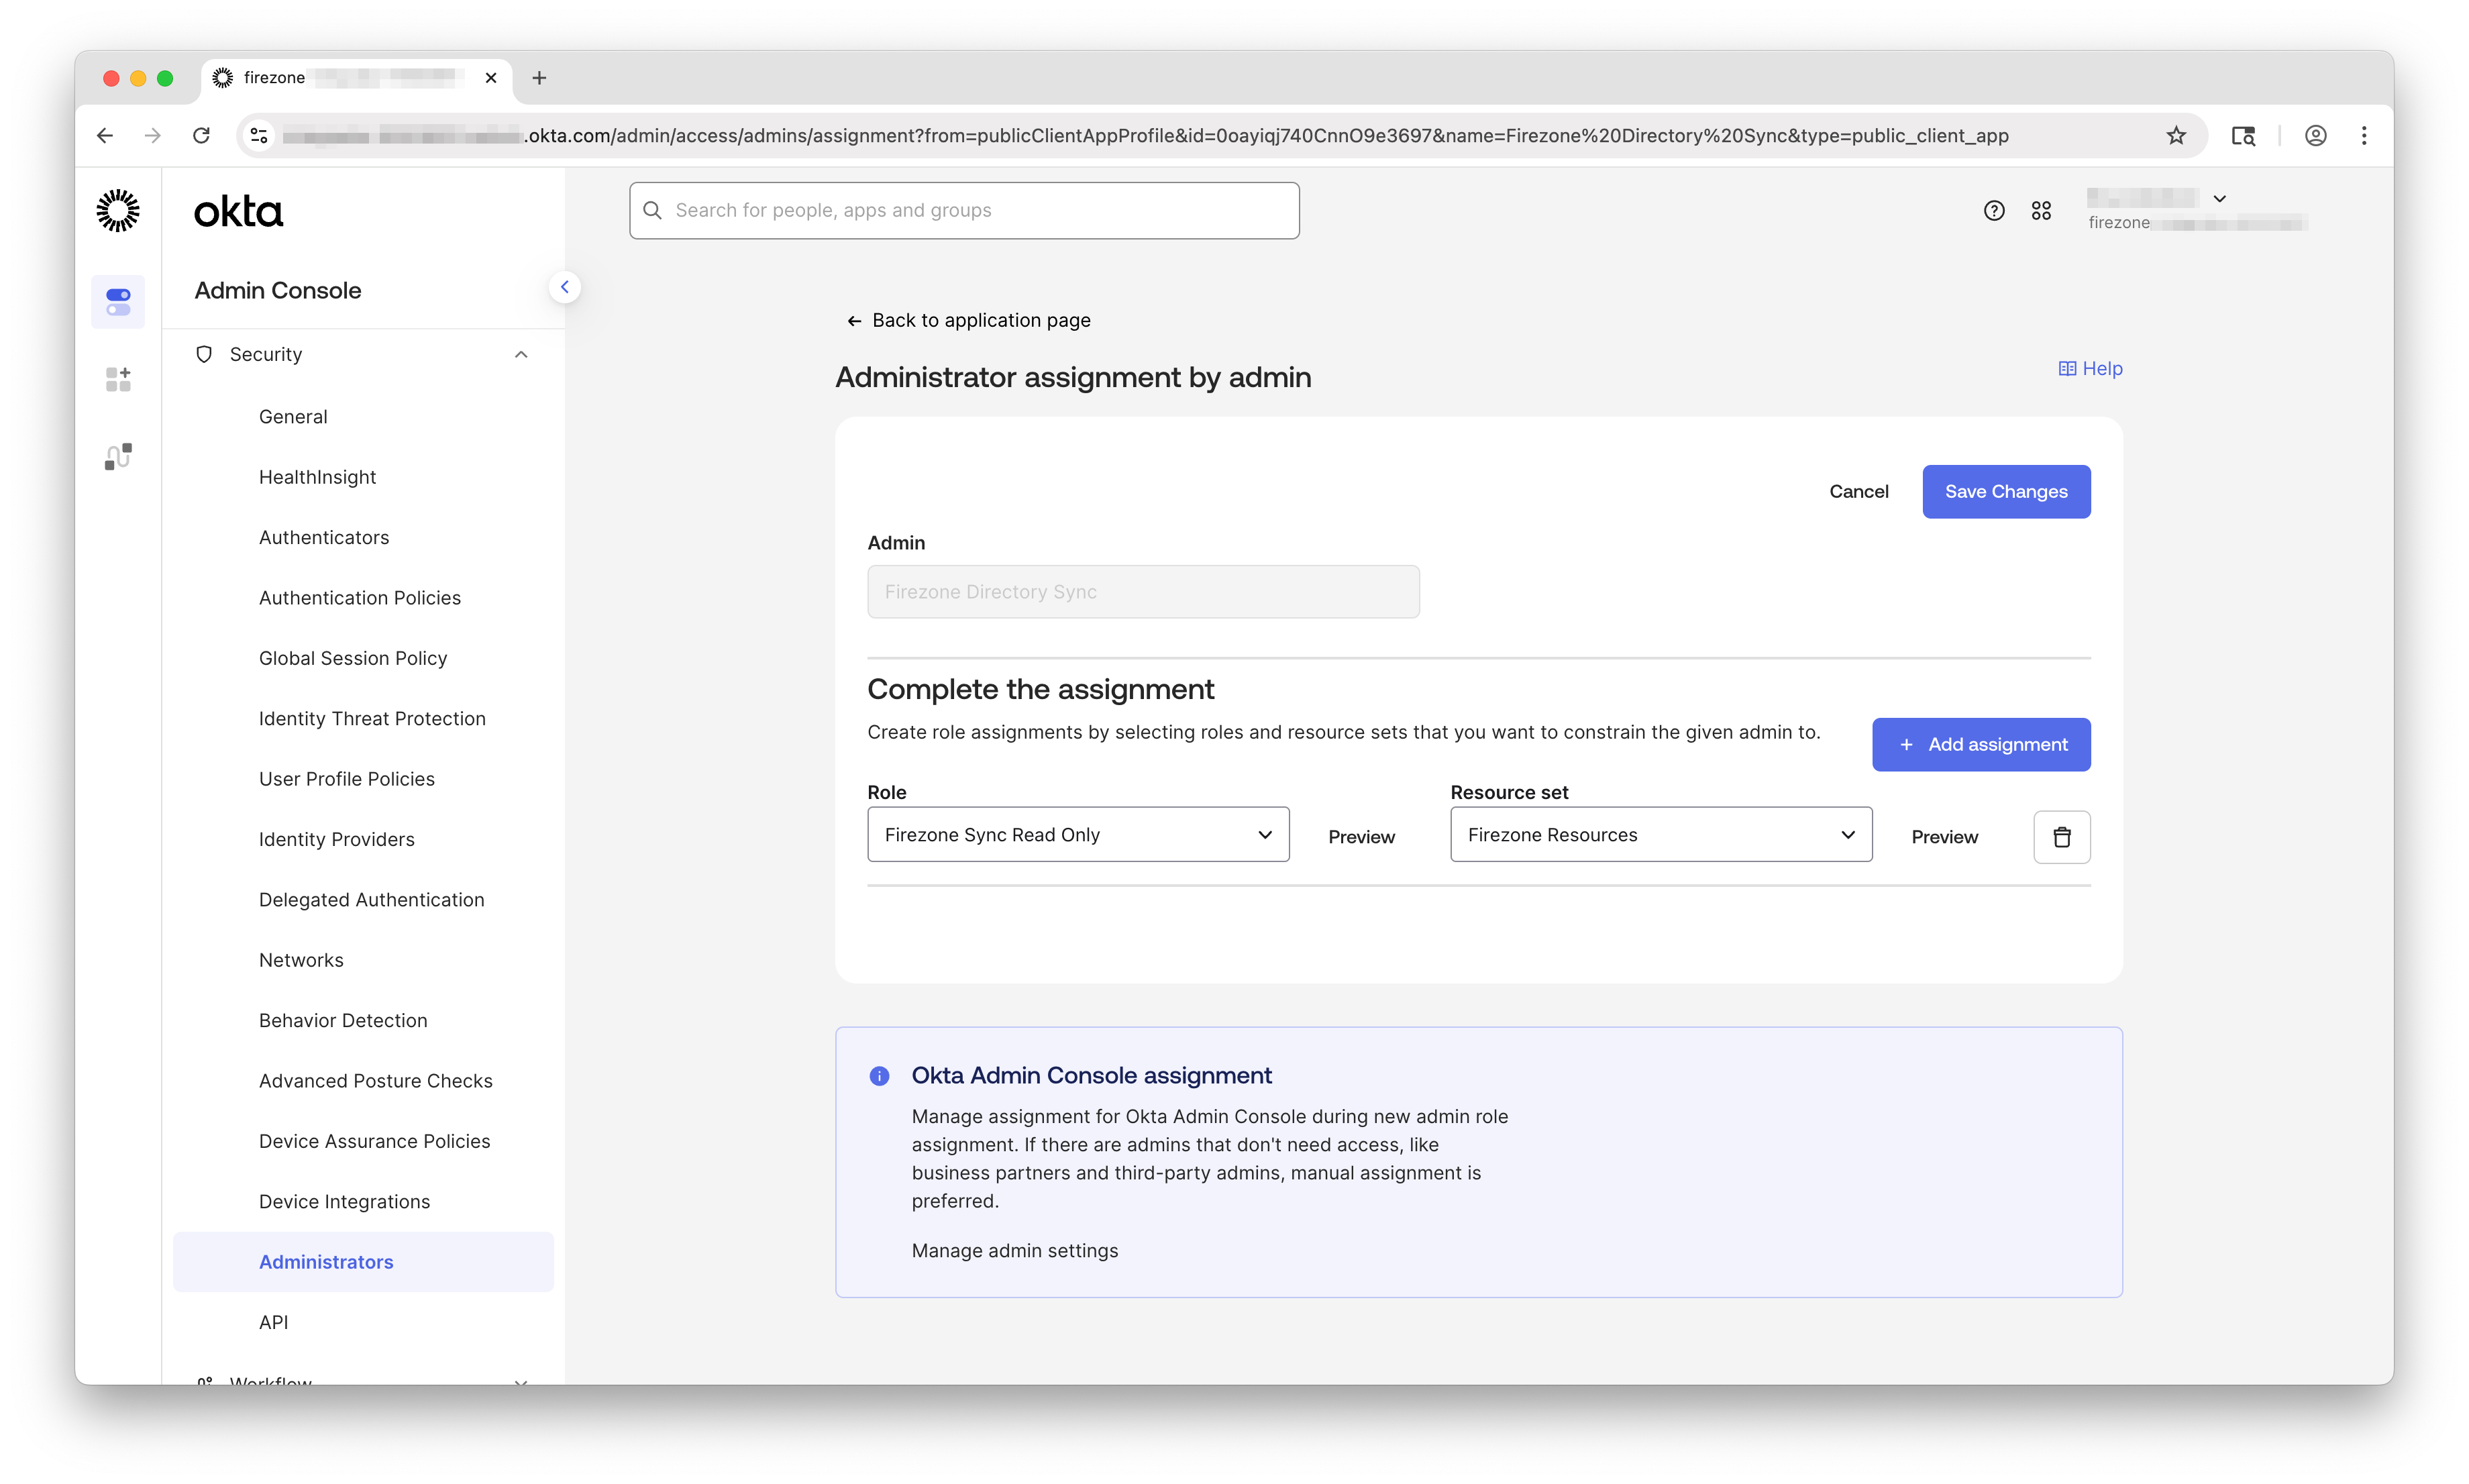
Assign the custom role
Navigate to the Admin roles tab and click Edit Assignments.
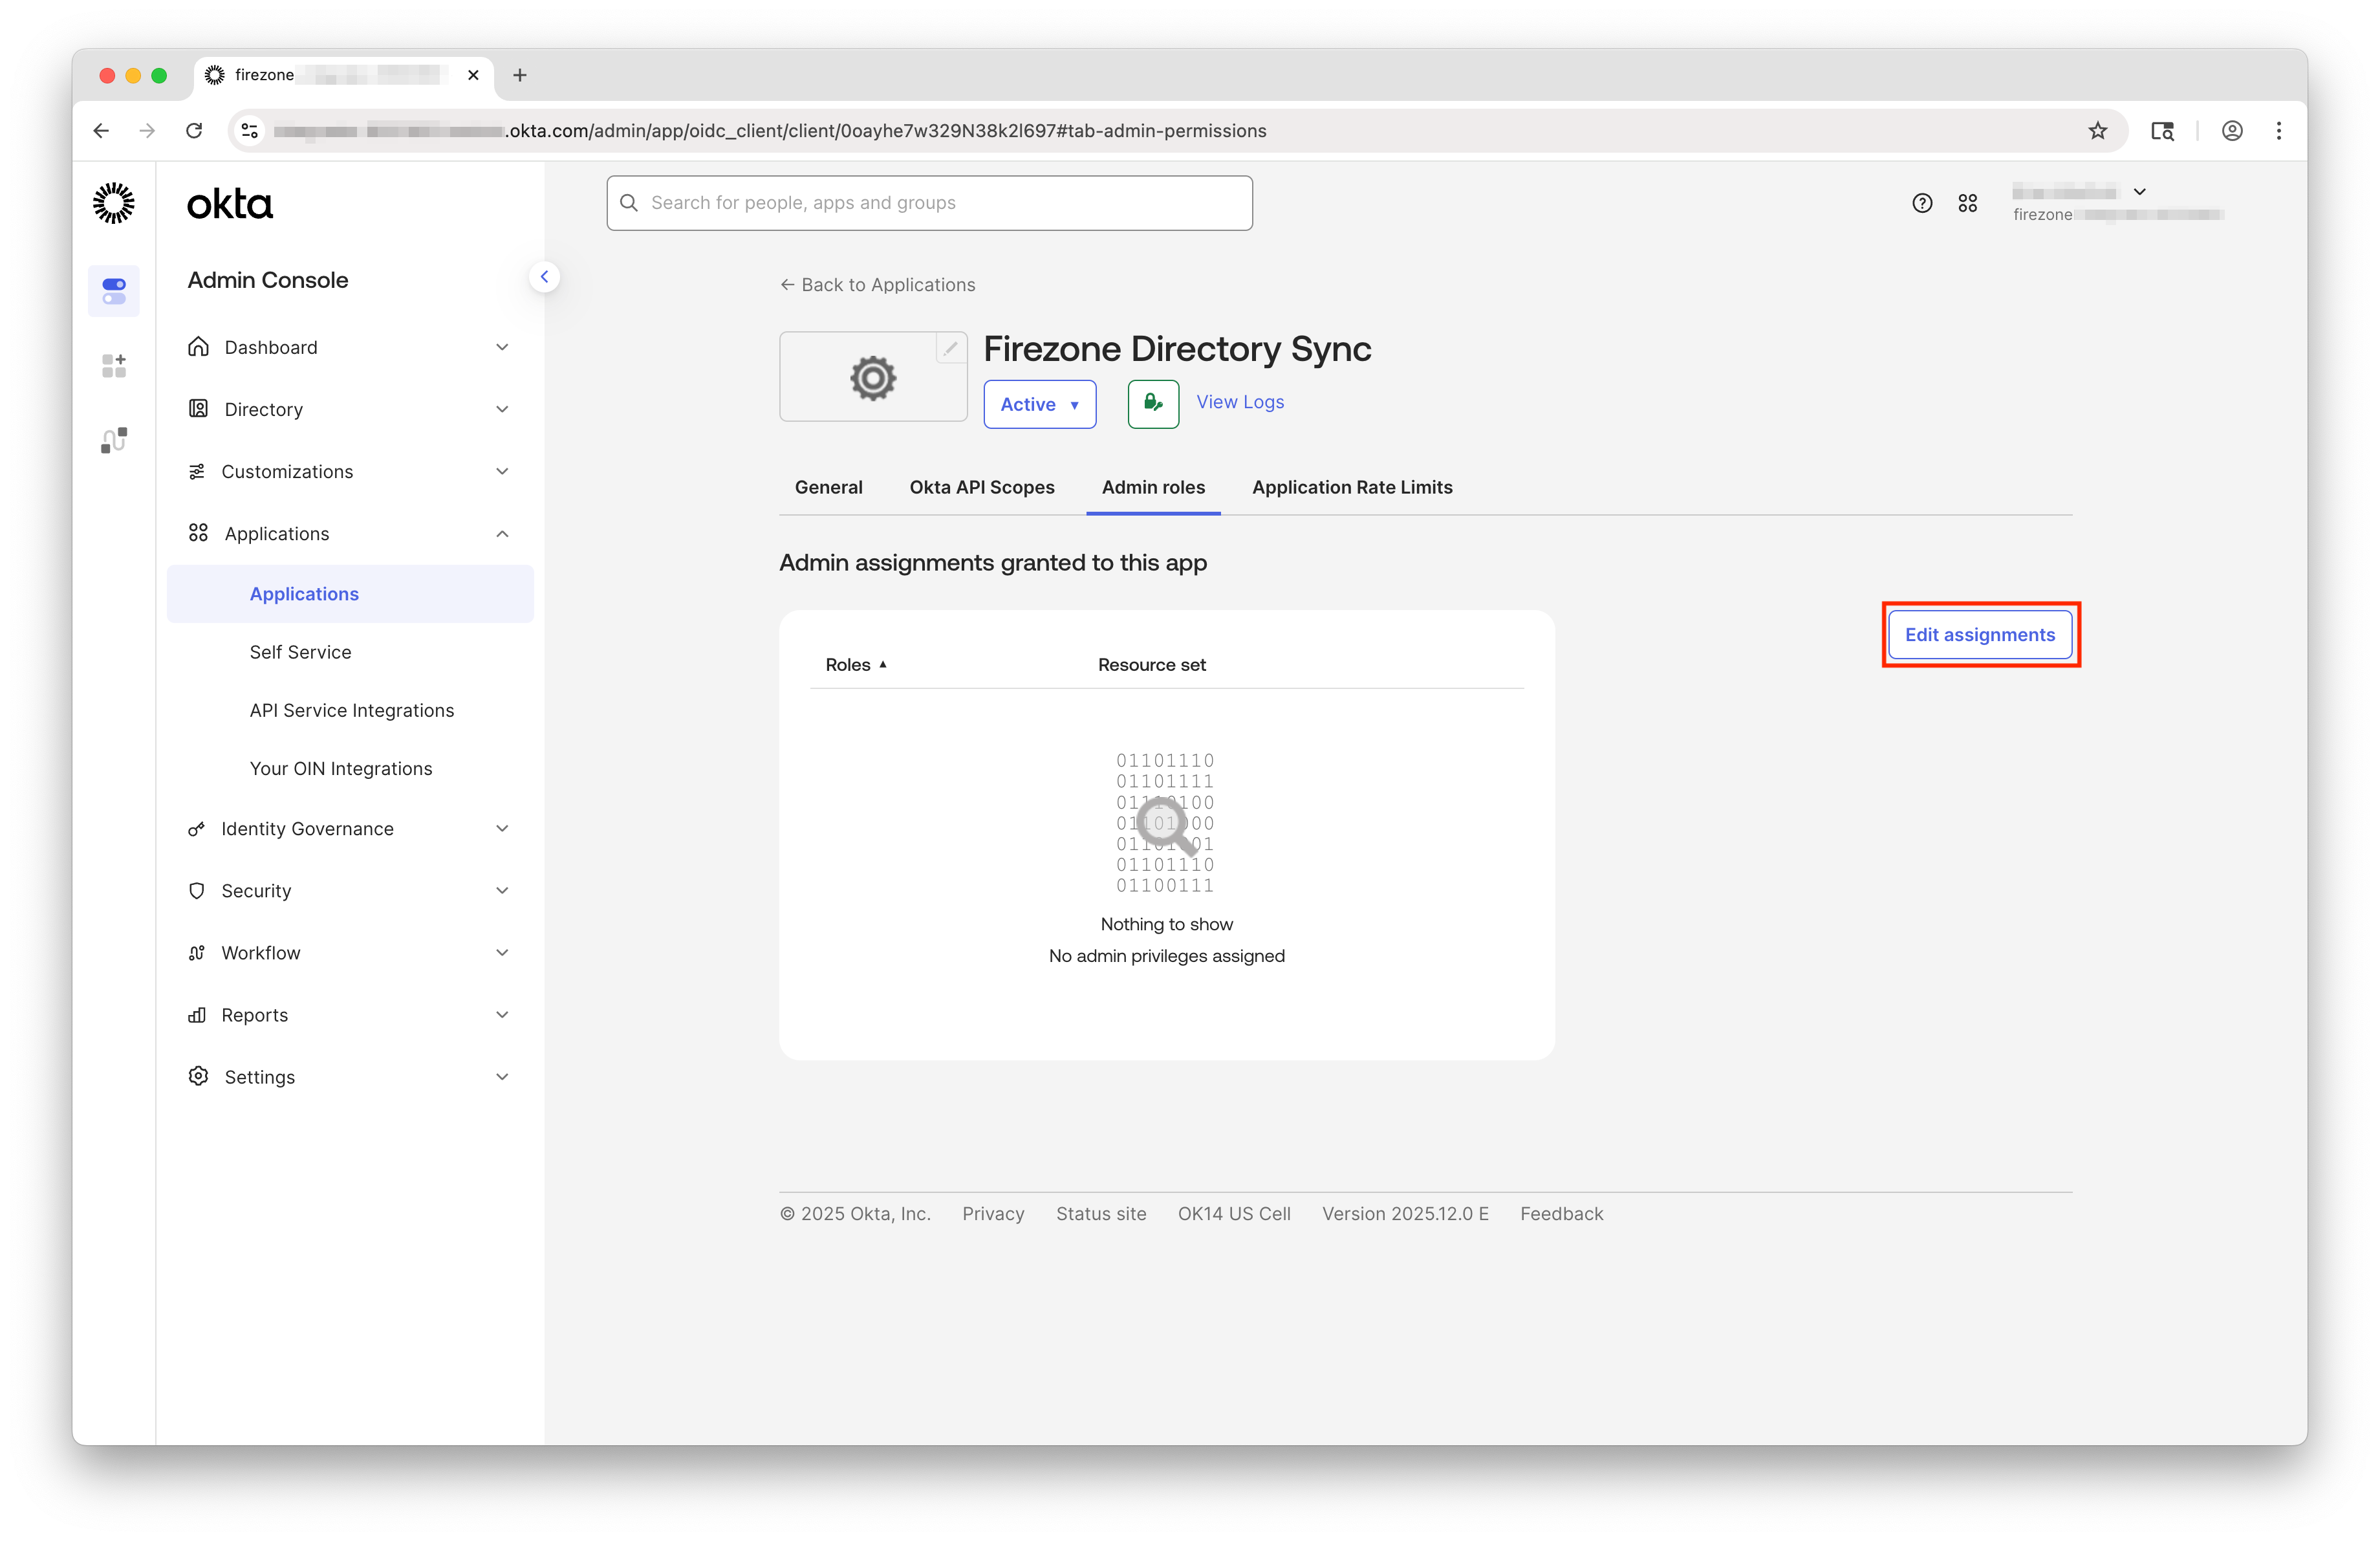
Configure the role assignment as follows:
- Role: Select Firezone Sync Read Only (the custom role you created in Step 1)
- Resource set: Select Firezone Resources (the resource set you created in Step 1)
Click Save Changes.
The Okta configuration is now complete.
Step 4: Complete the Firezone setup
Return to the Firezone Directory Sync setup form and fill in the following values from your Okta environment:
- Okta Domain: Click your username in the upper right corner of the Okta
dashboard to find your Okta domain (e.g.,
your-company.okta.com) - Client ID: Found on the General tab of your Firezone Directory Sync API service app in Okta
Once all fields are filled out, click Verify Now.
Firezone will attempt to connect to Okta and verify the configuration. If successful, you'll see a confirmation message and can click Create to complete the setup.
Users originally created from this directory may be removed if they no longer belong to any synced groups.
Sync timing
Directory sync runs automatically every 2 hours. To trigger a sync immediately,
click the Sync Now button on the directory card in
Settings -> Directory Sync.
Deleted users and Okta user states
Firezone removes deleted Okta users on the next sync. It also filters users by
their Okta status.
- Synced states:
ACTIVE,STAGED,PROVISIONED,RECOVERY, andPASSWORD_EXPIRED, andLOCKED_OUT - Filtered-out states: Firezone excludes all other Okta states, including
SUSPENDEDandDEPROVISIONED. - Defense in depth: Firezone re-checks
statusafter receiving both app user and group member payloads. - Defensive handling: If Okta omits
statusunexpectedly, Firezone logs the event and skips that user instead of treating them as active.
Once a synced Okta user is deleted or transitions to a filtered-out state, their Firezone identity is removed on the next sync. This signs them out of Firezone and prevents new sign-ins through the synced Okta identity.
Troubleshooting
"Unauthorized" or "Forbidden" error
This typically means the API service app is not configured correctly. Verify:
- The custom role has all three required permissions (view users, groups, and applications).
- The resource set includes the Firezone OIDC app, All Users, and All Groups.
- The API service app has the custom role assigned with the correct resource set.
- All three API scopes are granted (
okta.apps.read,okta.groups.read,okta.users.read).
Public key not working
Ensure the public key from Firezone was pasted correctly into the Okta API service app. The key must be added before clicking Verify Now in Firezone.
Users or groups not syncing
Only users and groups assigned to your Okta authentication app will sync. To add more users or groups:
- In Okta, go to Applications → Applications.
- Select your Firezone OIDC app.
- Go to the Assignments tab and add the users or groups you want to sync.
Need help? See all support options.