SSO with Okta
Firezone supports authenticating users with Okta using OpenID Connect (OIDC). You can configure multiple Okta providers within a single Firezone account, each with a different client ID.
Looking for directory sync? See the Okta directory sync guide to automatically provision users and groups from Okta.
Create an OIDC application in Okta
Before enabling Okta authentication in Firezone, you'll need to create an OIDC application in your Okta admin portal.
Step 1: Start the Okta provider setup in Firezone
- In your Firezone admin portal, go to
Settings → Authentication. - Click Add Provider and select Okta.
- Keep this page open — you'll enter information from here into your Okta app configuration and vice versa.
Step 2: Create a new OIDC app in Okta
- In a separate browser tab, open your Okta admin portal.
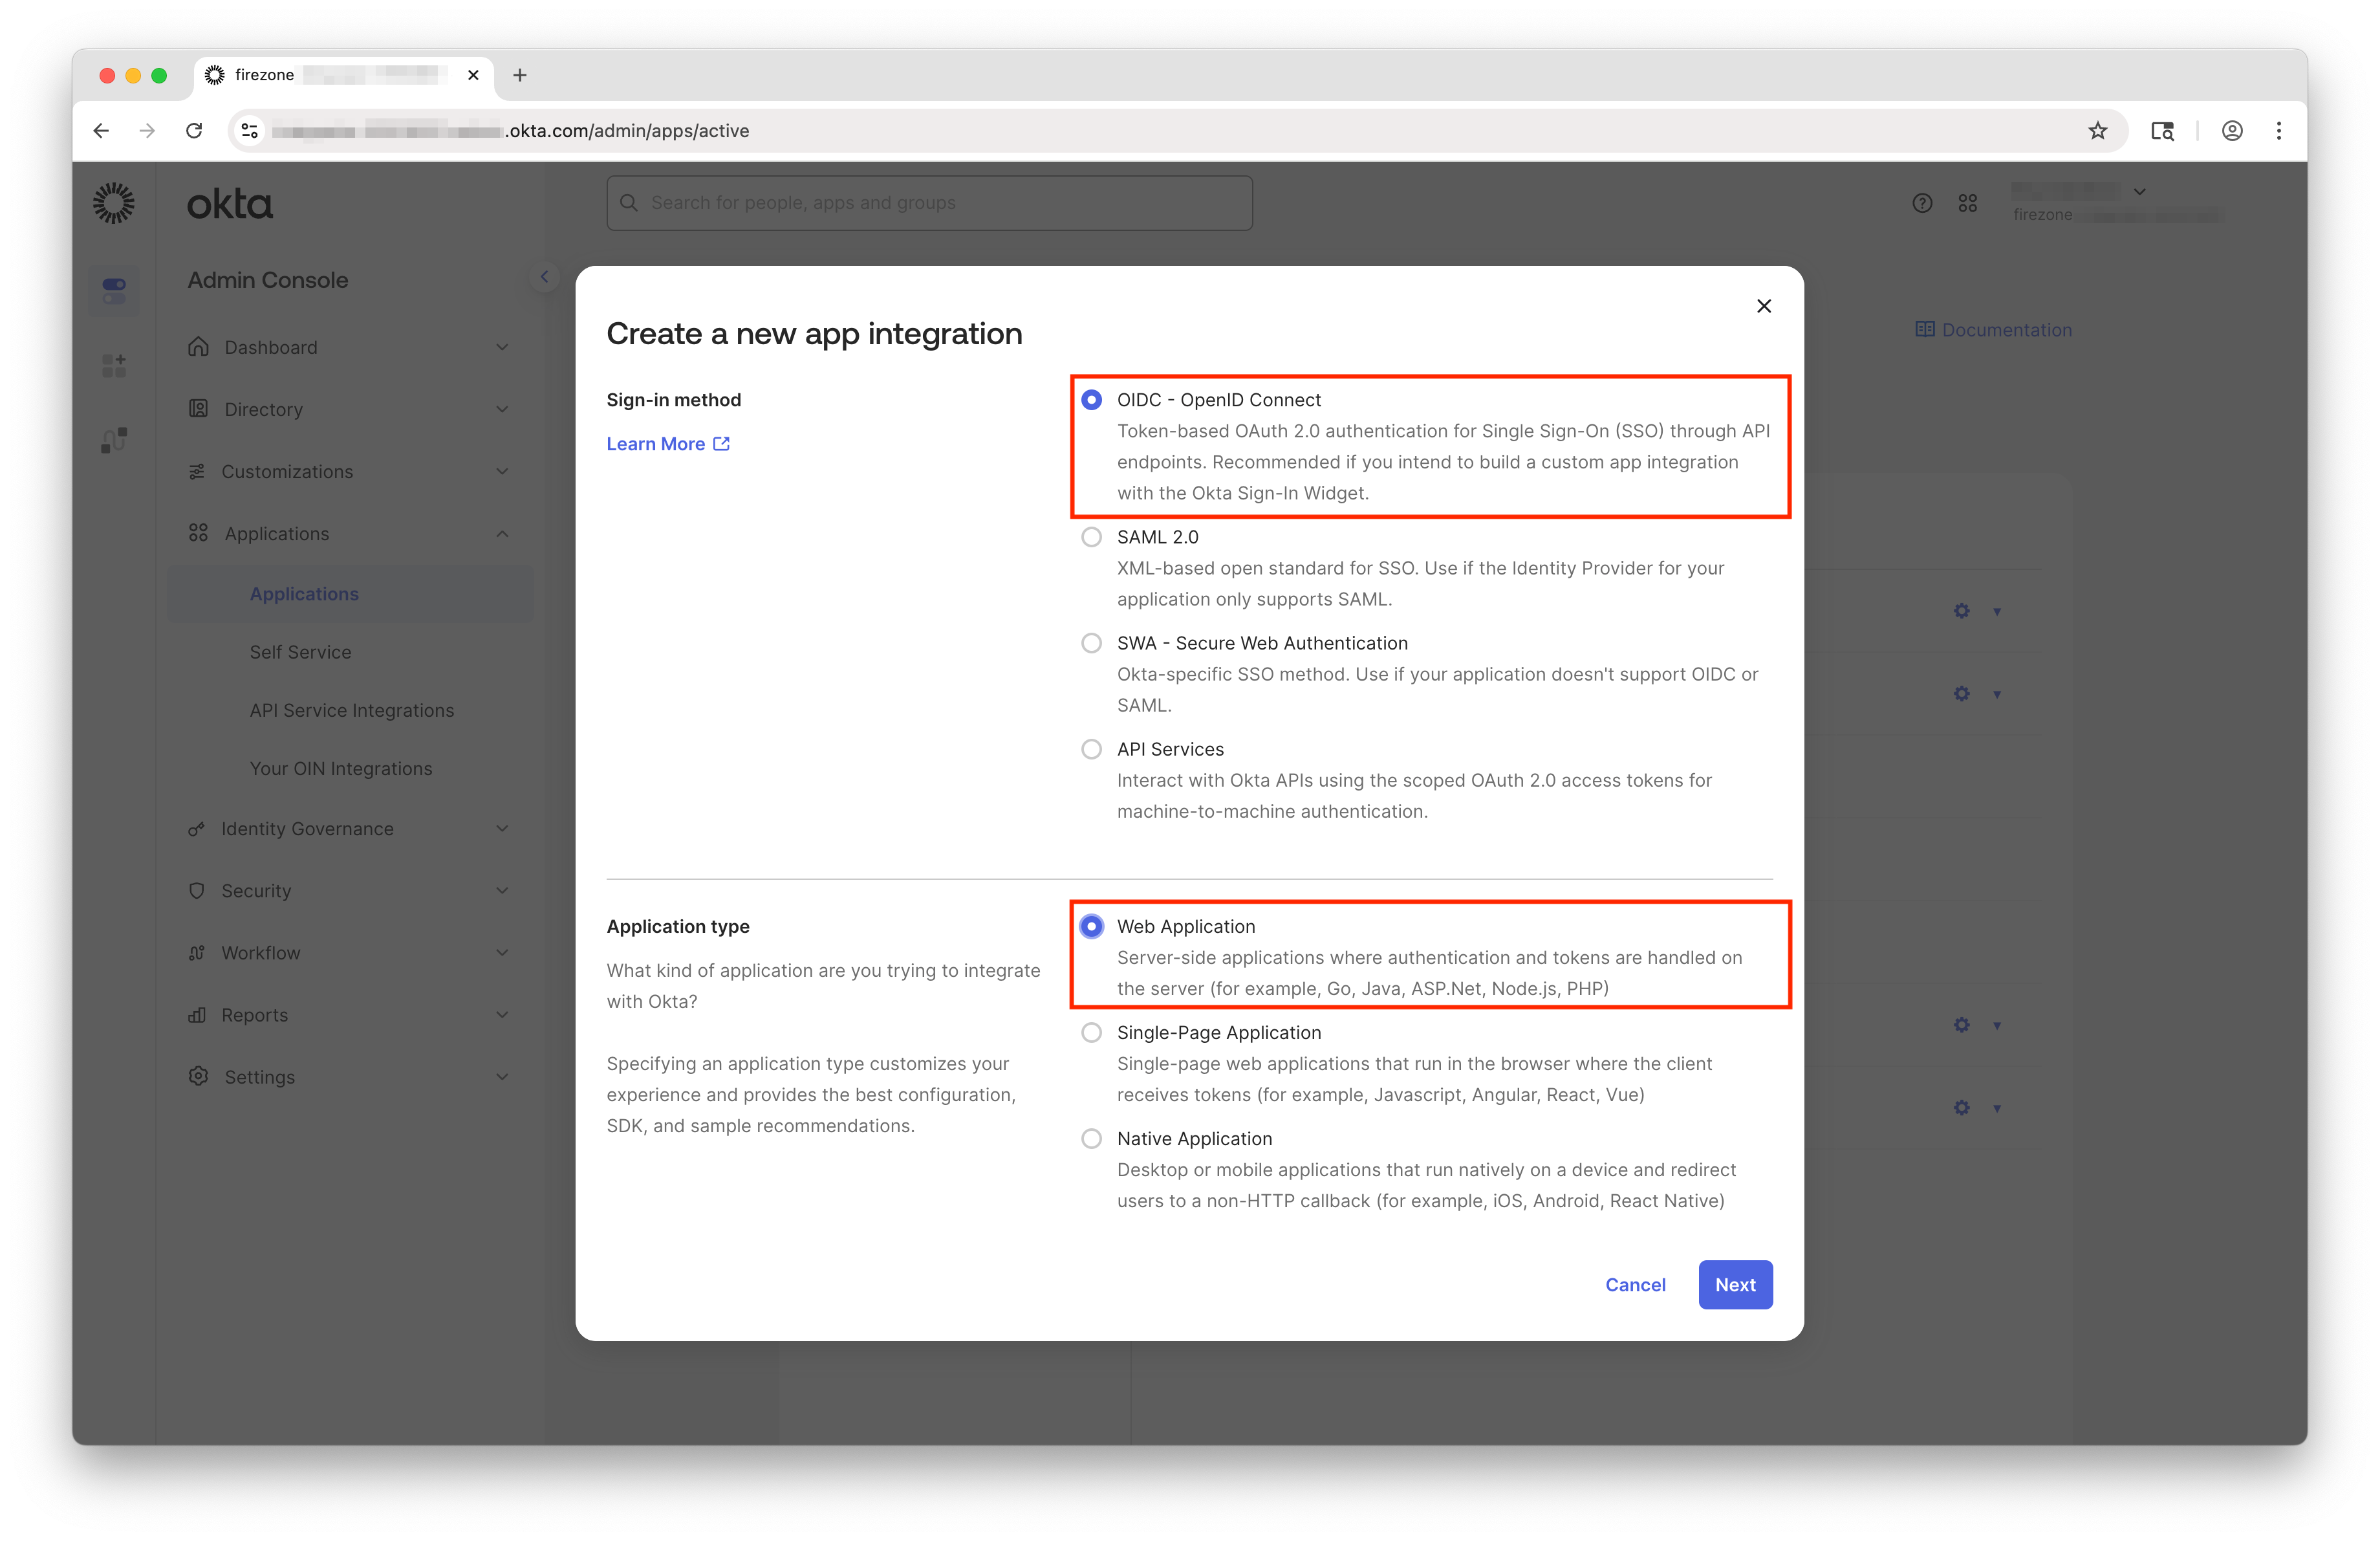
- Go to Applications → Applications and click Create App Integration.
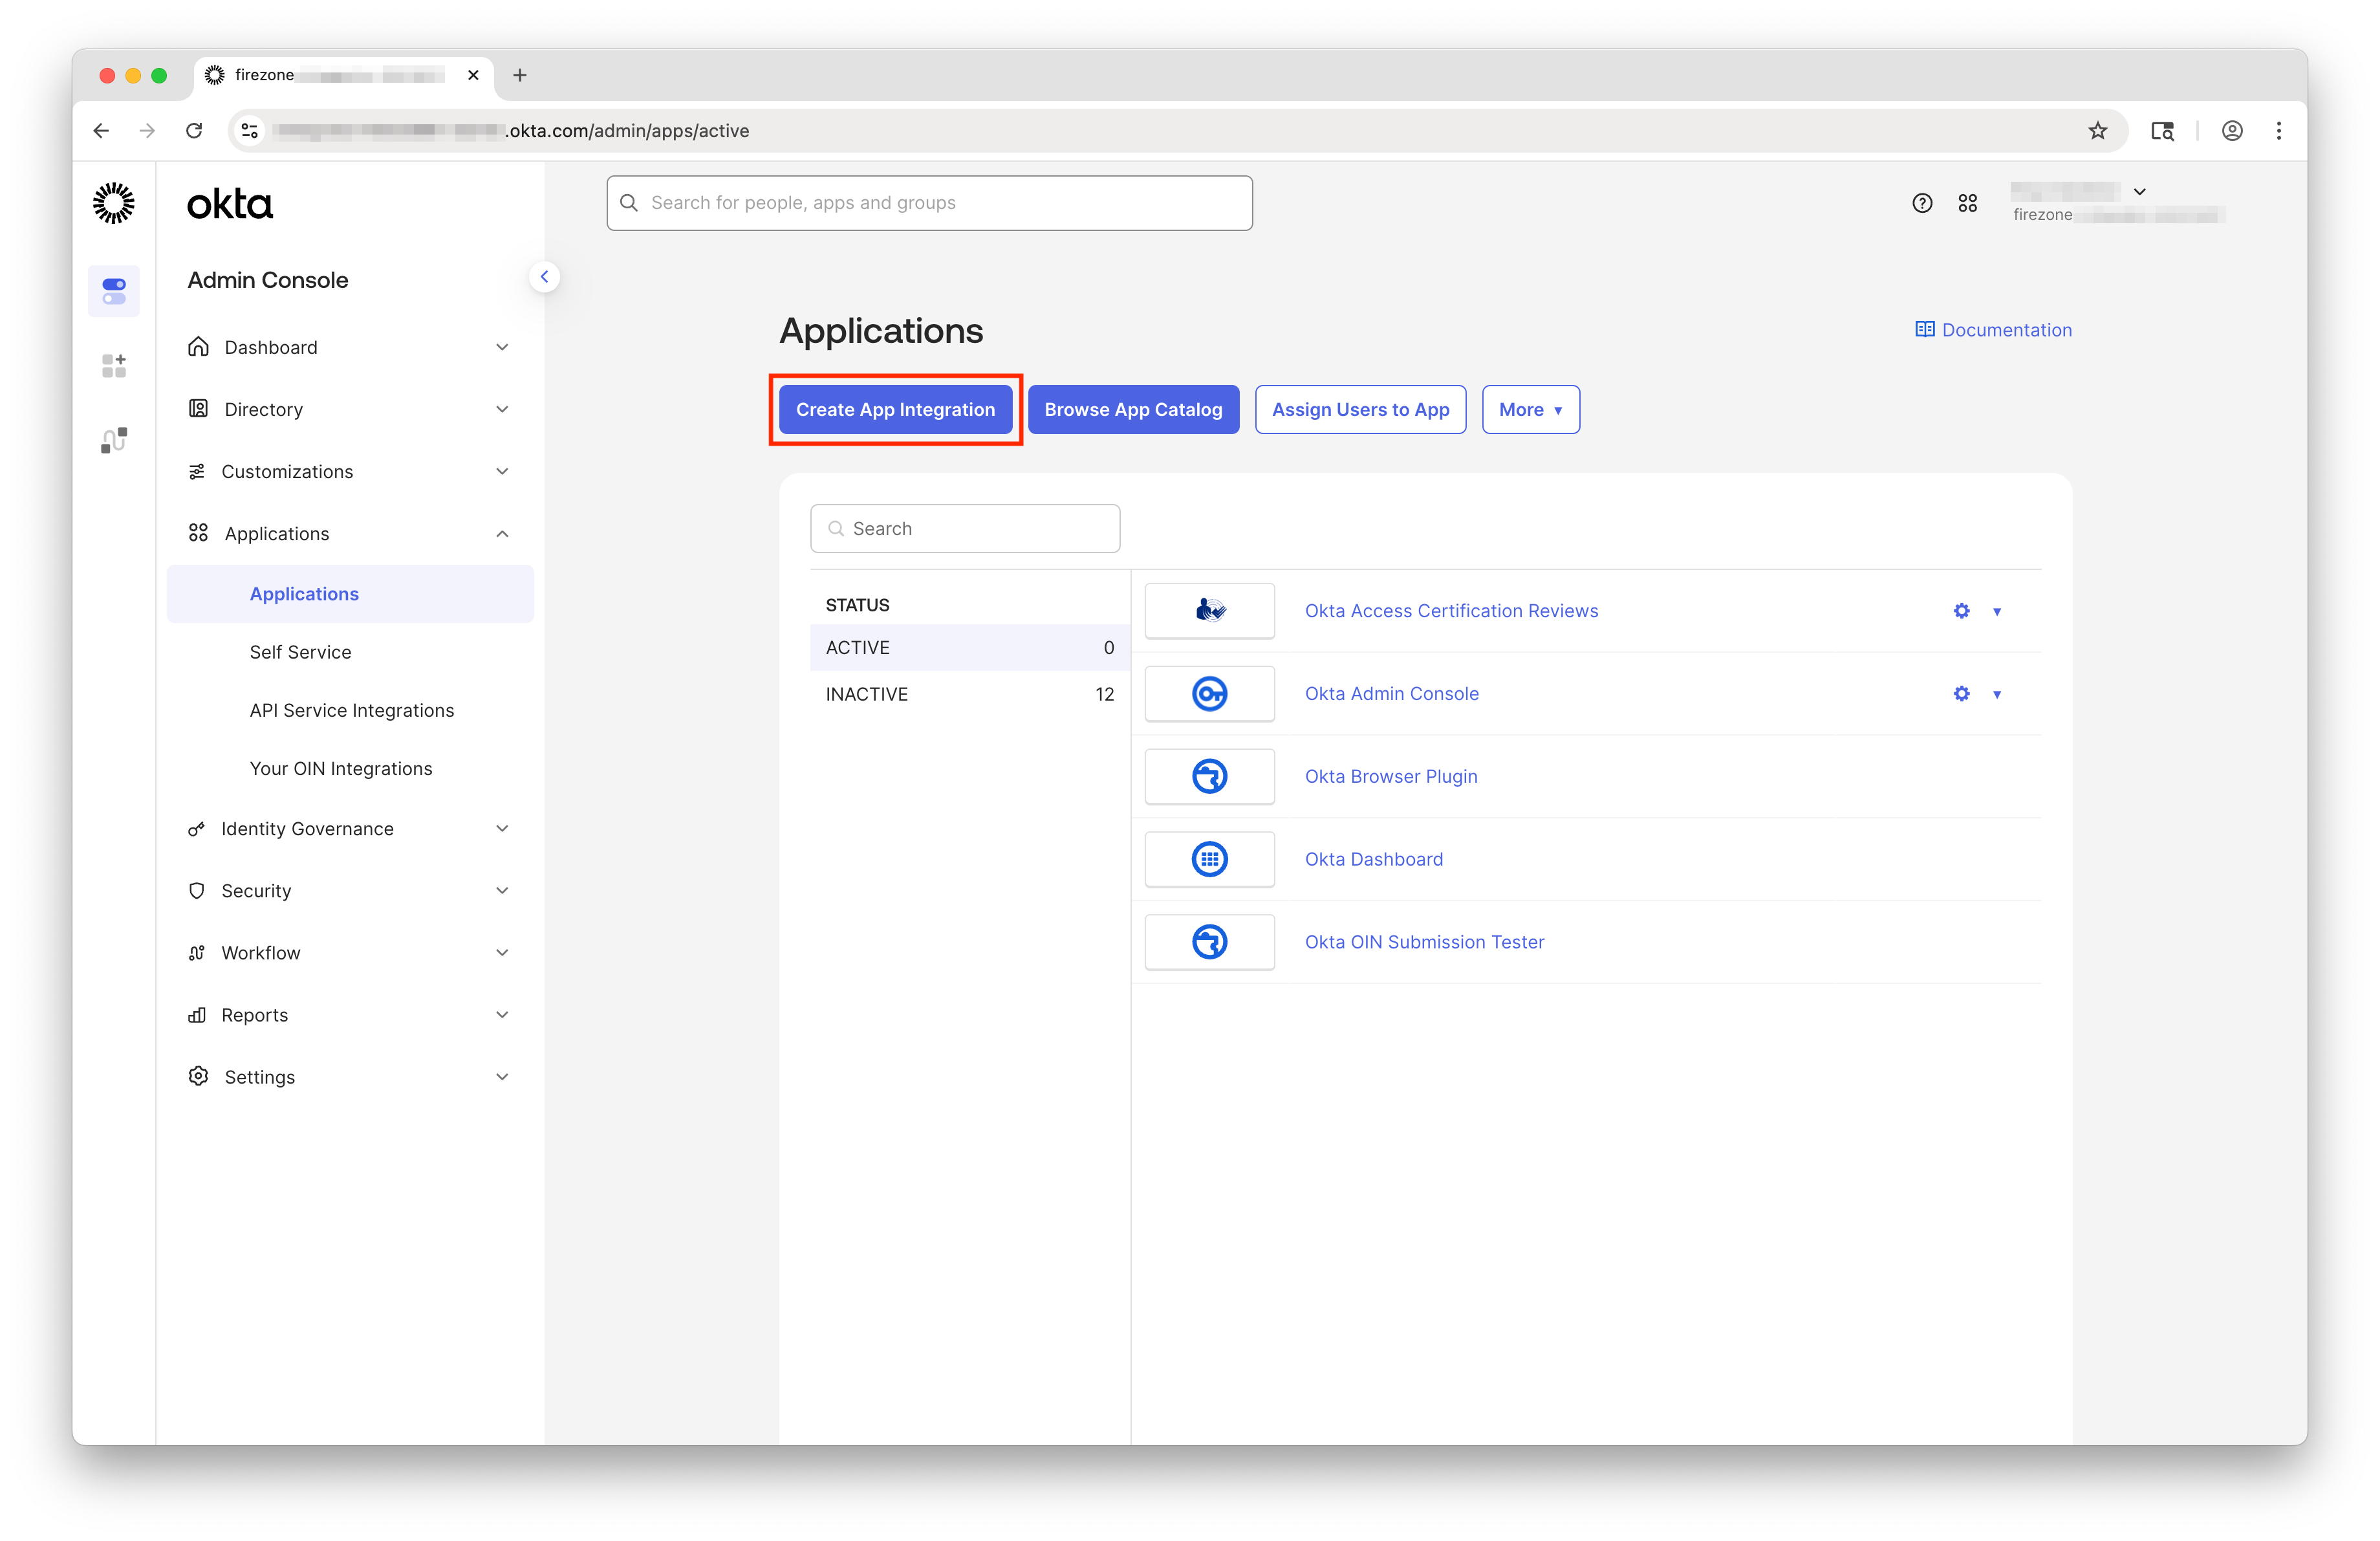
- Select OIDC – OpenID Connect, then choose Web Application and click Next.
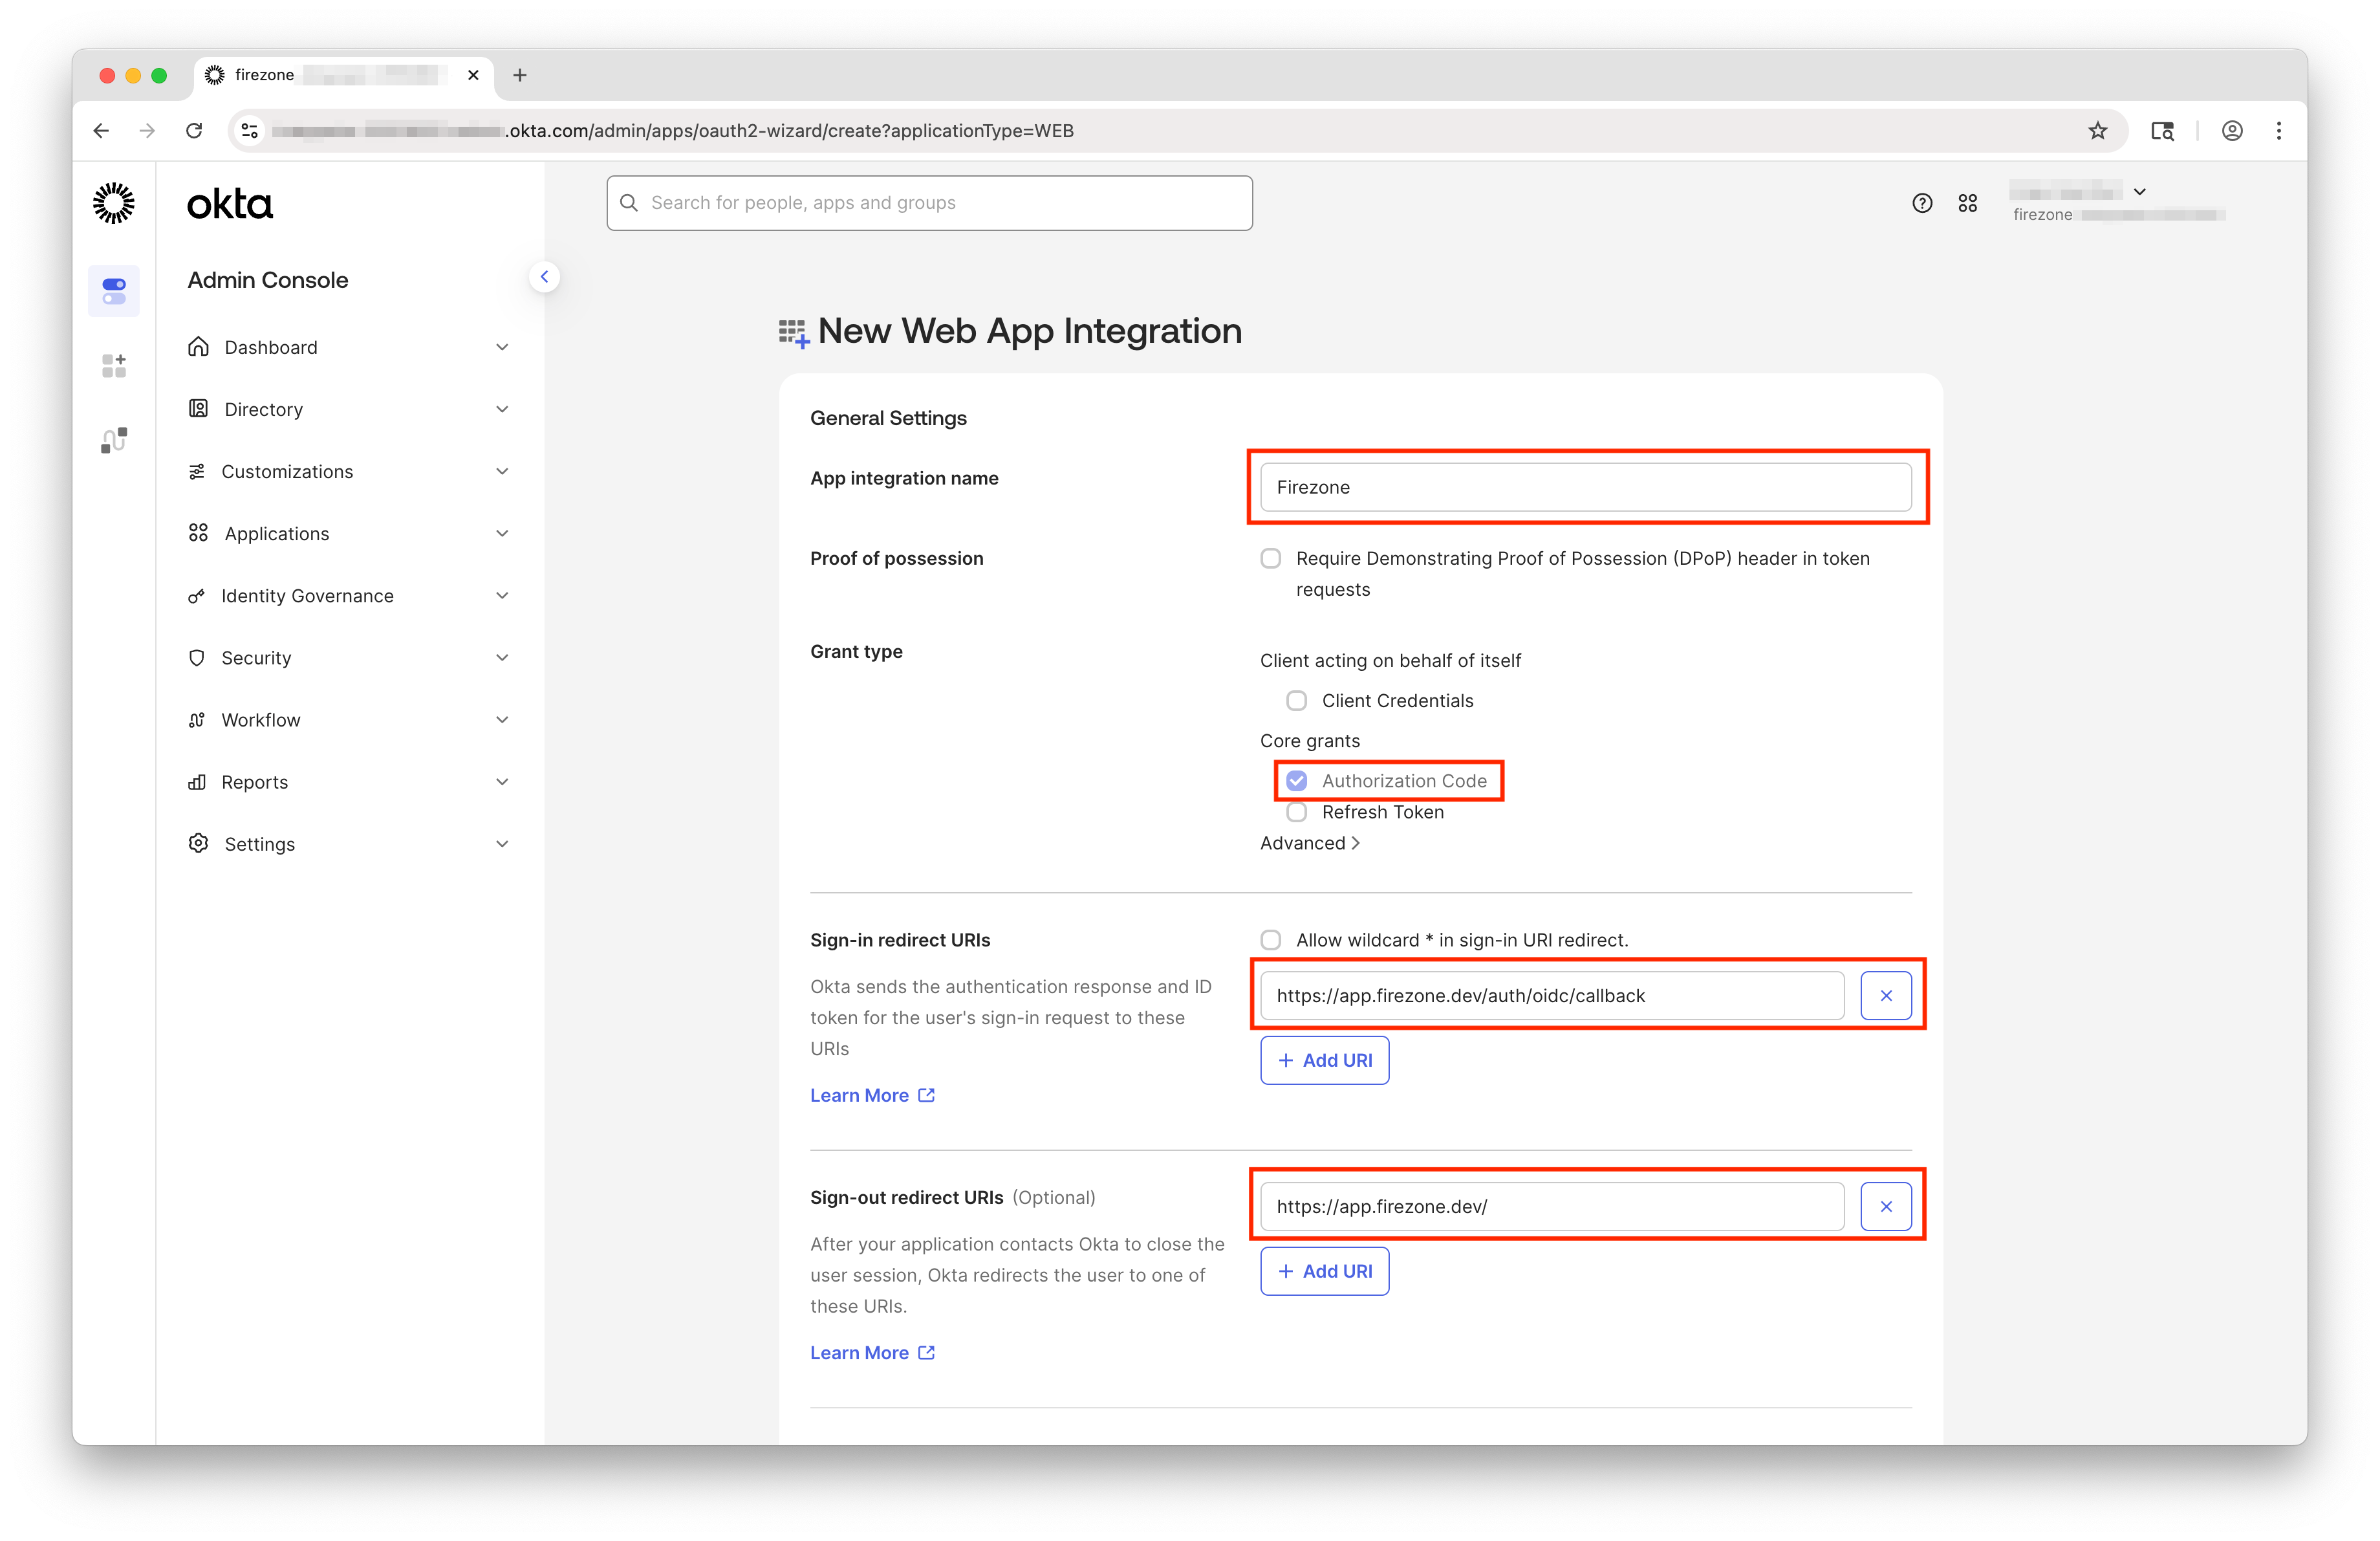
- Configure the application as follows:
- App integration name:
Firezone - Grant types: Authorization Code
- Sign-in redirect URIs: The redirect URI shown in the Firezone setup form.
- Sign-out redirect URIs:
https://app.firezone.dev
- App integration name:
- In the Assignments section, assign the application to the users or groups who should be able to sign in to Firezone.
At a minimum, the user completing this setup must be assigned to the Okta application. Ensure this assignment is done before proceeding.
On Enterprise plans, these assignments also apply to directory sync. Only users and groups assigned to the Firezone application will be synced.
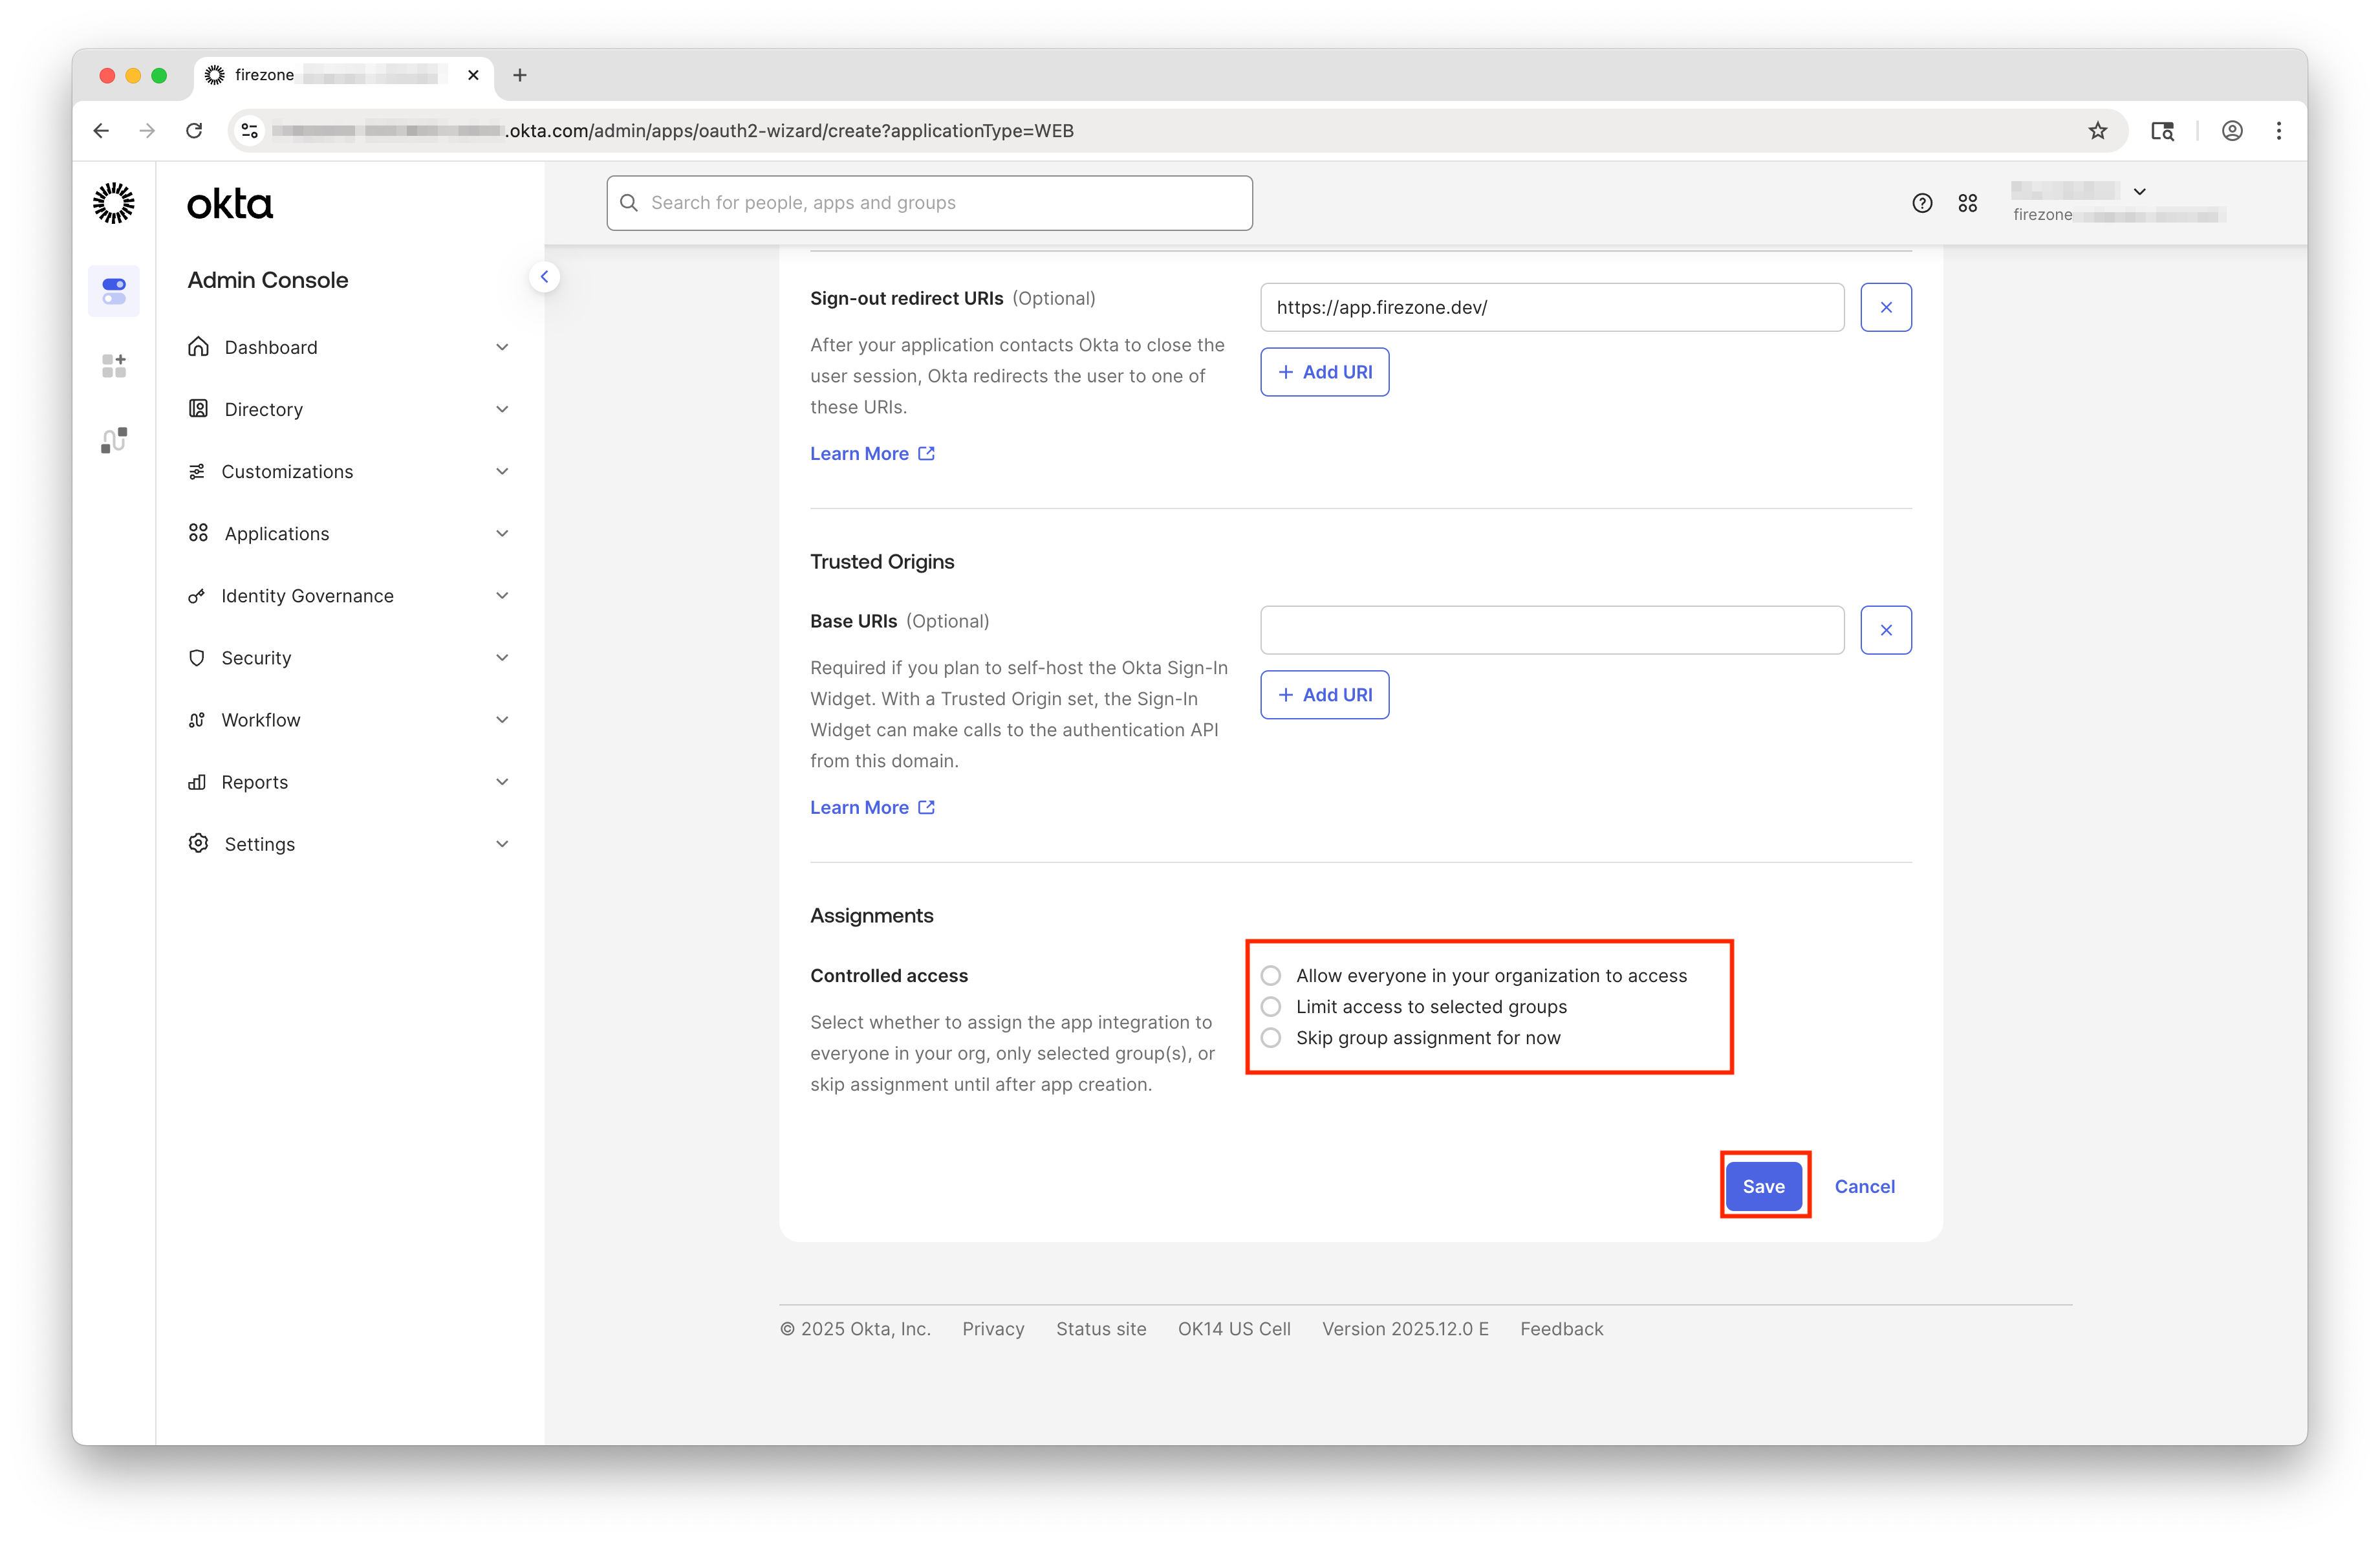
- Click Save to create the application.
Step 3: Configure the Okta provider in Firezone
In the Firezone setup form:
- Name the provider — this is shown to users on the sign-in page.
- Select the authentication context:
- Client Applications and Admin Portal: Users can sign in to both the Firezone client applications and admin portal using Okta SSO.
- Client Applications Only: Users can sign in to the Firezone client applications using Okta SSO but not the admin portal.
- Admin Portal Only: Users can sign in to the admin portal using Okta SSO but not the Firezone client applications.
- Portal session lifetime: (optional) Set a custom session lifetime for users signing in to the admin portal with Okta SSO. Leave blank to use the default session lifetime.
- Client session lifetime: (optional) Set a custom session lifetime for users signing in to the Firezone client applications with Okta SSO. Leave blank to use the default session lifetime.
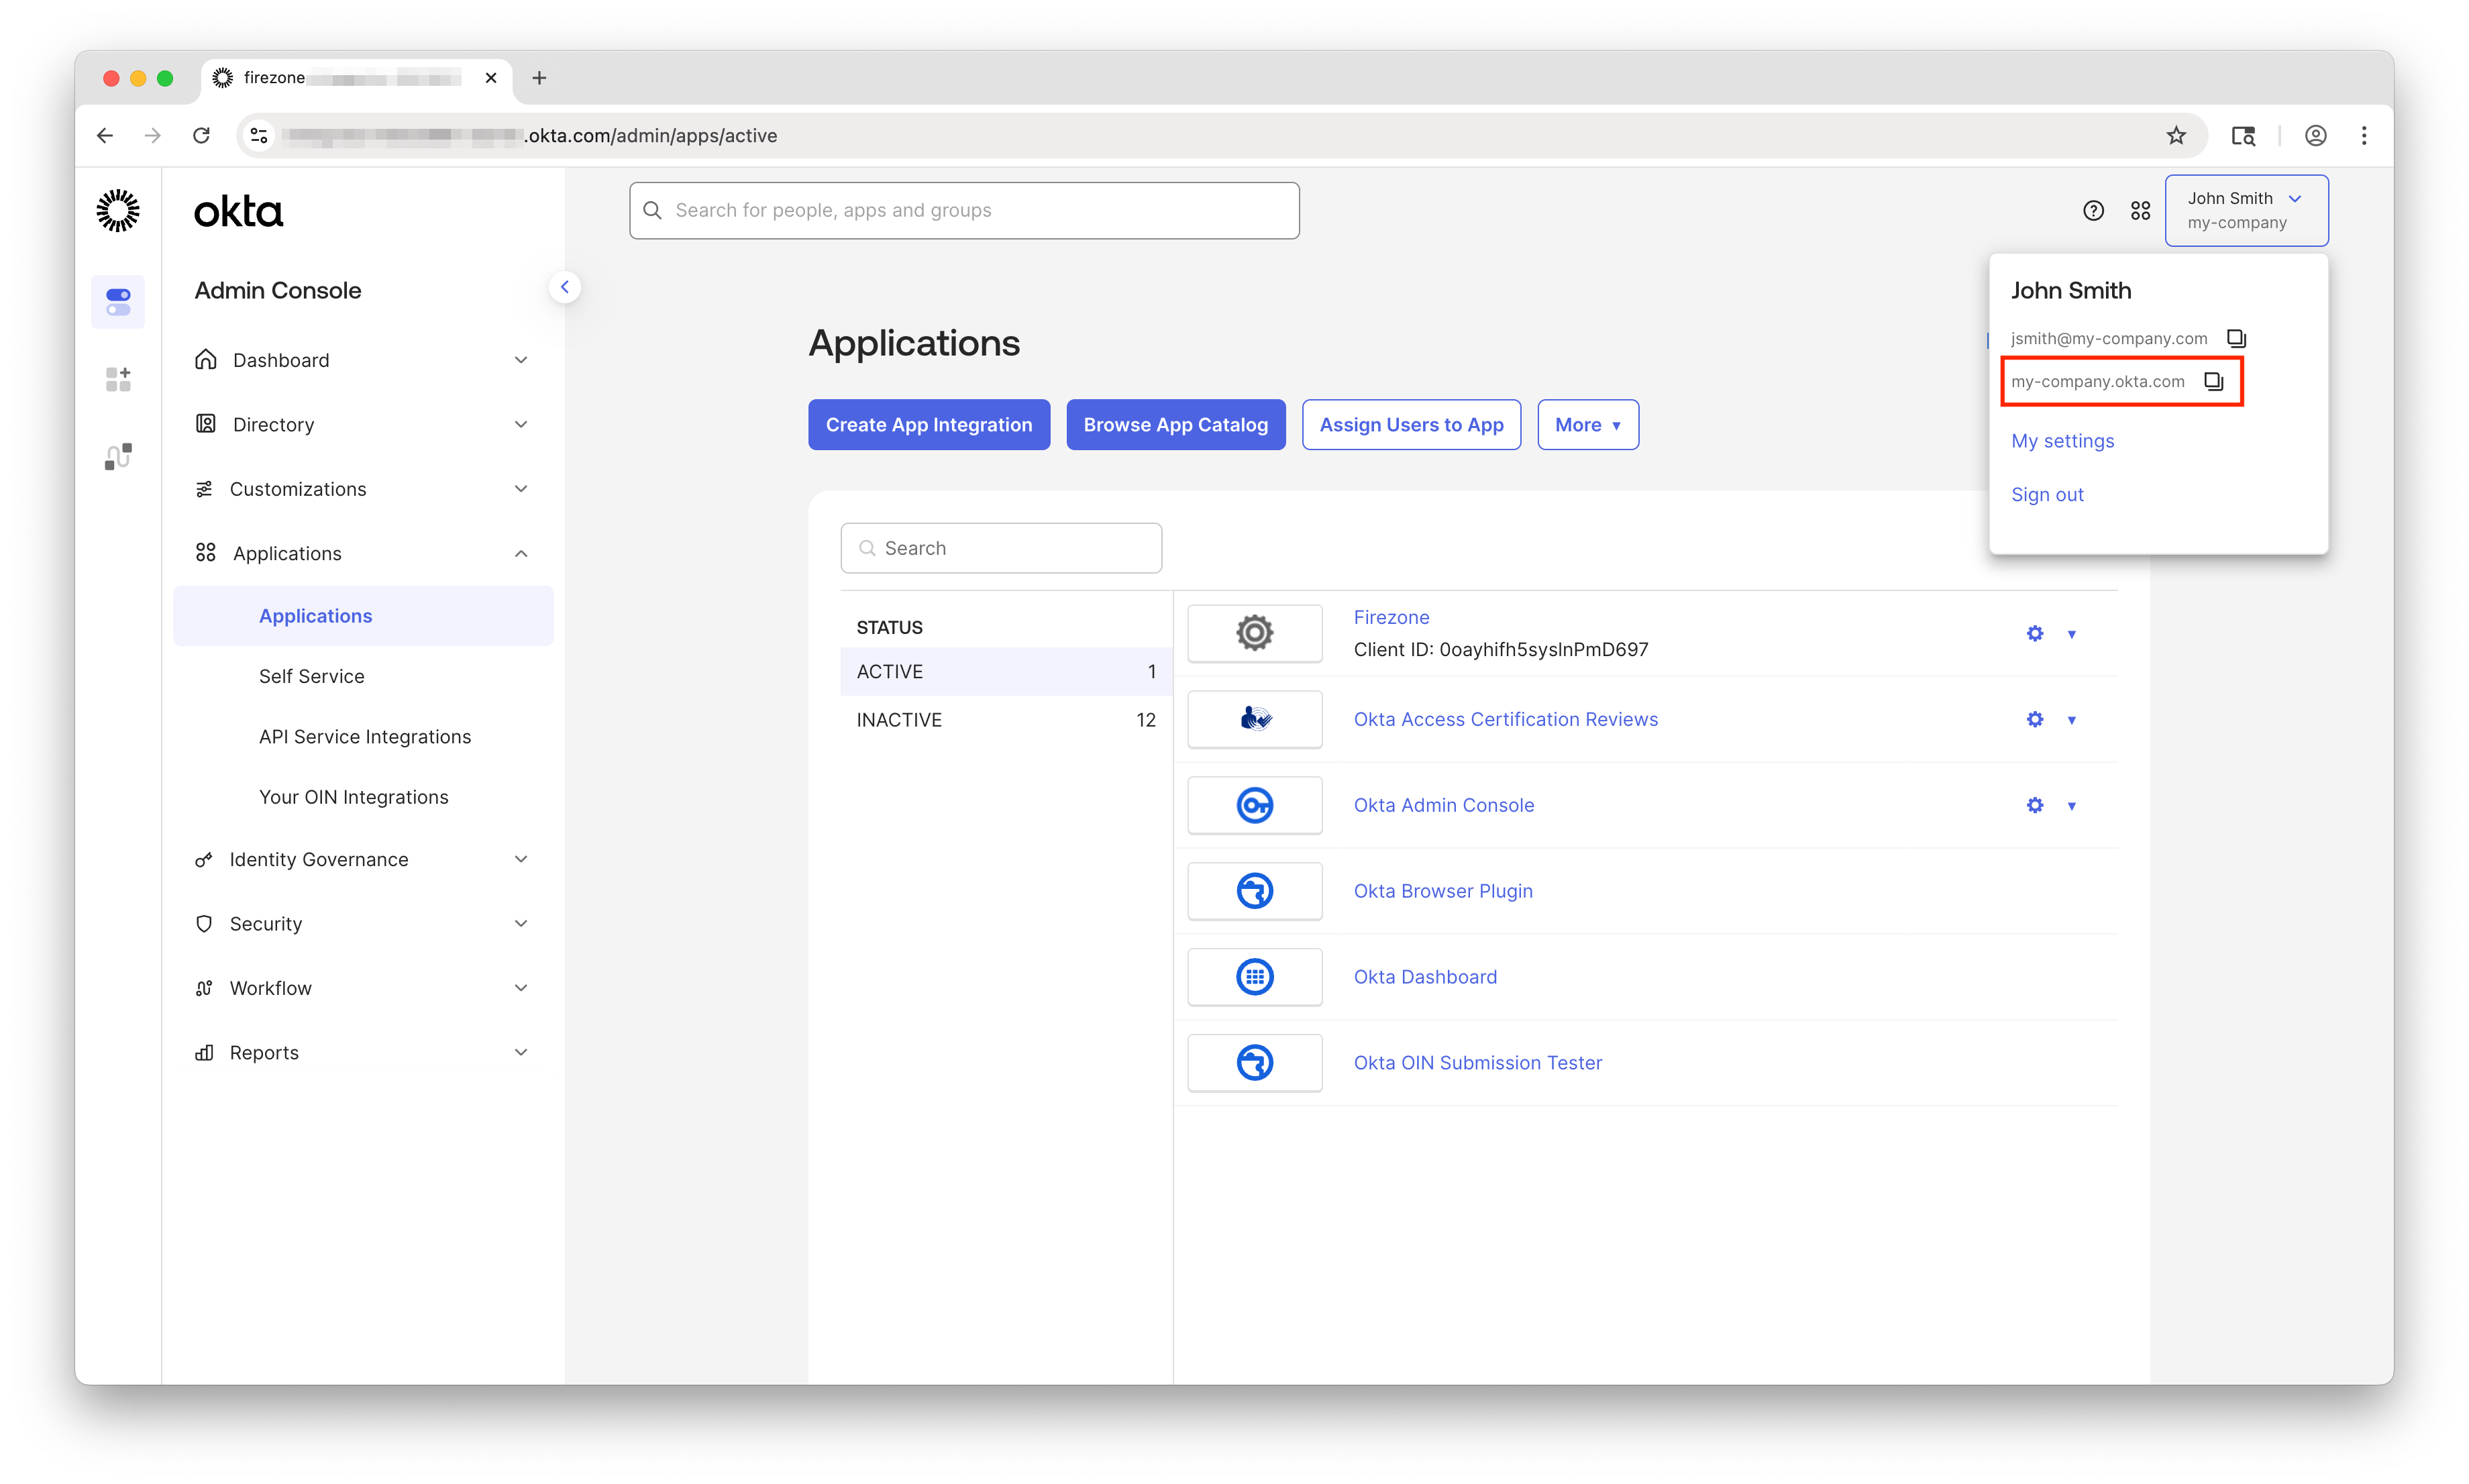
Next, copy your Okta domain from the upper right corner of your Okta dashboard (click on your username to see it) and paste it into the Okta Domain field in the Firezone setup form.
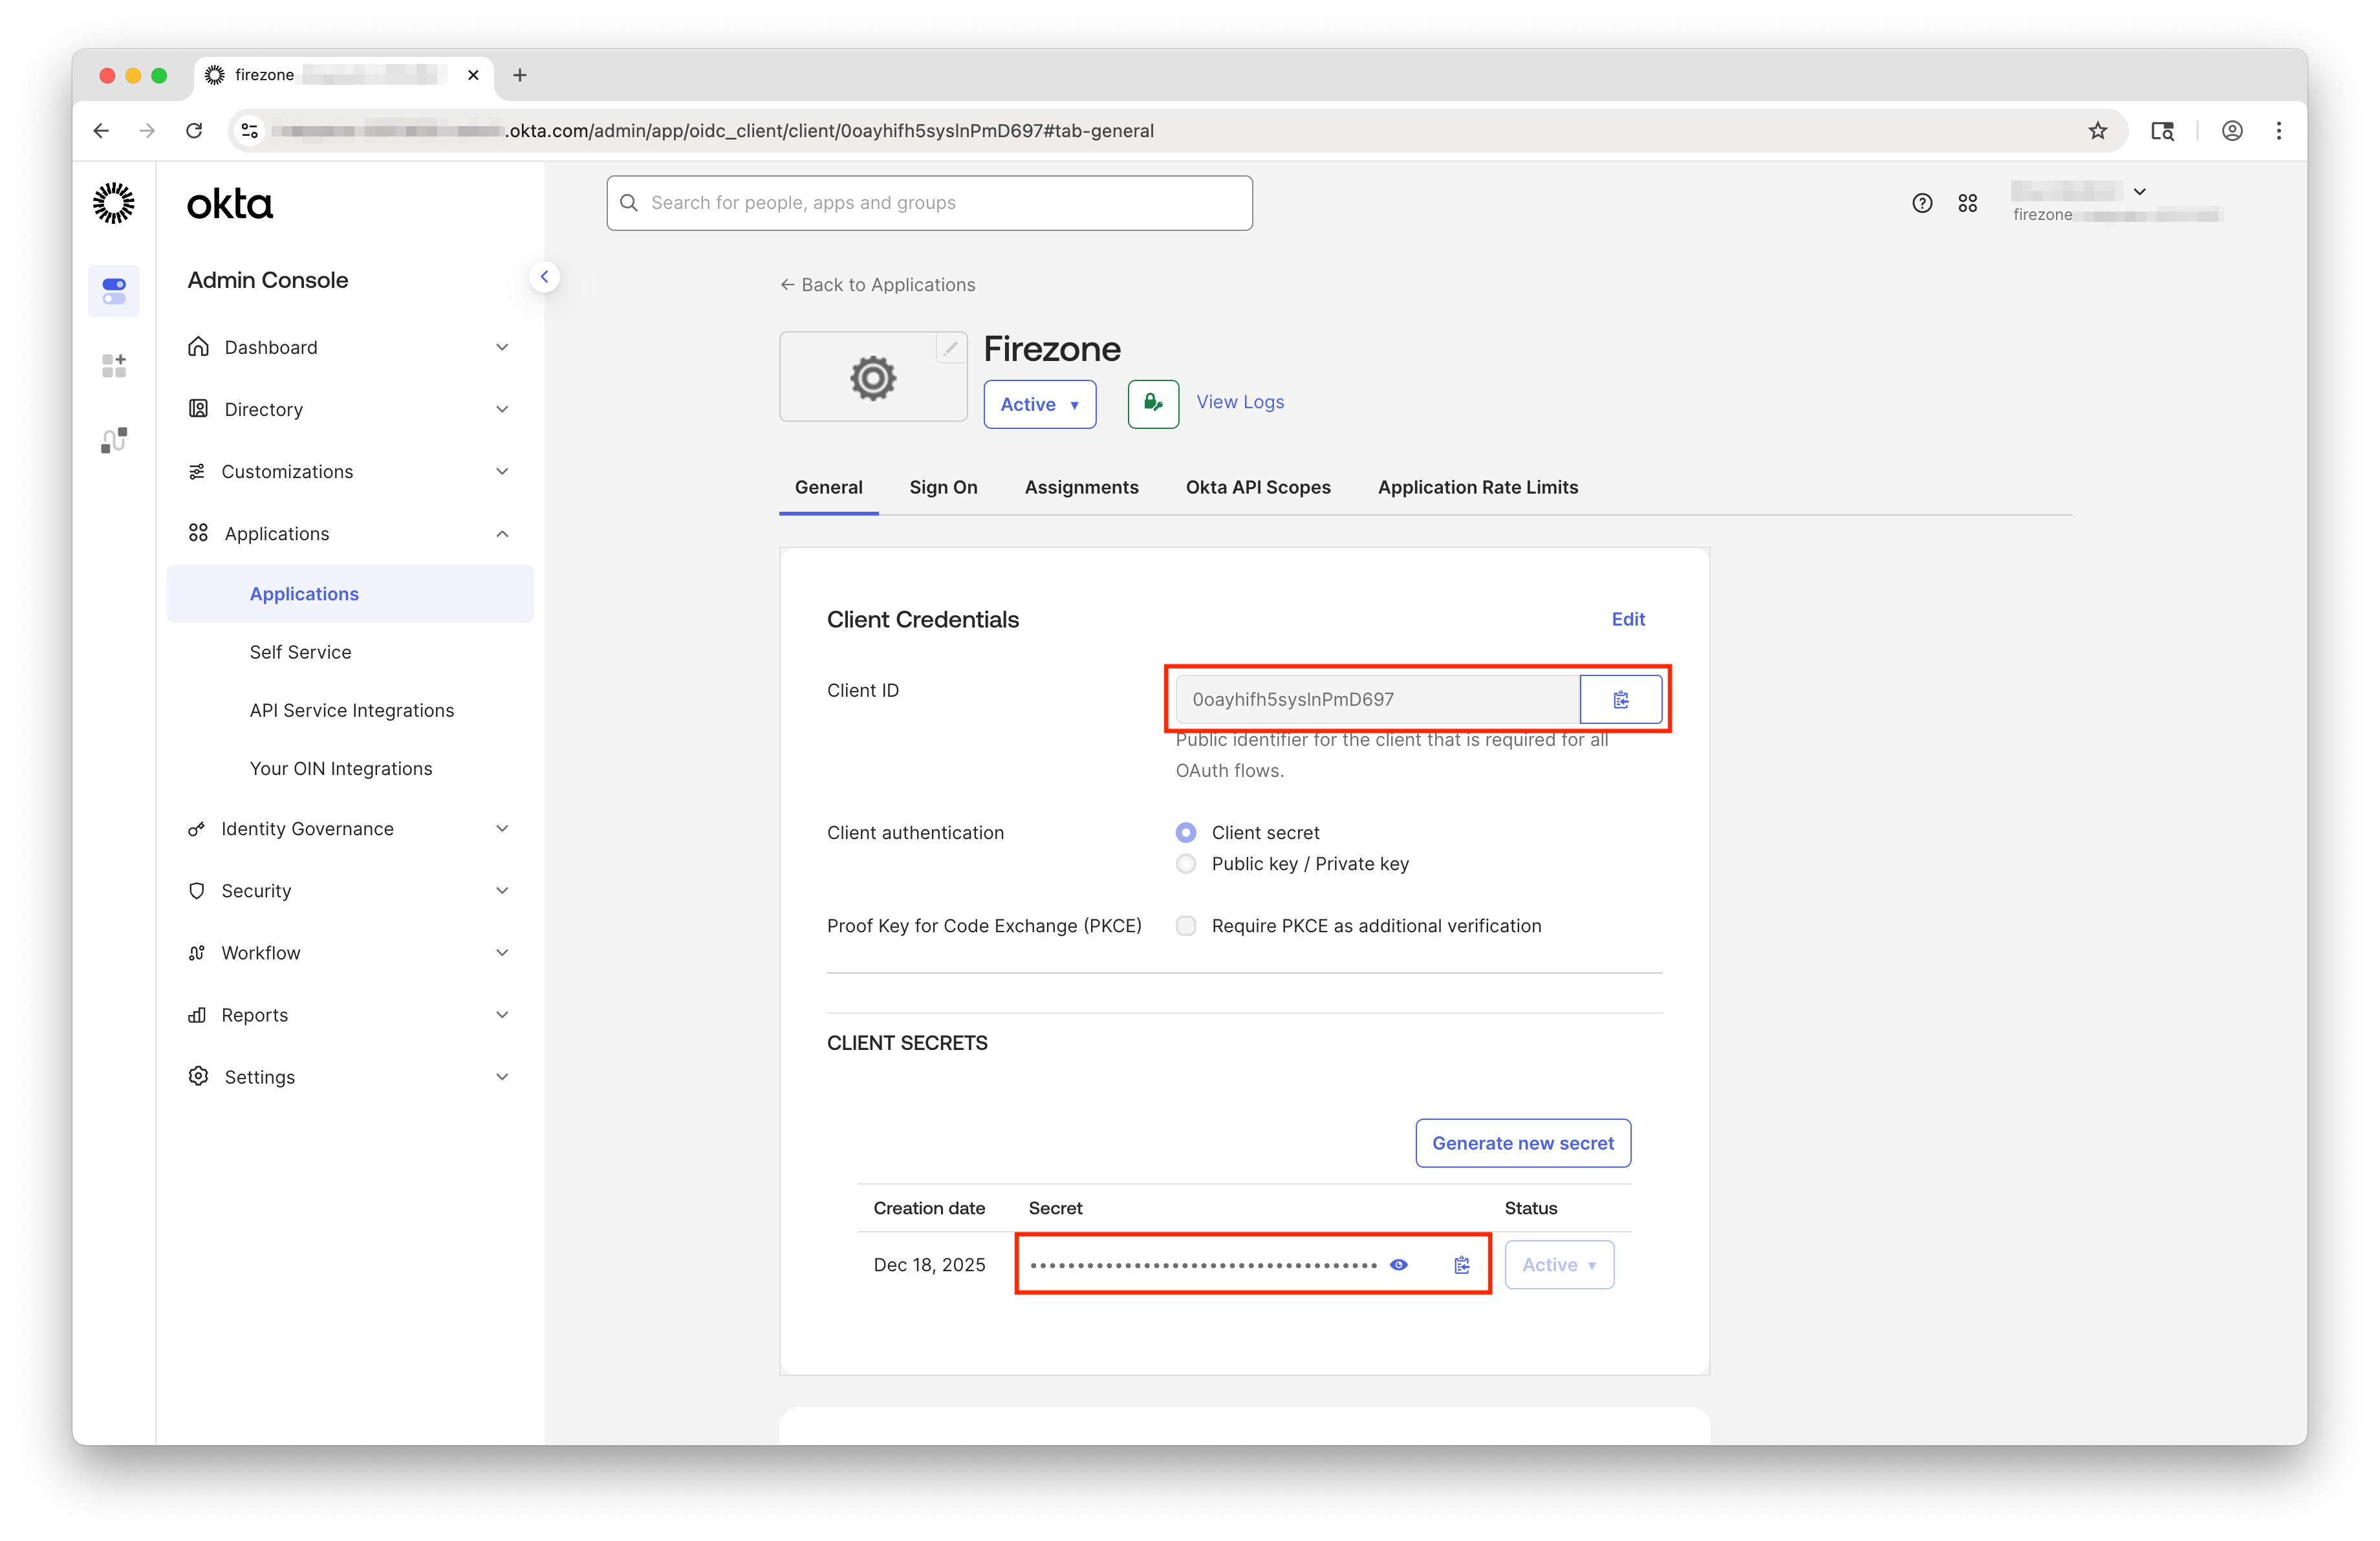
In the Okta application settings, copy the Client ID and Client Secret and paste them into the corresponding fields in the Firezone setup form.
Step 4: Verify and save
Click Verify Now to complete an authentication flow and confirm the provider is working. If successful, you'll see a confirmation page. Close that tab and click Save in the Firezone setup form.
Users will now see this provider as an option on the Firezone sign-in page.
How it works
Firezone connects to Okta using standard OIDC. When a user signs in:
- They're redirected to Okta's sign-in page.
- After authenticating with Okta, they're redirected back to Firezone.
- Firezone matches the user using the
issandsubclaims from Okta. For users provisioned via directory sync, this identity already exists. For manually created users, Firezone matches by email on first sign-in and saves the Okta identity for subsequent sign-ins.
Data accessed
Firezone requests the following scopes from Okta:
openid— Required for authentication.email— Used to match users on first sign-in.profile— Used for the user's display name.
Firezone does not access any other Okta data.
Multiple providers
You can configure multiple Okta providers within a single Firezone account, each with a different client ID. This is useful if you need to authenticate users from different Okta organizations or with different app configurations.
To add another provider:
- Go to
Settings → Authenticationin your admin portal. - Click Add Provider and select Okta.
- Create a new OIDC application in Okta as described above.
- Complete the setup with the new client credentials.
Restricting access
Only users and groups assigned to the Firezone application in Okta can sign in. To manage access:
- In your Okta admin portal, go to Applications → Applications.
- Select the Firezone application.
- Go to the Assignments tab.
- Add or remove users and groups as needed.
Provisioning users
Users must exist in Firezone before they can sign in with Okta. You can:
- Create users manually in the admin portal or via the REST API.
- Enable Okta directory sync (Enterprise plans) to automatically provision users and groups from Okta.
Troubleshooting
User not found
If a user sees a "user not found" or similar error when signing in, it means no matching user exists in Firezone. The user must be created manually or provisioned via directory sync before they can sign in.
User not assigned to application
If a user sees an error indicating they're not assigned to the application, the Okta admin needs to assign the user (or a group containing the user) to the Firezone application in Okta.
Invalid client credentials
If verification fails with a client credentials error, double-check that the Okta Domain, Client ID, and Client Secret are entered correctly in Firezone.
Revoking access
To revoke a user's access, remove their assignment from the Firezone application in Okta. This prevents future sign-ins but does not end active Firezone sessions. To immediately revoke access, also delete or disable the user in Firezone.
Need help? See all support options.